Dan asks:
I’m a pistol guy and know my way around all kinds of wheel guns and semi-autos. I’m now thinking about getting my first AR-type rifle (just for fun) but I’m confused by all the terminology. What’s an upper? What’s a lower? Are some types better than others? Are they interchangable? What’s a free-floating barrell? If you could give a bit of a primer on how an AR is assembled, what the various parts are/how used, and how a newbie could go about assembling one of their own I would be very thankful.
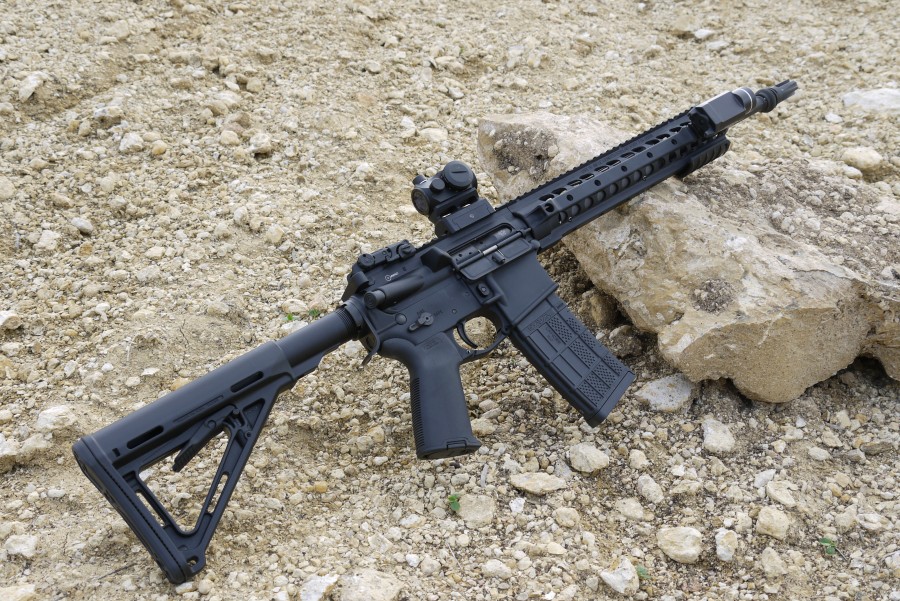
I have a stripped lower from Stag Arms sitting in the gun shop for a second part to this answer (how to build a stripped lower from parts), but I figured it would be good to start with a basic overview of this firearm first and how it all comes together. And since I just got back from the range I figured I could kill two birds with one stone: clean and document at the same time.
The AR-15 is a fantastic platform for one reason: everything is interchangeable. With the push of a couple pins the entire gun comes apart and you can change out whatever components you want. It may seem daunting at first, but once you get to know the inner workings of this gun and become comfortable with servicing it you too will start to see how simple it is to do something like changing the trigger or barrel.
http://www.youtube.com/watch?v=2TMAgXRidzY
After I finished this article I decided that it wasn’t as clear as I wanted. So I went ahead and made a 30 minute video detailing the disassembly and reassembly process, going through the names for everything as well. Pick your poison, video or text.
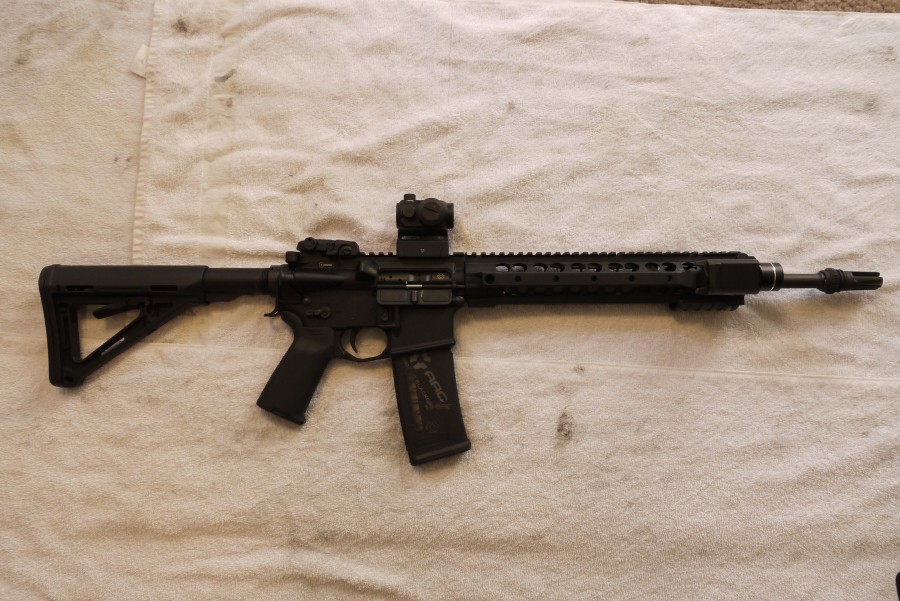
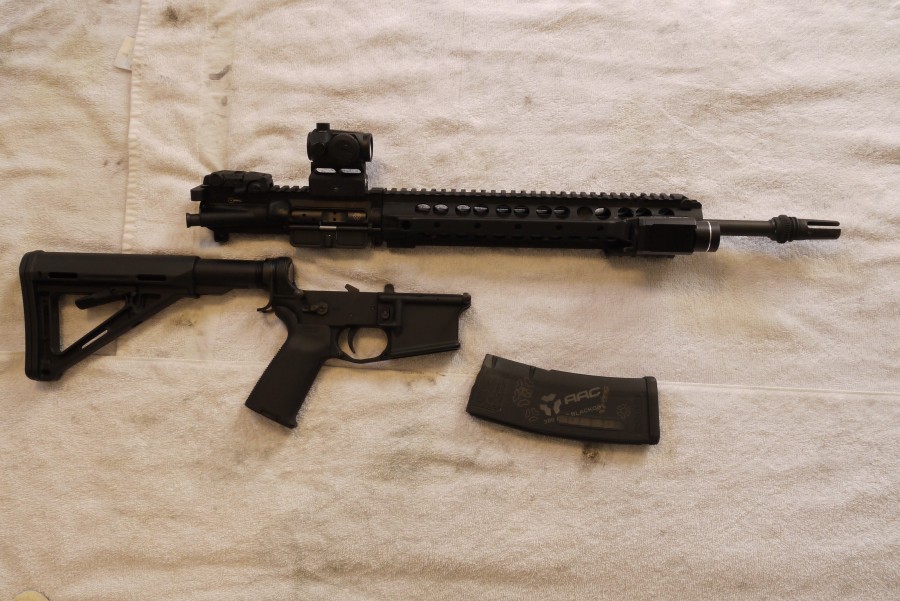
I always like to lay out some towels when I clean my guns, as they protect my carpet and make for fantastic cleaning rags.
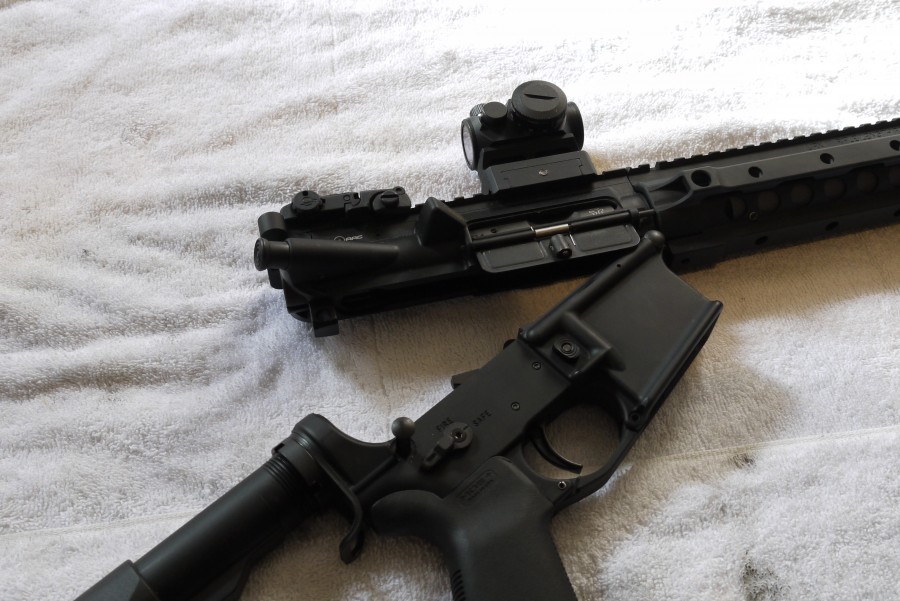
The first step in disassembling an AR-15 for cleaning or maintenance is removing the magazine and separating the upper and lower receiver. Personally I like to keep the magazines out of my weapon during transport and storage, but I popped one in for demonstration purposes here.
The first step is to separate the upper and lower receiver. We’ll go into detail when they’re apart, but all you need to know right now is that the gun is composed of two parts, an upper receiver that houses the bolt and barrel and a lower that houses the trigger and magazine well.
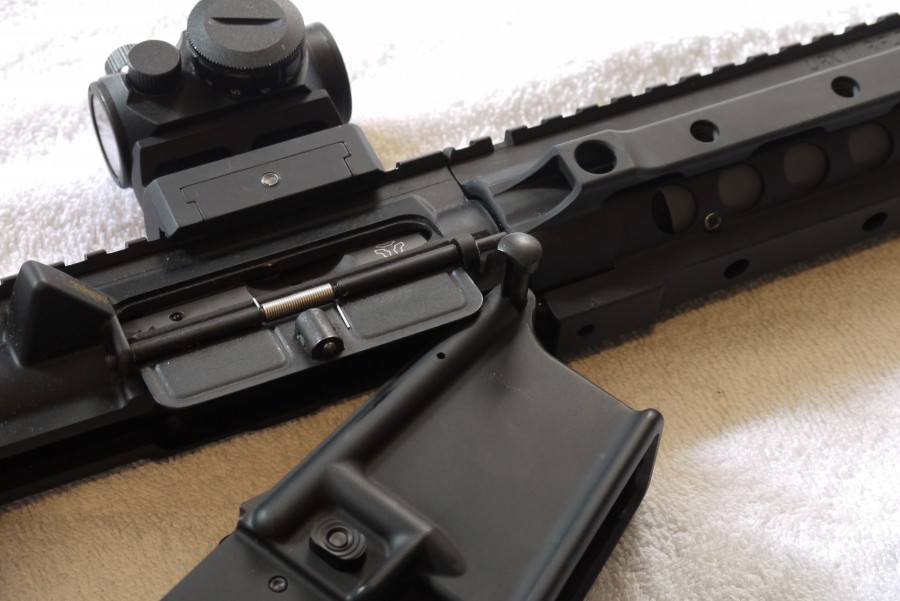
Getting these two apart is as easy as pushing a couple pins, specifically these two pins known as the “takedown pins” which are the only things that hold the two halves together. You can either push these pins from the other side of the gun (they protrude a little bit on the opposite side) or use your fingernails to pull them out. Pull until they stop moving — they have a “detent” (small catch inside the housing) that prevents them from being removed from the gun completely.
Once you have the pin all the way out the gun will pivot open. The pivot point is our second takedown pin, which is located under the chamber.
Once the pin is removed the two halves will come apart.
The two parts are now clearly visible, so let’s talk about what each of them contain.
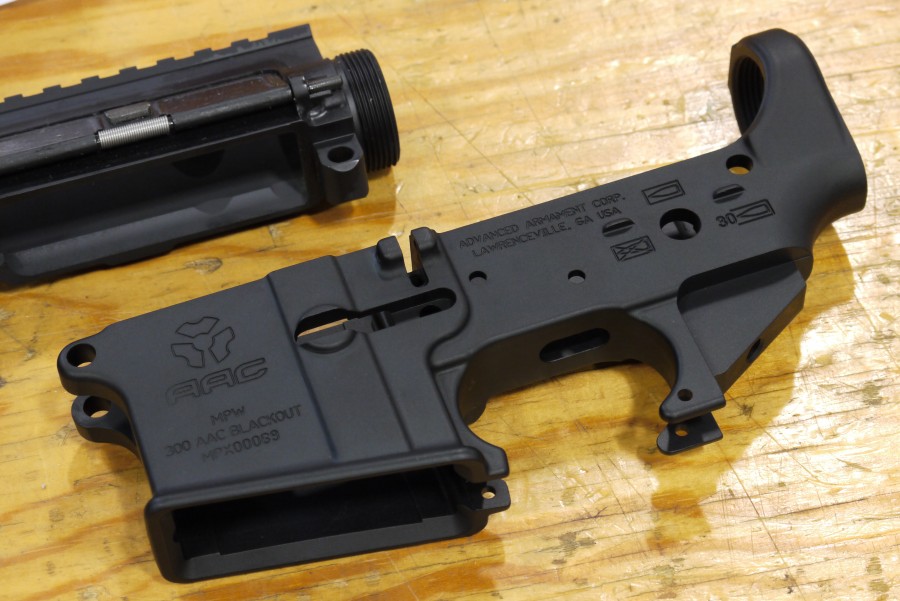
The actual lower receiver (or simply “lower”) is traditionally machined out of a solid block of aluminum. A “stripped lower” can be purchased from most online gun retailers and is simply this machined aluminum block with nothing installed in it, allowing the end user to pick and choose their parts. This is a picture of an AAC stripped lower in their Atlanta factory. The lower receiver is technically the “firearm,” so it has a unique serial number engraved into it and needs to be transferred through a federal firearms licensee such as a gun shop, but the upper receiver has no such restrictions and can be sent through the mail directly to the customer.
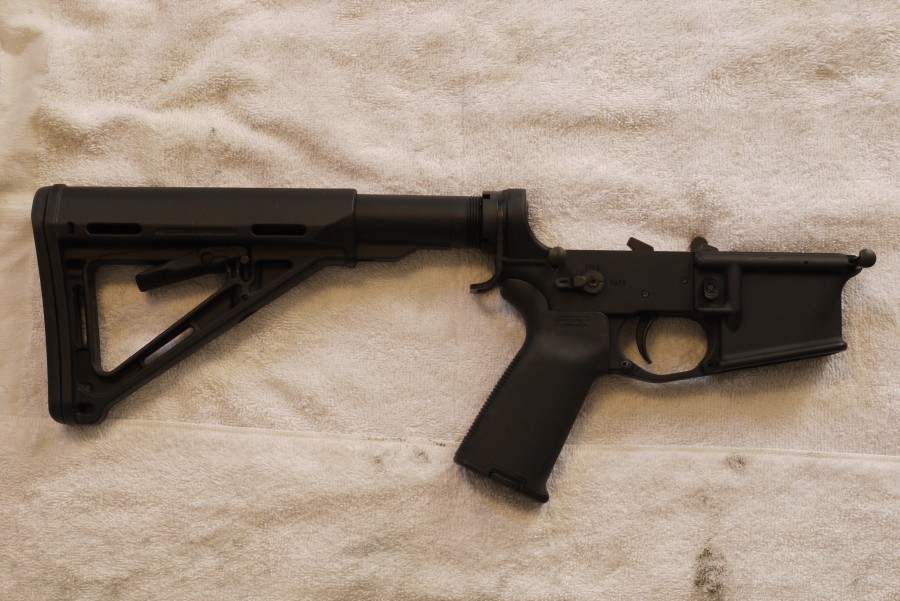
There are a couple of pieces that slot onto that single machined block of aluminum that make up a finished lower receiver, and seeing as I have nothing else to do today let’s take a look at them.
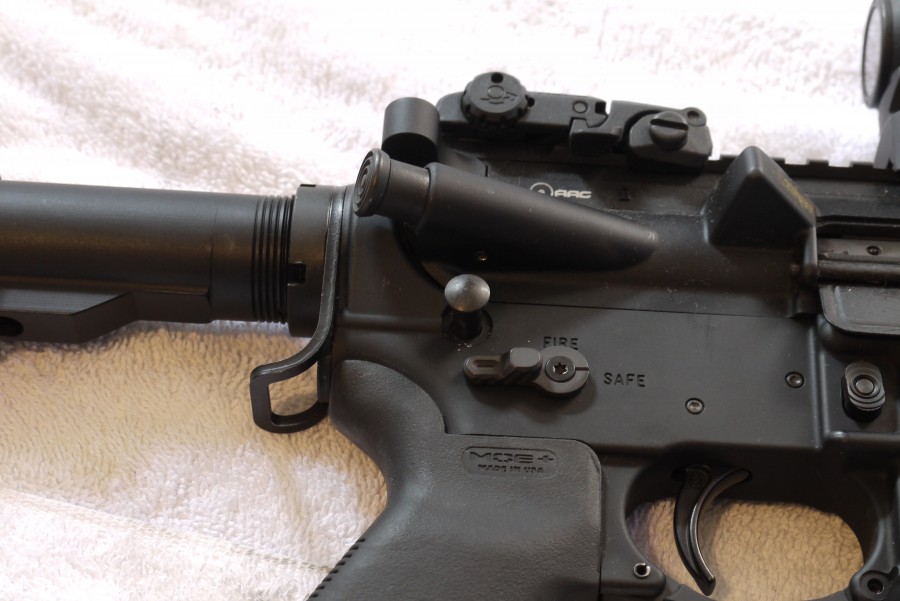
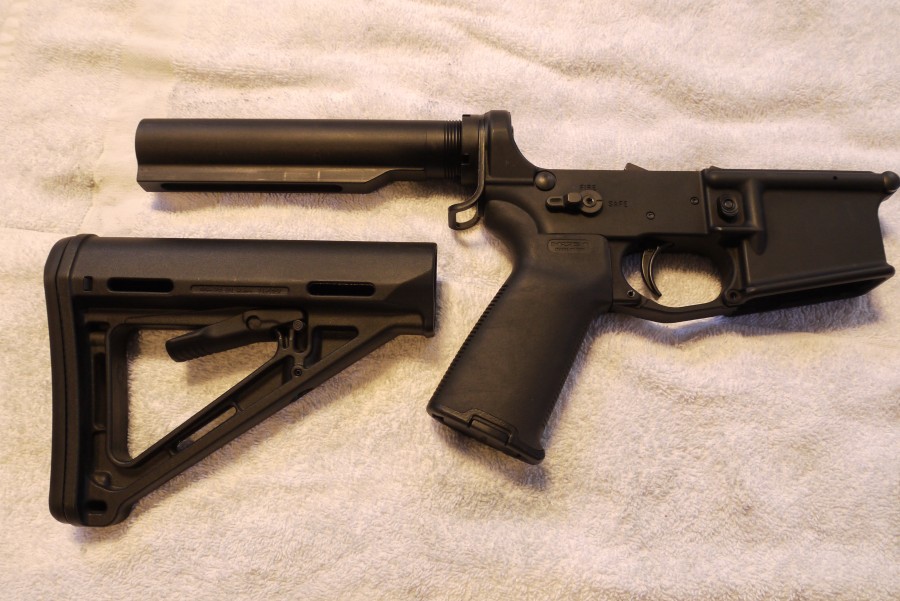
The most noticeable part is the long tube stuck on the end of the lower, called the “buffer tube.” It actually screws into the back of the lower and is held in place by friction using something called a “castle nut.” These have a tendency to work loose after years of use and so sometimes they are “staked” in place permanently.
The original M16 stock used a perfectly round buffer tube which slotted into a fixed stock, but that proved heavy and uncomfortable. The solution was to build a ridge onto the bottom of the buffer tube into which a slot was drilled with a series of holes. A stock was then designed to use this ridge to keep the stock from tilting, and the holes provided a point for the stock to grab onto to keep it from extending or collapsing any further. And the collapsible stock we know today on the M4 platform was born. I’m not a huge fan, but it does the job.
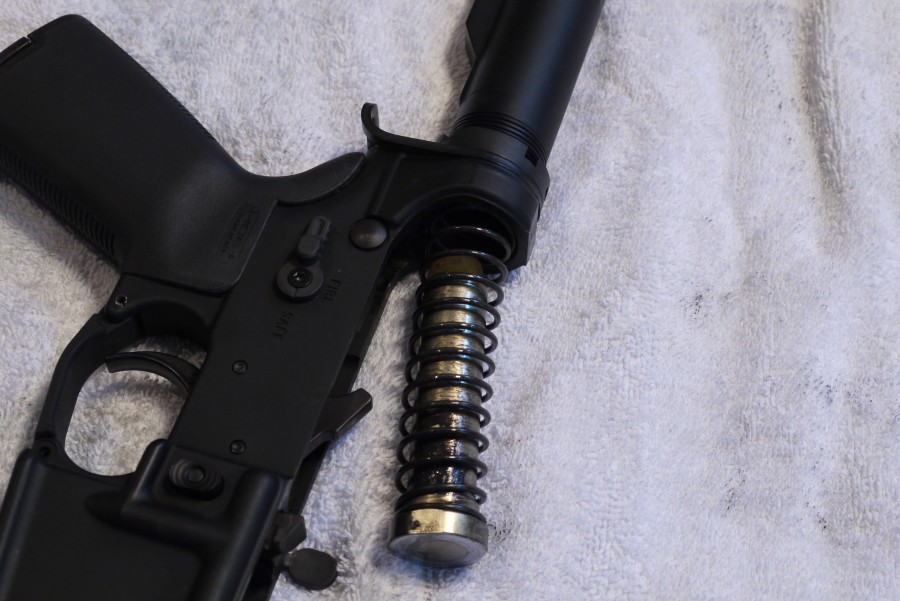
The inside of the buffer tube is hollow and contains the buffer (the silver part) and the buffer spring. When the gun cycles the bolt carrier (more on that later) moves backwards into the buffer tube far enough to fling the spent cartridge out of the gun and pick up a new cartridge form the magazine. The buffer tube allows that movement of the bolt, and the buffer spring forces the bolt carrier forwards once again to make the gun ready to fire.
The purpose of the buffer is to slow down the speed at which the bolt cycles, as well as provide enough mass to seat the next round. There are a number of different buffer weights out there (Carbine, Standard, Heavy, H2…) and choosing the right one for your rifle usually takes a combination of trial and error and field testing. For example, my 300 BLK rifle won’t cycle my handloads (I purposely skimp on the powder) with a H2 buffer but works fine with the standard buffer.
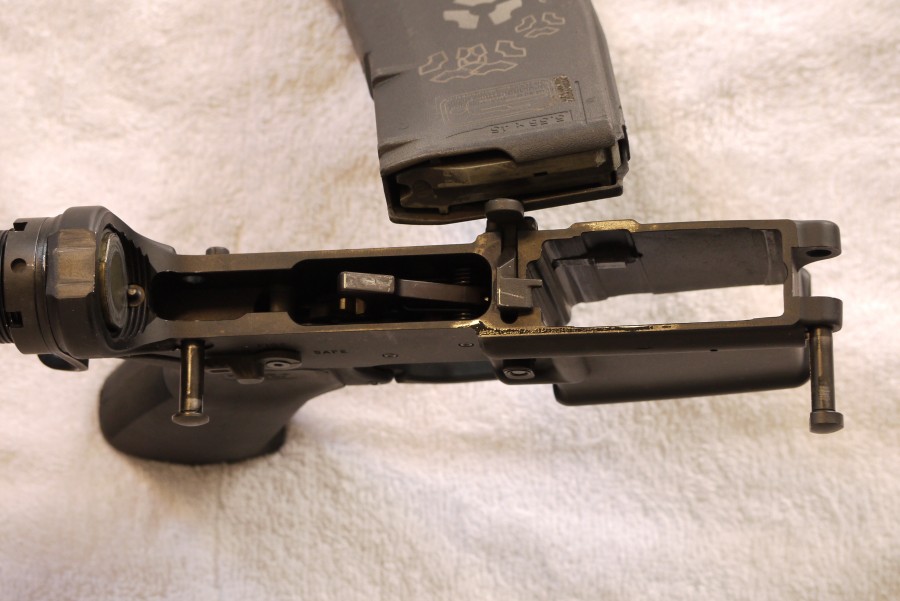
The lower is also where the grip mounts to the gun, and houses all of the fire controls (trigger, safety, etc) as well as the magazine well where the magazine slots into the gun and is held in place. You can see the magazine catch protruding into the magazine well, the open portion on the right side, which locks into a corresponding slot in the magazine and holds it in place.
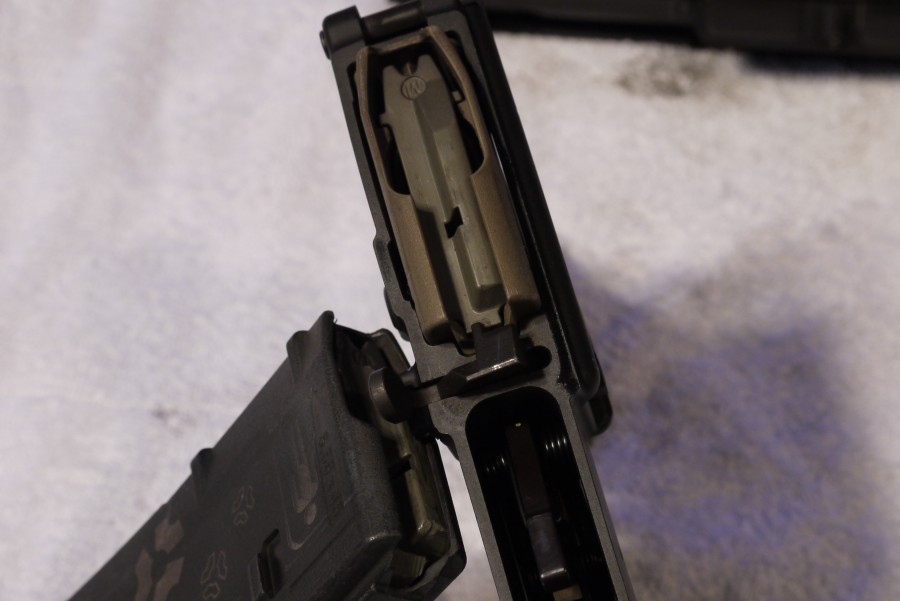
You can also see the bolt hold open mechanism on the top of the lower receiver, right next to where the magazine is touching in this picture.
When the magazine runs out of cartridges, the follower (the part that pushes the cartridges to the top) moves all the way to the top and a small protrusion at the back trips this device. It allows the bolt to move back one more time to eject the spent cartridge, but prevents it from going forwards again. The bolt hold open release (similar in appearance to a ping pong paddle) is located on the left side of the gun and will drop this device back into position to allow the bolt forward once again.
This angle also shows off the takedown pins, fully extended to allow the upper receiver to come off.
The top section is called the “upper receiver” (or “upper”) and the three main components are the barrel, the actual upper receiver itself and the bolt.
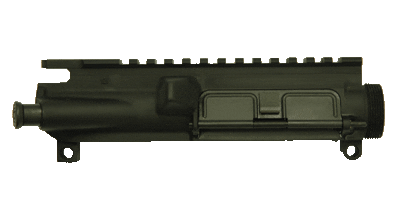
This is a picture (thanks to Stag) is the technical upper receiver part — you can see the two blocks protruding below the receiver where the takedown pins slot into the upper and hold it in place.
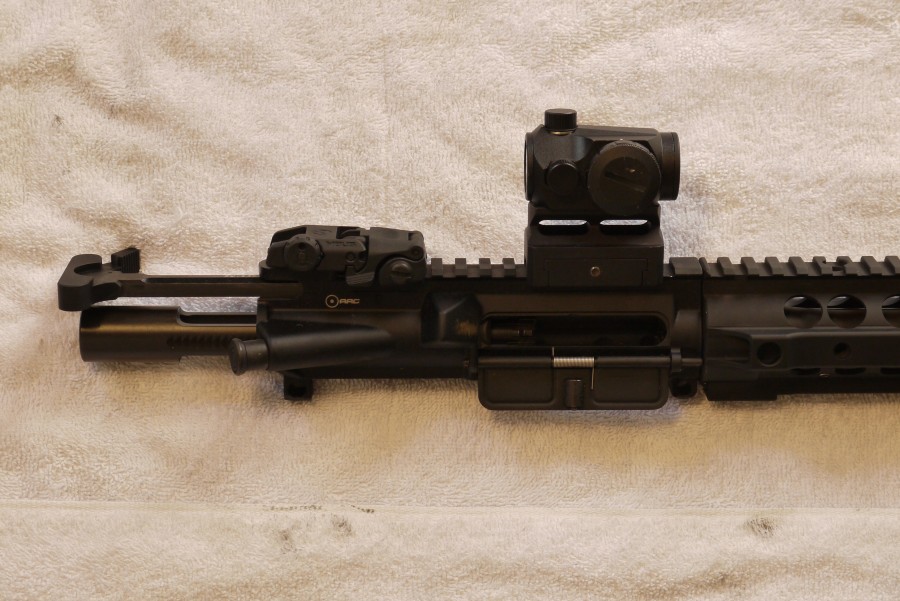
The first step in disassembling the AR-15 upper receiver for maintenance is getting the bolt carrier group out of the gun. We’ll talk more about it in a minute, but right now we need to get it out. The charging handle is a device on the upper receiver that allows the shooter to move the bolt carrier backwards. In this case it allows us to move it back far enough so that we can grab it and pull it out of the upper completely.
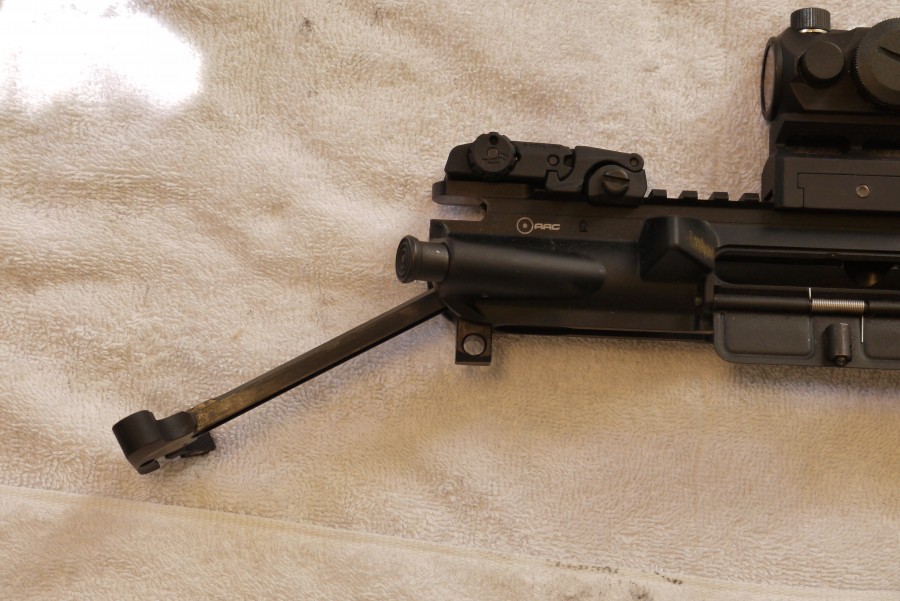
The next step is to remove the charging handle. The charging handle rides in a groove above the bolt carrier using protrusions on either side of the long skinny shaft of the handle and DOES NOT come straight back out of the upper receiver. Instead, there is a small break in the groove near the rear of the receiver that allows the protrusions to drop down and the handle to be removed.
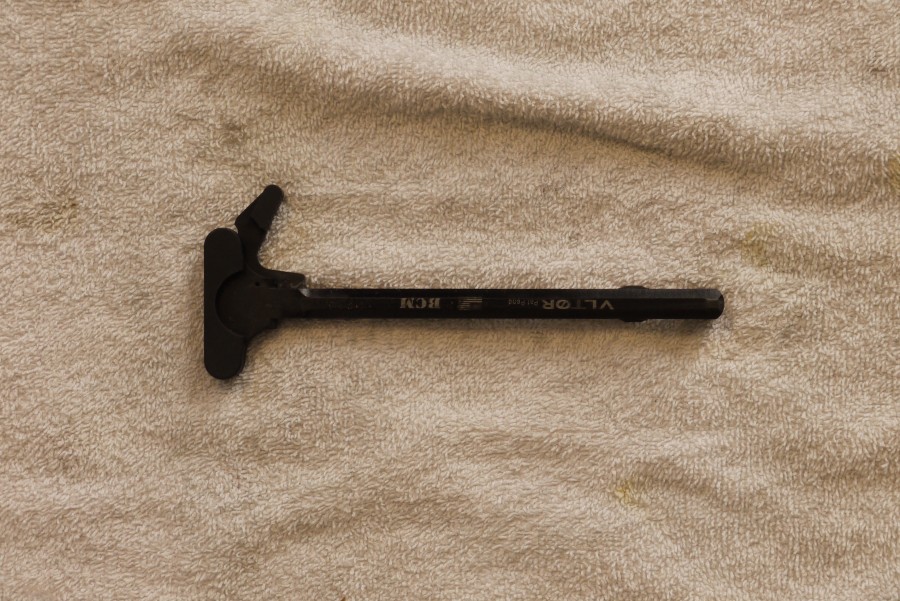
Here’s a better picture of the charging handle. You can see the protrusions on either side of the charging handle on the right. Pulling the charging handle straight out the back will shear these off and make the gun malfunction, so be sure to never force it into place.
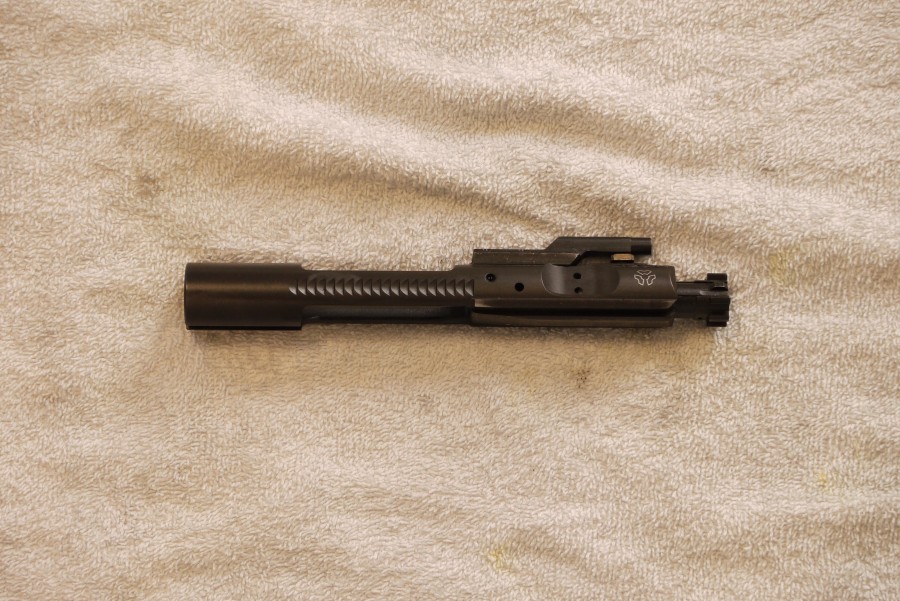
Finally we get to the famed “bolt carrier group” or BCG. The BCG is the primary moving part of the AR-15 system which allows spent casings to be ejected and fresh ammunition to be inserted into the chamber. The largest component is the bolt carrier, which exists to transport the bolt and other components back and forth. In reality everything from the serrations visible on the side all the way to the left end is unnecessary to fire the gun, only to cycle the gun.
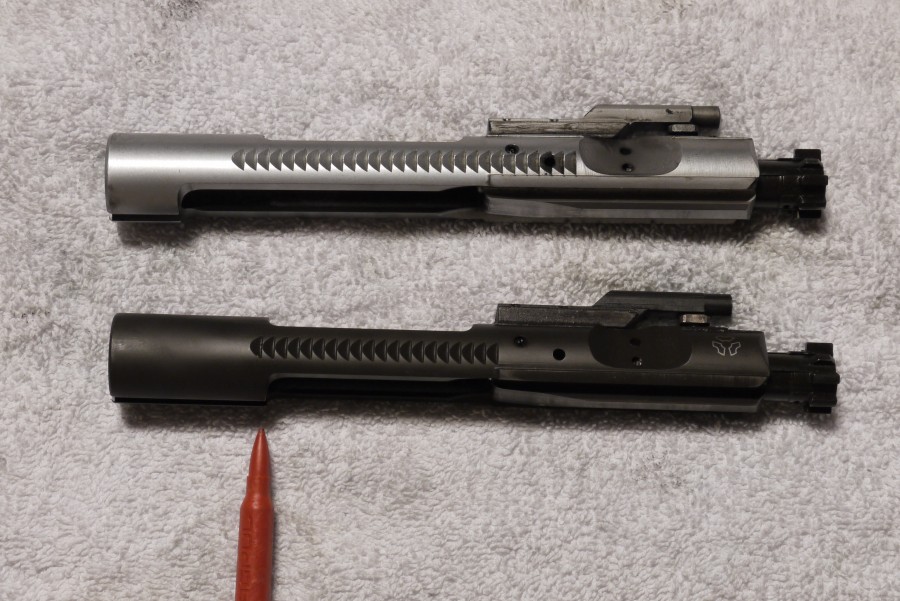
Quick interesting fact: this is a “full auto” bolt carrier (the black one). The silver one above is a “semi auto only” bolt carrier. The only difference between the two is that the material on the bottom of the bolt carrier has been removed as far back as possible on the semi-auto version. The reason is that the mechanism that makes the gun fire fully automatic uses this lip (indicated by the dummy round) to sense when the bolt has seated a new round and is ready to fire. Without it the gun will only fire semi auto, even if inserted into an actual machine gun. In reality it takes much more than a “full auto” bolt carrier to make a machine gun, so even if you have a full auto BCG you still don’t have a functioning machine gun despite what the mainstream media may think.
Disassembling and reassembling the BCG is slightly more complicated than taking down the rest of the gun, so pay attention boys and girls because I’m only saying this one. Unless you read the article again, that is…
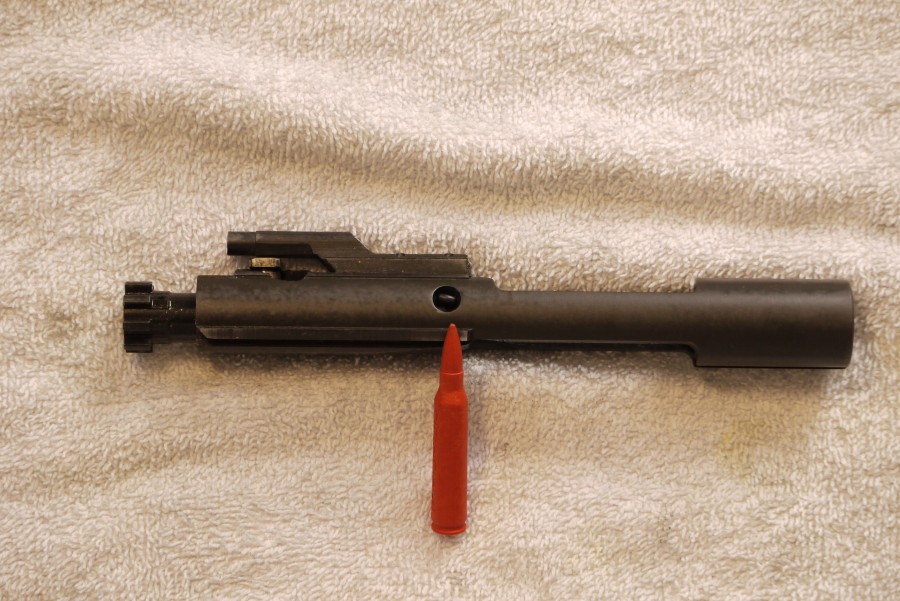
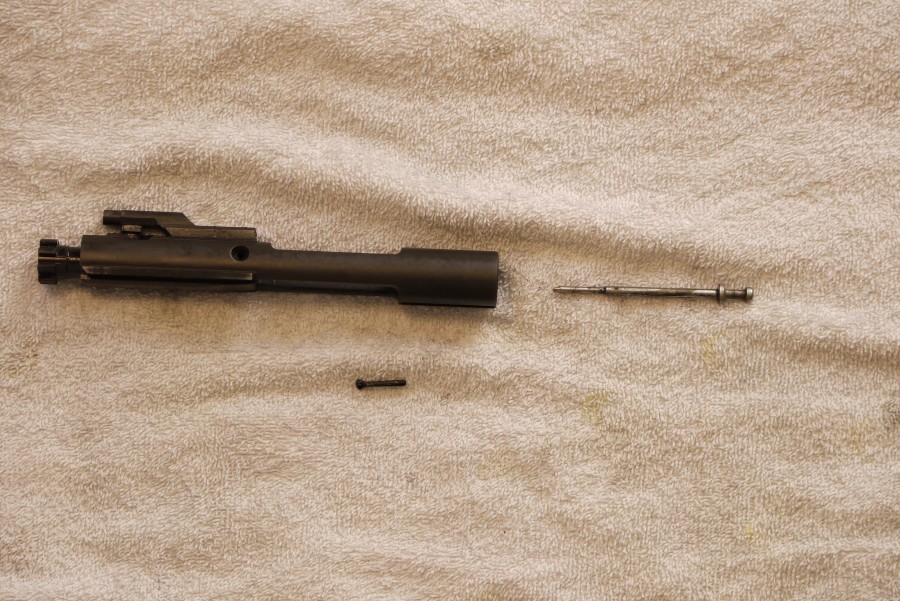
If you flip the bolt carrier group over you will notice a small pin inserted across the bolt carrier. This is the only thing keeping the bolt carrier group together, and with it removed everything will simply slide out. So naturally we want to pull the pin. The pin was designed so that a shooter could use the tip of a standard m855 ball round of 5.56x45mm NATO ammunition to take it out, but toothpicks or dental tools work much better.
Once you remove that the firing pin will fall straight out the back of the bolt carrier. If it doesn’t come quietly you can tap the bolt carrier butt first on a table and let gravity help you.
The top of the bolt carrier features a small spout like protrusion called a “gas key.” When inserted into the gun this key marries up with the end of the gas system and uses gases which have been redirected from the barrel to cycle the action. The part sticking out on the left is the bolt itself, the portion that seals off the chamber during firing and extracts the spent cartridge. The bolt features a number of spikes called “locking lugs” that interact with corresponding lugs just outside the chamber to lock the bolt in place during firing.
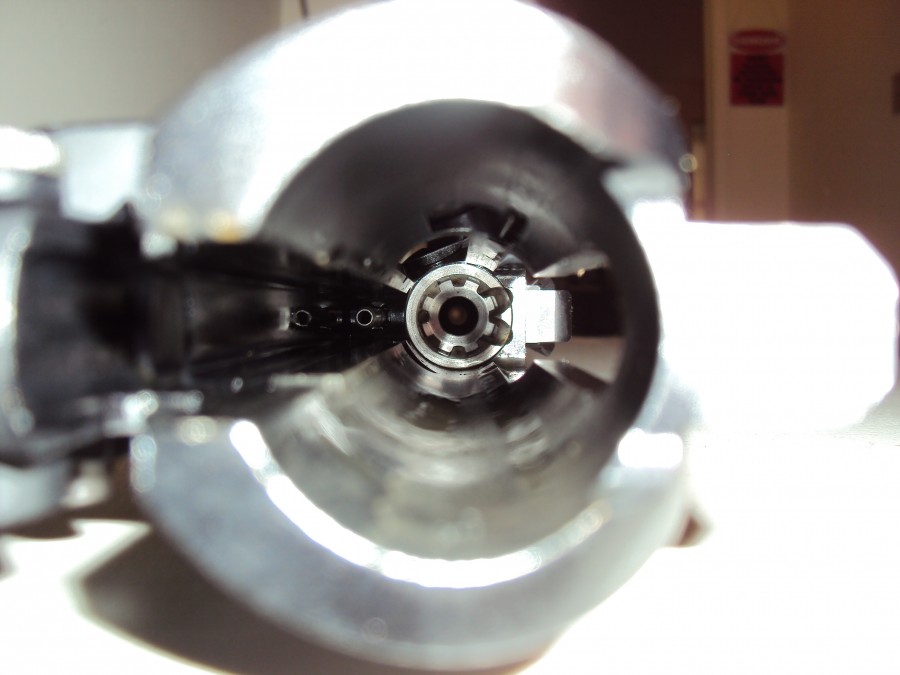
Here’s a picture looking down the upper receiver from the back of the gun where you can see the locking lugs machined into the chamber clearly. The locking lugs on the bolt pass through the slots on its way forwards, and then rotate clockwise until the lugs on the bolt sit behind the lugs in the chamber. These lugs maintain the seal of the chamber, which is under intense pressure from the burning gunpowder and expanding gases being used to propel the round downrange.
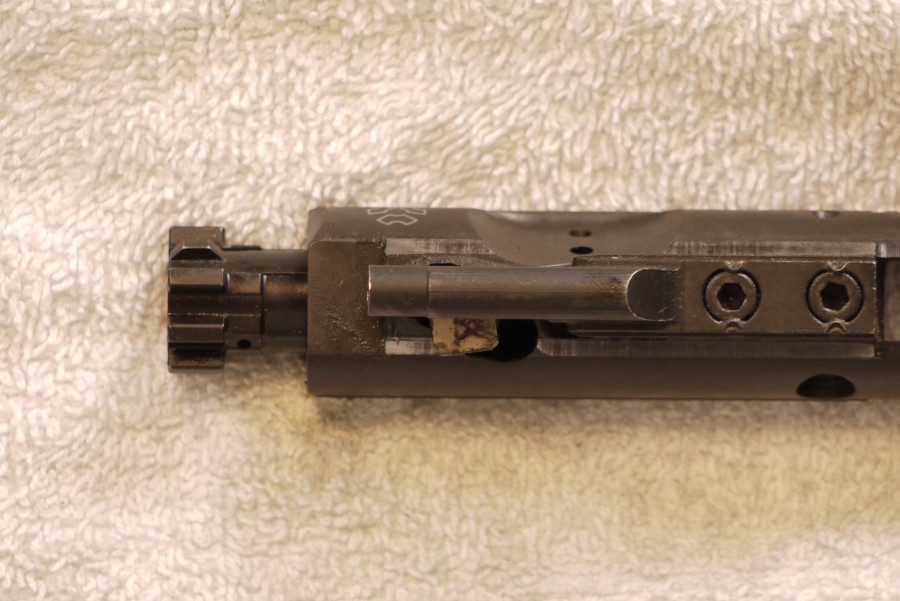
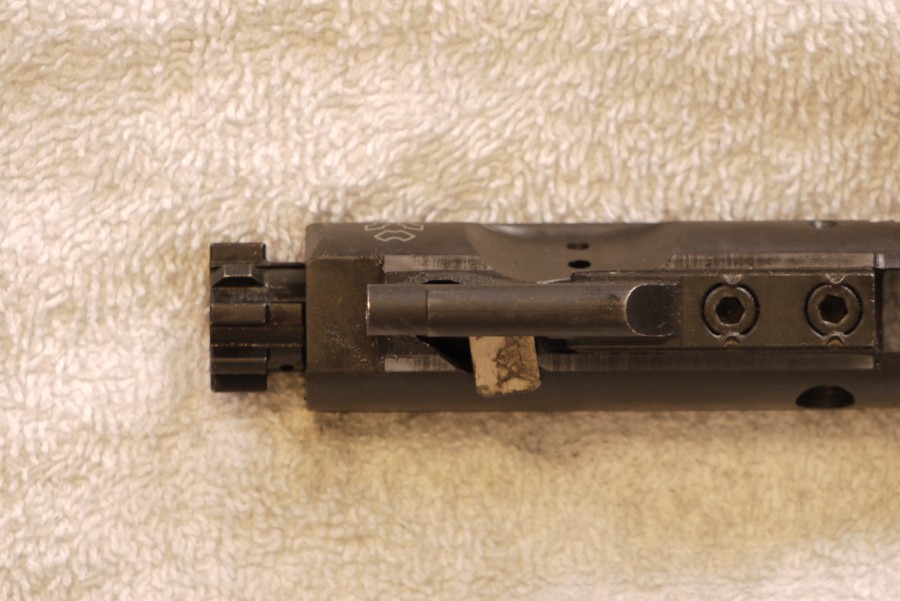
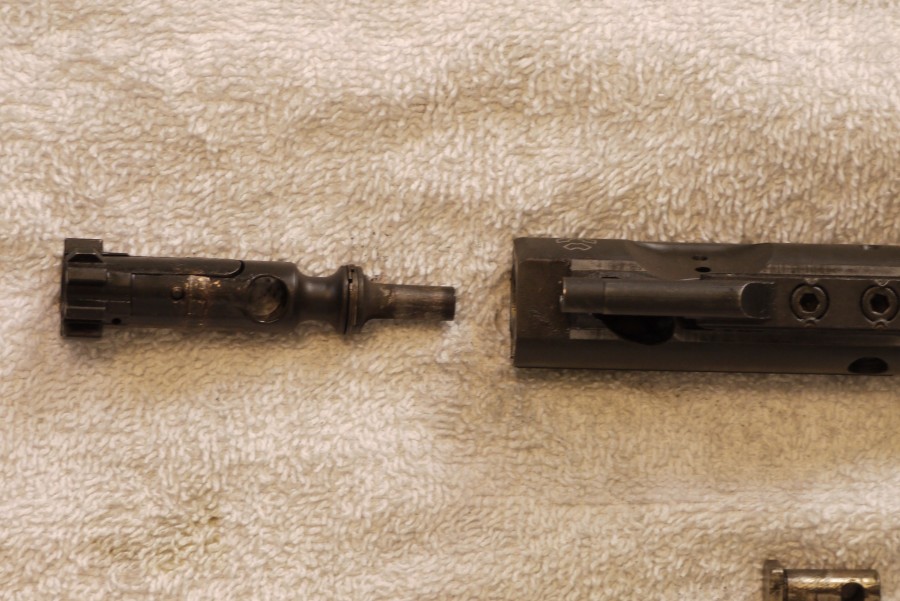
There’s a small piece called a “cam pin” located underneath the gas key. This cam pin acts to rotate the bolt as it enters the chamber, locking it in place when going forward and unlocking it when going back. As a consequence of the locking and unlocking the bolt will actually move in and out of the bolt carrier slightly, extending and retracting. In order to remove the bolt for cleaning we need to get this cam pin out of the way.
The first step in removing the cam pin is to push the bolt into the bolt carrier. This will rotate the cam pin to one side.
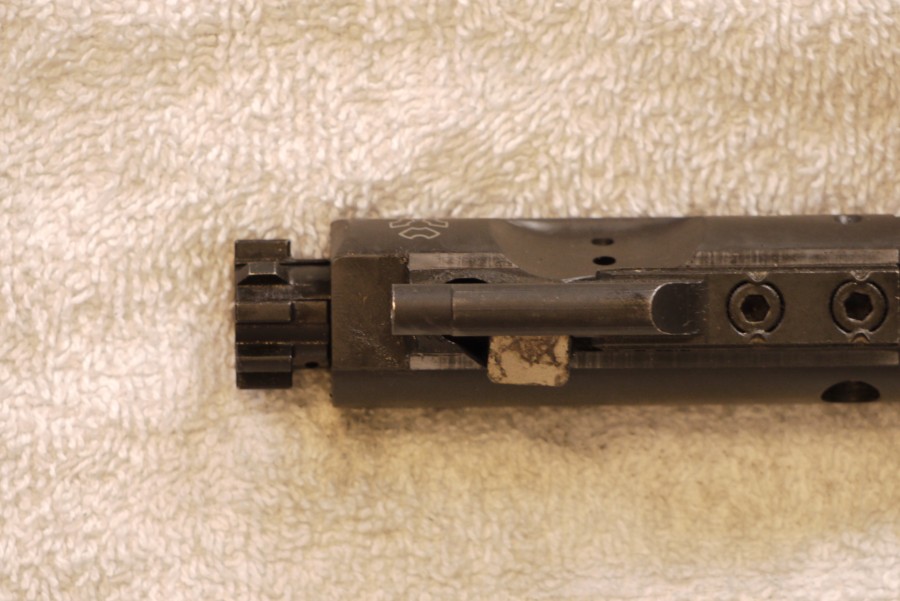
Step two is to rotate the cam pin itself. The head of the pin is a rectangle, with two sides longer than the others. This helps to keep the cam pin from accidentally falling out during disassembly. Rotate the pin 90 degrees so that one of the shorter sides is facing the gas key and then yank that sucker out of there.
With the cam pin removed the bolt is now free to slide forwards, free of the bolt carrier.
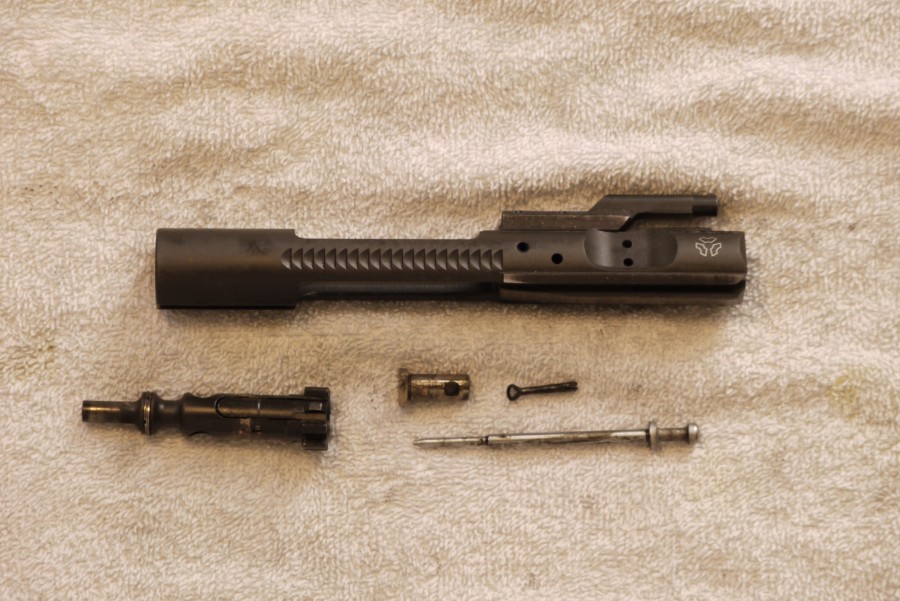
Here’s a picture of the completely disassembled bolt carrier group.
For cleaning, the general rule of thumb is “wipe everything down and then CLP ALL THE THINGS!” Em, ahem, what I meant was apply a light coating of a lubricant of your choice to the bolt, firing pin, cam pin, bolt carrier, the inside of the upper receiver, and the top of the hammer in the trigger group. NEVER lube the chamber, as it could cause problems.
Reassembly is simply the same process in reverse. There are a couple tricks to remember, though:
- The bolt needs to be inserted so that the extractor (the only unique feature on one side of the outside of the bolt) is on the same side as the gas ports in the bolt carrier. If not done correctly the cam pin will not go in.
- The cam pin should be inserted with the short side facing the gas key.
- The pin in the bolt carrier needs to go directly across the bolt carrier and may need some coaxing to find the corresponding hole on the other side.
- When re-inserting the charging handle insert it into the larger open space under its track first, right side up. Then gently press it against the top of the upper receiver and slide it back and forth to find the cutouts that allow it back into its groove.
- The charging handle needs to be back slightly to allow the gas key to fit inside as you put the bolt carrier group back in the upper receiver.
A quick function check and you’re good to go.
And that’s how babies are made.
[Email your firearms-related questions to “Ask Foghorn” via [email protected]. Click here to browse previous posts]




Nicely done. Hard to balance an overview with detailed explanations.
Also use google images for “AR-15 exploded diagram” and find several labeled
diagrams for reference.
Excellent job! I have to admit that I’ve been looking at getting into AR ownership as well but found the whole upper-lower, gas tube, thingamabob very confusing. This article and video cleared up a lot of my confusion and now I think I’m ready to go shopping! Thanks Nick!
Great step-by-step presentation of an AR take-down. Bookmarking this article to pass along later. I hate having to send people over to arfcom for the basics.
I just had flashbacks to Basic Training long ago.
Ha I was about to say “oh its not that hard” but then again it was beaten into my head in Basic Training. I love the AR platform sure its not as “reliable” has an AK, but if your use to it you can work around the so called “downfalls” of the AR. But then again I had the pleasure of running a piston AR oh what a joy and doesn’t get near as dirty. The US mil-groups need to switch to piston AR across the board ASAP.
I thought that was one of the anticipated upgrades for the US Army carbines.
Piston systems have their own specific problems and experience has shown they do not increase reliability over correctly made DI guns. Receiver Fouling doesn’t matter much to the military, guns are getting jammed up by sand in the middle east not carbon. you can easily run thousands of rounds through a well made AR without cleaning(as long as you aren’t still using CLP), and nobody goes that long without cleaning his weapon.
One of your best technical articles yet! Also, what could go wrong if you oil the chamber?
There was a report from NDIA last year about possible headspace separation with lubed chambers.
The problem was happening with the M249 which doesn’t fully support the case head as much as the AR-15 bolt, but I wouldn’t take any chances.
http://www.thetruthaboutguns.com/2011/05/foghorn/ndia-lube-in-your-chamber-is-bad/
Ok, thanks. I must had missed the link above.
Ummm…Nick… I think you might want to re-read your lube article. It’s pretty clear that it is referring to excess lube on belt-fed ammo and not to having a normal amount of CLP or similar oils applied during cleaning.
However the lube gets in there, the issue is lube between the chamber wall and the case wall. So whether it was put there during cleaning or comes on the ammunition itself makes no difference.
“And that’s how babies are made.”
Well done sir!
TTAG needs more articles such as this. Enjoyed it very much.
god, this is well done, way to go! how about a video like this on the 1911 platform?
Ask and ye shall receive.
you are the man NL.
Sigh. Y’all really need to find something better than youtube. I get 6 seconds of video at a time before stuttering, there are numerous complaints on google’s forums about their lack of service and bandwidth.
On further research (yeah, I do that) it’s slow in firefox, but speedy in Chrome. go figure. Thanks for the video, very nicely done.
FLAME DELETED. IF YOU TAKE ISSUE WITH THIS ARTICLE, PLEASE BE SPECIFIC
Really? FLAME DELETED because I said the article sucked? I didn’t even mention the author just the article. Is It possible to “flame” an inanimate object? I wasn’t flaming, I was being literal. I LITERALLY didn’t have time to point out all the things wrong with it. I was at work.
I don’t really gave time now either but since apparently I must spell everything out or it gets deleted I’ll go ahead and hit the highlights.
1: Lowers are traditionally forged, there are several machining steps after forging but they are not “traditionally machined out of a solid block of aluminum.”, that kind of lower would be known as “billet” and they are not traditional.
2: The original m-16 stock did not “prove heavy and uncomfortable” the classic m-16 style stock is still in use today on, you guessed it, the M-16. The collapsible “m-4 style” stock was created to go with the short barreled Colt Commando rifles because they were designed to be smaller more maneuverable rifles. The stocks then were used on the M-4 when the commandos proved not so reliable. Also, nick leaves out any mention of the fact that the “rifle” style buffer tubes are longer and use a different length buffer and spring. He also neglects to include the alternate name for the buffer tube, “receiver extension”.
3: He neglects to mention that full-auto bolt carriers are lauded for their increased weight and the suppossed increased reliability and strength that comes with it, he also need to make it more clear that a full-auto style bolt carrier is completely legal and not nefarious in any way. They are prized among top end AR manufacturers and consumers.
4: The bolt does not “seal off the chamber” the brass seals the chamber, the bolt supports the brass.
5: The locking lugs are not “machined into the chamber” and the bolt does not “enter the chamber”. The locking lugs are machines into the barrel extension. The chamber is only the part of the barrel that contacts the brass.
6: The cam pin head is not shaped like a rectangle because “This helps to keep the cam pin from accidentally falling out during disassembly” it is shaped that way because it travels inside a channel in the upper receiver which prevents it from moving until the bolt is approaching battery. This is necessary because friction in the msg causes the round being fed to resist motion, this resistance pushes back on the bolt face as the bolt is pushing the round out of the mag, if not for the rectangle cam head pin and the channel in the upper receiver it travels in, this pushing back force would cause the bolt to rotate and the locking lugs on the bolt would be out of position to mesh with the lugs on the barrel extension.
IDK what number: The purpose of the gas rings is not to “seal off the vents in the bolt carrier”. They are there to seal the bolt to the bolt carrier, and to prevent as much gas and carbon from leaking around the bolt and getting into the chamber, barrel extension, and receiver.
Whatever # is next: now on to the worst part. Nick’s entire description of the purpose of the two vent holes on the bolt carrier is incorrect. they do not
Bleed off gas “during the first few fractions of a second as the bolt unlocks and the bolt carrier starts to move backwards” and this doesn’t “keep the bolt from moving backwards too fast and shearing off the locking lugs before it fully unlocks”
The AR-15 gas system forces gas INTO the bolt carrier, this gas then pushes FORWARD(not backward) on the bolt, and concurrently pushes BACKWARD on the bolt carrier. The bolt carrier doesn’t pull back on the bolt during unlocking, the gas pressure pushes the bolt and carrier away from each other and since the bolt can’t go anywhere(it’s against the barrel) this causes the bolt carrier to move backward while the bolt itself is trying as hard as it can to move forward(but it can’t). The AR-15 system is mis-labeled as “direct impingement” but it is much closer to “co-axial piston” than DI because all the bolt/carrier un-locking and locking force are in-line with the barrel. The operating system does not induce any shear forces on the locking lugs of the bolt, only the chamber does. Once the gas inside the bolt carrier has caused the bolt carrier to move backward far enough to cause the bolt to rotate and allow the lugs to un-mesh, and the bolt has telescoped as far as it can, this is where the gas rings pass the vents in the bolt carrier and the gas pressure inside the bolt starts to decrease. This is done to reduce wear on the cam pin and the part of the bolt around the cam pin and to vent as much gas and fouling to the out side of the gun as possible before the gas key un-mesh’s with the gas tube. At this point the higher inertia of the bolt carrier(vs the bolt itself) and the fact that they are attached to each other, causes the bolt carrier’s rearward momentum to counteract the gas’s forward pressure on the bolt and they both start to move to the rear.
I’m typing this on a phone so proofreading ain’t gonna happen. Hopefully I have explained everything properly.
Nicks got some good stuff but he needs to spend more time in the technical section of m4carbine before he becomes the “resident AR guy”.
Oh, I forgot to include that the bit about making sure the gas ring gaps are not lined up is useless. When the bolt it inserted into the carrier, the gaps in the gas rings close and become a non-issue. This same “dont line the gaps up” nonsense is spouted about automobile engine piston rings as well and is equally a non-issue. The moment you start to cycle the action, those gas rings are gonna laugh at you and move wherever they want to go.
Thanks for that. TTAG’s posting policy: no flaming the website, its authors or fellow commentators.
Hey,
I’ve removed some of the parts that you’ve had an issue with and I will be reviewing them shortly. Most of the information presented is based off interviews with the armorers at MCB Quantico, as I don’t trust a single thing I read on a forum anymore. If you could provide sources for your statements it would be greatly appreciated.
Some of the semantic issues you had I am leaving in because it is a far better way to explain it to newbies, but I’ll take it under advisement and update shortly.
You have to admit, your original comment was very insulting. We don’t take insulting well. You can disagree with us and we are often wrong (and fix those mistakes quickly) but we won’t tolerate insulting language.
-Nick
Please explain what was insulting? Did I comment about your mother? Did I make disparaging remarks about your haircut? No, I said I didn’t have time to correct all of your mistakes. And I didn’t. That post above took me an hour to write and I don’t have that kind of time to waist on going around correcting people on easy to avoid mistakes. I have a job.
It seems perhaps you guys got angry over a perceived slight and overreacted. I can understand that, this being the Internet and all, since inflection and tone don’t come across in text. But don’t blame me.
First rule of being a gun guy; never trust anything anyone ever tells you about guns. That includes gun store emoyees, gun enthusiasts, forums, military armorers and especially blogs. Always look it up for yourself, or, even better, LOOK at the design of the firearm and make your own conclusions.
As for forums, the only one to trust is m4carbine and that only with a grain of salt.
Thank you. As some might know I am no fan of the M-whatevers. There was much ado about “not cleaning” M-16s in VN (1965). I seldom, if ever, have seen mentioned that the bolt/firing pin assembly on those M-16s could not be disassembled and cleaned in the field. It was a job for the armorer, and we all know there is never one of those around when you need one. The M-16s we were issued, select fire, semi/auto could be broken open like a shot gun, as your photos show. All we could do was clean & dust, bore clean and of course wipe down the rifle. But, the bolt carrier/firing pin could not be cleaned, other than wipe down and maybe pick at the cracks. The switch in powder proved to be the jammer upper of those bolt assembly’s, particularly in sustained auto, firing pin would stick tight. I am sure that has been remedied for some time. It is good to see that a complete field cleaning can be done on current rifles. Assuming Military Spec is the same or close. Excellent article and photos. (After reading back up the line in here, I must apologize for not being entirely technically correct, and no where near perfection in my posts).
The Ar 15 rifle is one of the fantastic and interchangeable guns, you can easily change out whatever components you want.
does it give a bad kick
I’m new to AR platform weapons. I just recently got my first one…big change from bolt actions or my favorite, single shots…lol. This article was very beneficial for me. I still have lots more questions, but this was an excellent intro. Keep up the good work.
Where can I buy a bolt on lug for my AR 15. Locking ring style. Seen a few pictures on web but doesn’t give address where to buy them.
Nick,
Crap, I’m impressed. Just getting into AR’s and this is just what I was looking for. The disparaging remarks have been discounted.
Talk to a dozen AK guys who really know their stuff and they all come back with somewhat different explanations of why and how it works. In some cases, they are way off the mark.
This was really useful to me, Thanks, I bookmarked it.
good info above…
I too am new to the AR platform myself. I did not have a clue what or how the parts went together and such.
Reading is good but, Video is Great. I have spent a fair bit of time searching for a good video tutorial.
I found a really great video by a guy named Jim VanMiddlesworth The Gun Coach.com called “the Ultimate step by step AR-15 Build Guide” . It was a really good instruction video, showing and explaining the complete step by step- assembly of an AR-15 rifle, along with tips and tricks in doing so.
It made the pile of parts and pieces a simple easy to understand and easy to follow job to assemble. He ended the video with a trip to the range to fire the gun (he put together) without any additional work outside the video.
Hey guys and gals. I have a question, well, two questions I would appreciate answered, for anyone who wants to put their 2c worth in…..BTW, I am not new to firearms.
Q1. What is it called, properly, a “foregrip” or a “handguard”? I know what the schematic breakdown shows, but I
would like more than one person to clarify. I have a neighbor who is an AR enthusiast, who also insists I name parts a certain way. One of them is the “handguard”. I just need a few of you to say what I think it is supposed to be named, and please clarify both.
Q2. The rail that mounts on top of the keyways on M-Lok or Key Lok style (handguards?) is pronounced how?
“Pick – uh – tah – nee” or “Pick – uh – Tin – Nee”? My neighbor seems vowel challenged.
Thank you for all who reply.
I have gotten a AR-15 and a part fell off, how do I know what it is? Can I send a picture to someone to see if you know what the part is?
Comments are closed.