Marty asks:
I am new to your site but have already read a number of great articles. So thank you for providing a resource. In a recent article about the best AR platform, you go through various options to address this question. In particular, you mention building a lower and buying an upper as an option. Have you written an article that takes a beginner gun builder (me) through the process and the options depending on what uses you are looking for? I would love to see an article that addresses the ability to have multiple caliber/range options off a customized lower platform. Keep up the good work.
I hate you all. You’re the reason I don’t have any free time. Here we go…
First up, why would anyone want to build their own lower receiver from parts? The main reason is that it can be a whole lot cheaper, but another major benefit is the ability to customize your rifle however you want. You can mix and match parts to make the perfect rifle of your dreams. And, even better, you will gain the knowledge necessary to swap out the parts on your own in the future.
There isn’t anything keeping you from making a lower receiver. All of the dangerous components of the rifle are located in the upper portion, so even if you MASSIVELY screw up you won’t explode. Probably. Worst case scenario the gun simply won’t cycle. And once you’ve built the gun you’ll probably be able to figure out what went wrong and fix it.
Whatever the reason, the process itself is as simple as apple pie. There are some annoying bits, but there’s nothing really difficult. Even a small child could do it provided they didn’t choke on the small parts.
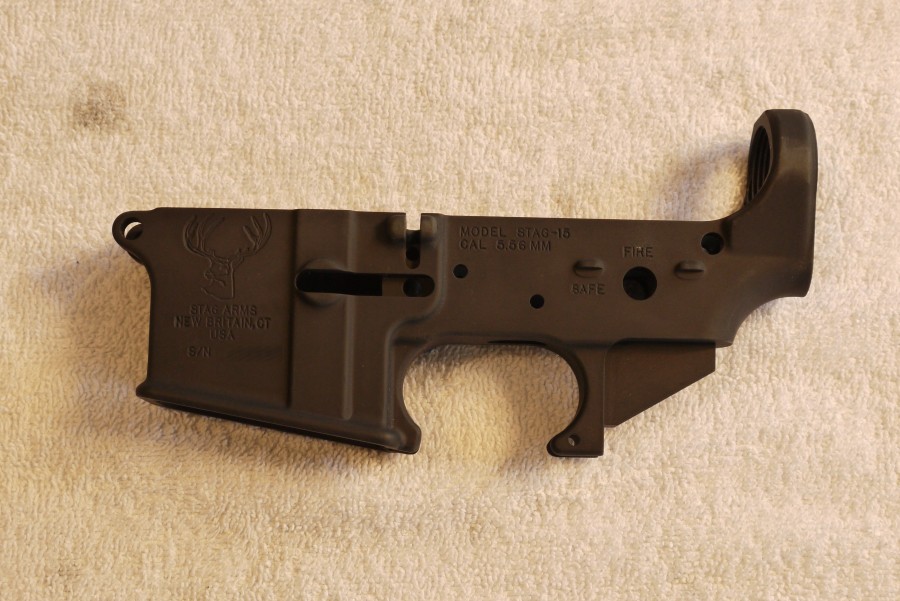
Picking a lower receiver is as simple as picking a nifty design and rolling with it. With the advent of the CNC machine (which precisely cuts each receiver to size) every lower is exactly the same and will work in your gun. Well, provided it’s the right kind and from a reputable manufacturer.
There are two basic types of lower receiver, the AR-15 and AR-10. The AR-15 takes shorter ammunition like the 5.56 round, and the AR-10 is designed for .308 ammo and is much larger. Don’t worry, you won’t be able to mistake one for the other. As long as you have the appropriate lower for the build you want you’re good to go. The only difference between lowers of the same type is the rollmark (the logo on the side of the receiver) and the other markings. Pick one you like and buy it.
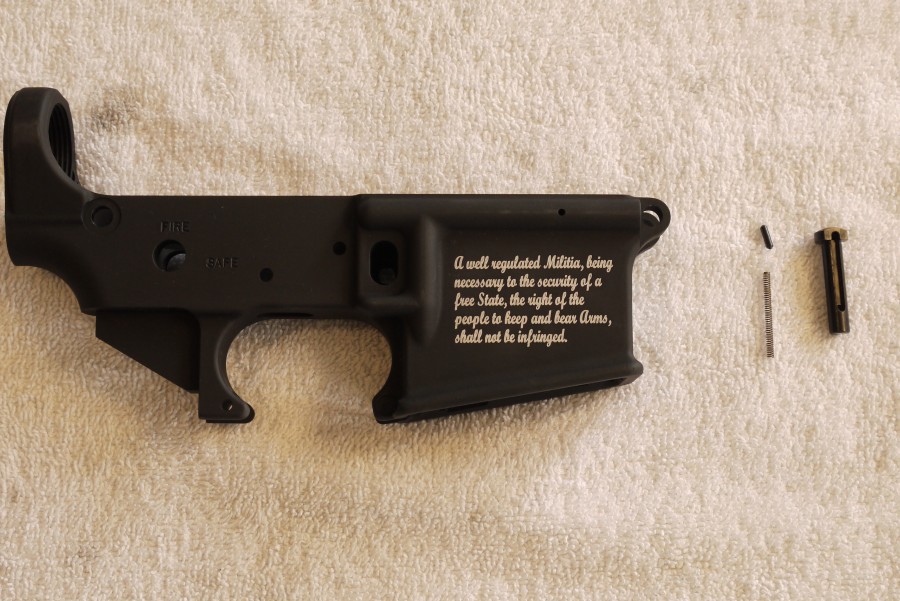
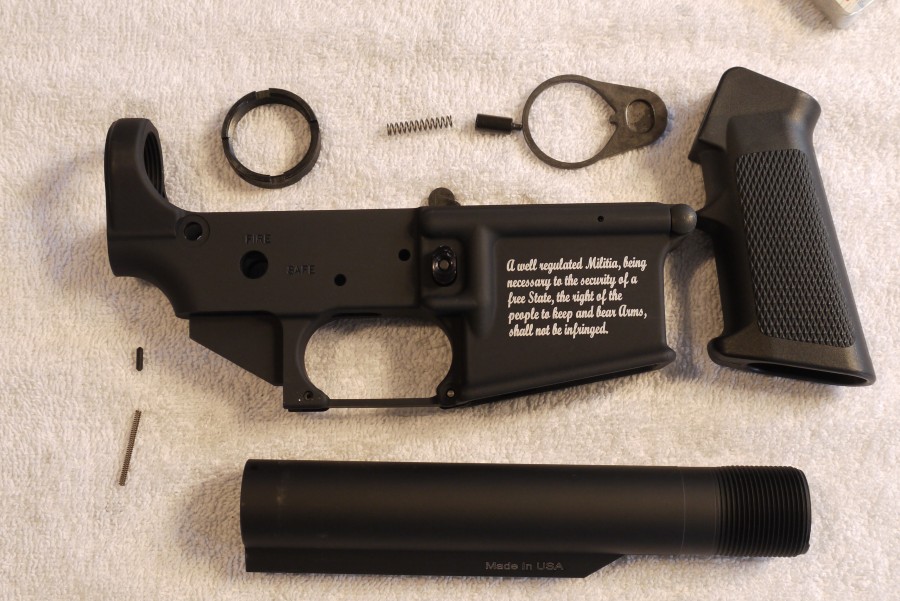
After you pick out a lower, you’ll need to get the parts. Thankfully a number of companies (such as DPMS and CMMG) make parts kits for the AR-15 platform that include most of the necessary items to build the gun. Typically, though, you’ll need to buy the buffer assembly separately. Here’s a quick list of all the parts you’ll need (from front to back) for an M4 style build with a collapsible stock:
- Lower receiver
- Forward takedown pin
- Forward takedown pin detent
- Forward takedown pin spring
- Magazine catch
- Magazine catch spring
- Magazine catch button
- Bolt catch
- Bolt catch plunger
- Bolt catch spring
- Bolt catch roll pin
- Trigger guard
- Trigger guard roll pin
- Hammer
- Hammer spring
- Hammer pin
- Trigger
- Trigger spring
- Trigger pin
- Disconnector
- Disconnector spring
- Safety selector
- Safety detent
- Safety detent spring
- Rear takedown pin
- Rear takedown detent
- Rear takedown spring
- Grip
- Grip screw
- Grip screw washer
- Buffer detent
- Buffer detent spring
- Buffer tube
- Buffer
- Buffer spring
- Receiver endplate
- Castle nut
- Stock
I know its a lot of stuff, but like I said the kit will come with most of what you need.
Once you have everything picked out and organized, you can start to assemble it. I’ll talk about parts you may want to consider upgrading as we get to them.
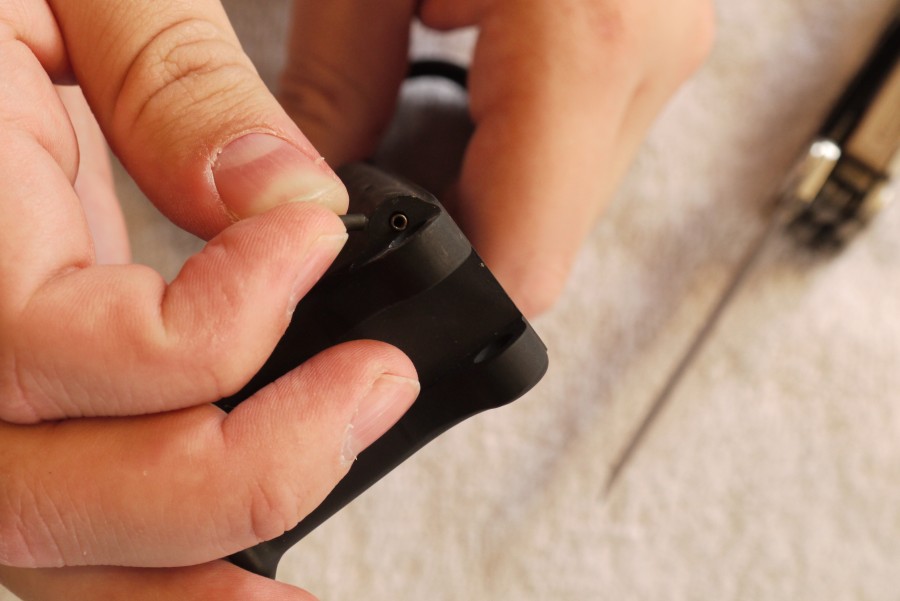
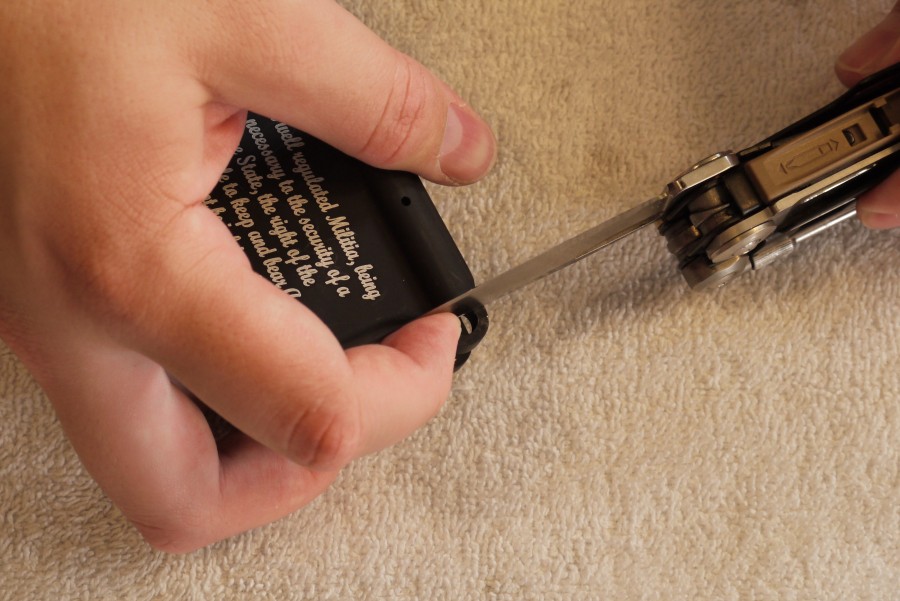
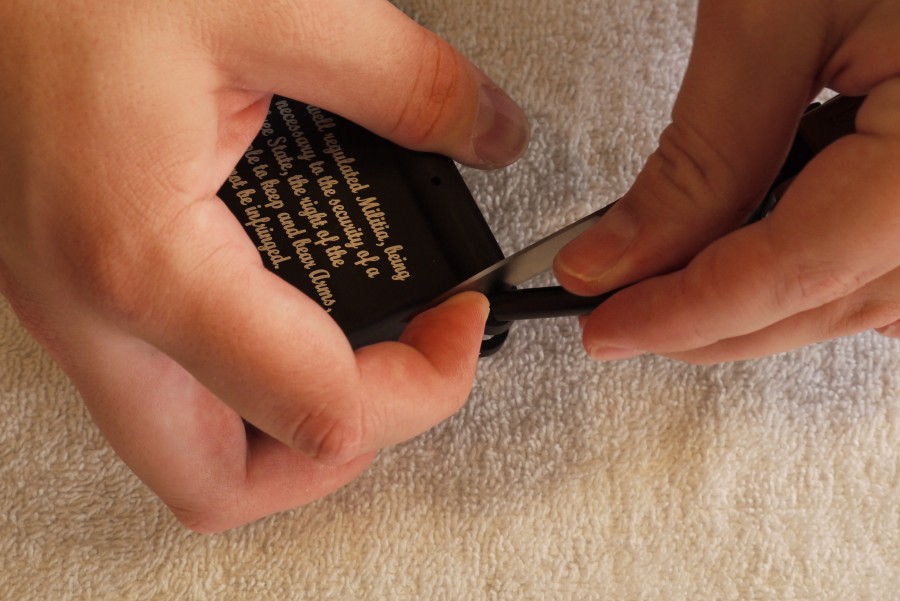
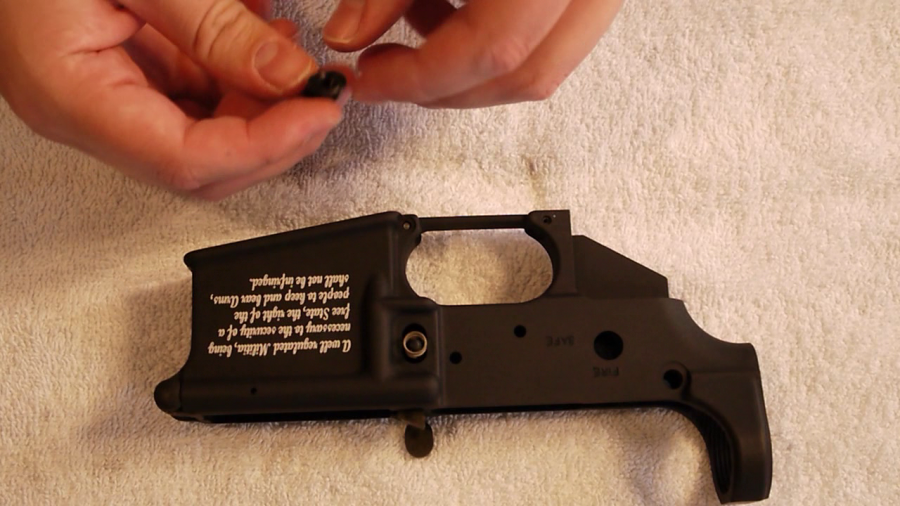
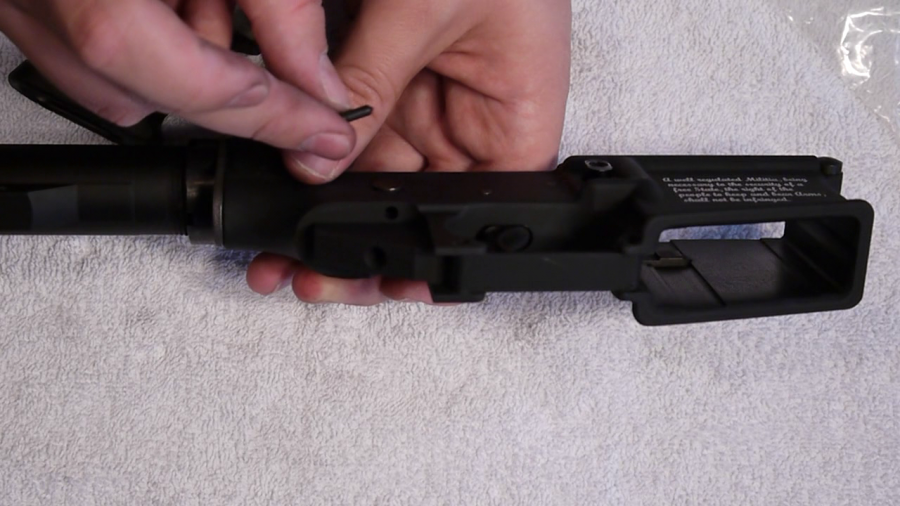
The first step is setting the forward takedown pin and detent. There’s a hole along the front of the receiver for the takedown pin, and there’s a detent that keeps it captured so it doesn’t fall out when disassembling the gun for cleaning. The detent slips into a tube alongside the receiver, and is pushed forward by the spring. The trick here is keeping the detent compressed in the hole long enough to get the takedown pin in place — I suggest using a knife to hold the pin back, and then slowly drawing it back as you apply pressure with the pin to slide it into place.
The next step is putting in the bolt catch.
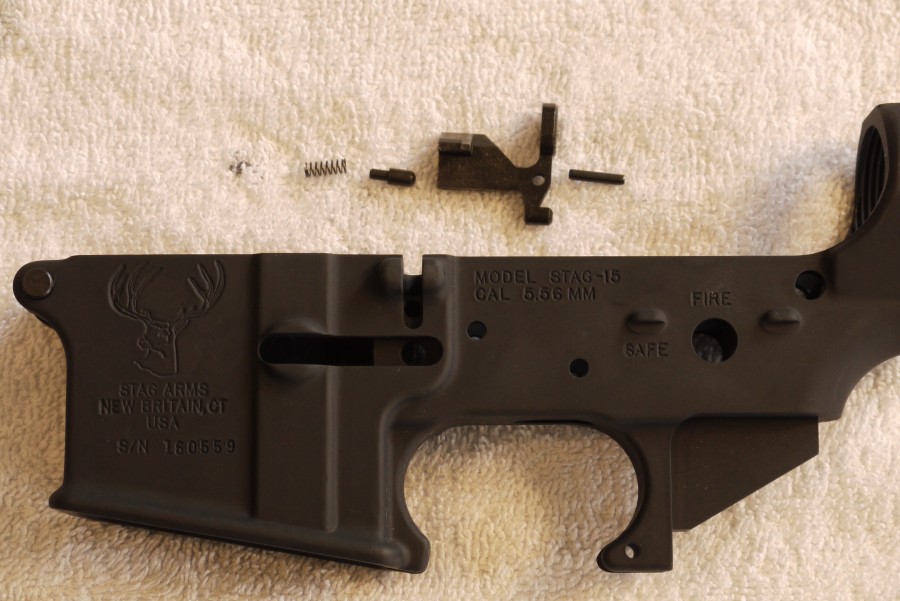
The bolt catch is the piece that pops up when the magazine is empty to keep the bolt from going forward again. It makes reloading a WHOLE lot easier, and while it’s not really a required piece of equipment it sure is nice. The bolt catch, when not in active use, is acted upon by a plunger which sits in a hole on the side of the receiver and forces the catch down and out of the way. A roll pin holds the whole affair together using friction to keep it in place.
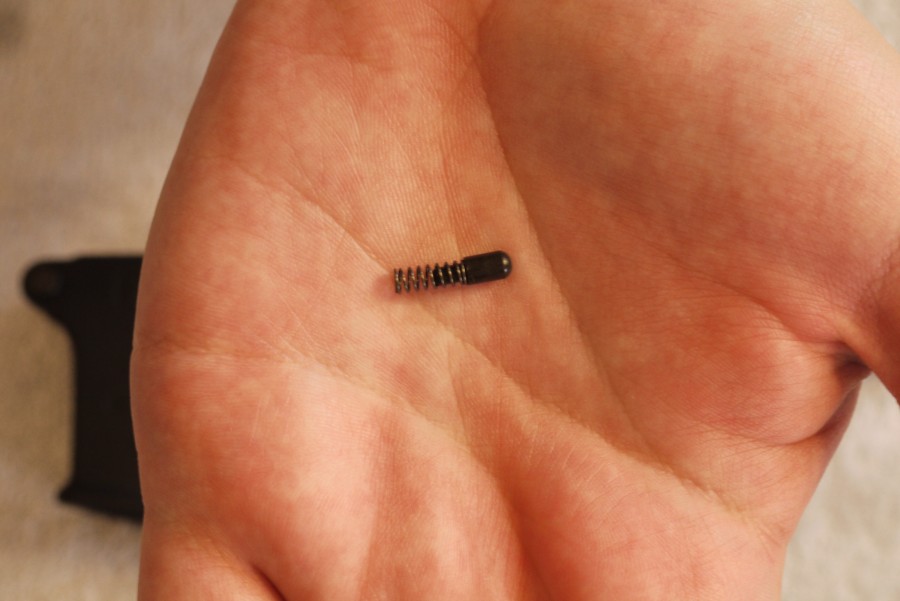
The plunger is configured like so. The plunger is the part that rests against the bolt catch and needs to be facing outwards.
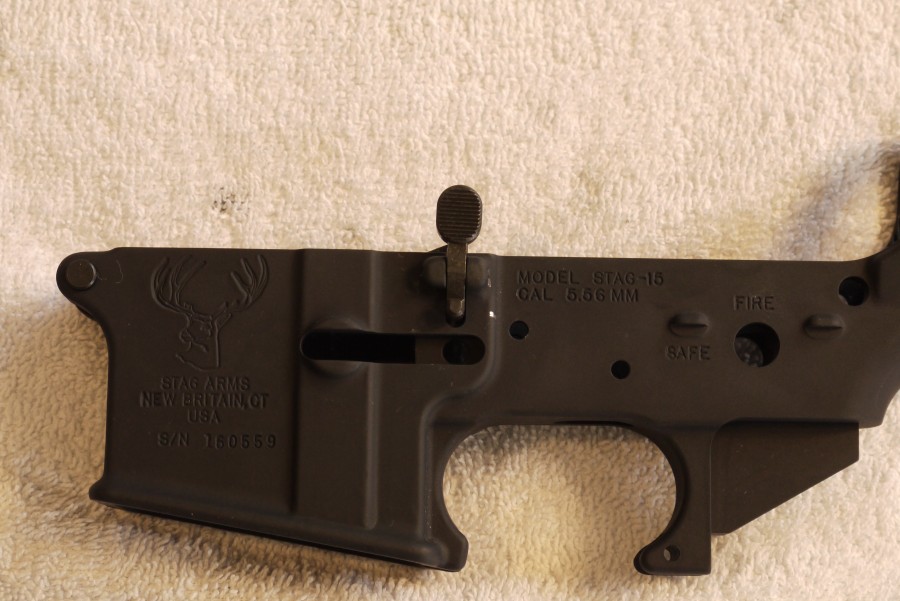
Here’s the bolt catch properly assembled.
Tjere are two schools of thought for getting the roll pins into place on an AR-15. Thought #1 is to bash it with a hammer and a punch until it bends to your will. Thought #2 is to use a pair of vicegrips, with duct tape on the grip part (to keep from scratching the finish), to push the pins in. I like option #2, but use whatever works for you.
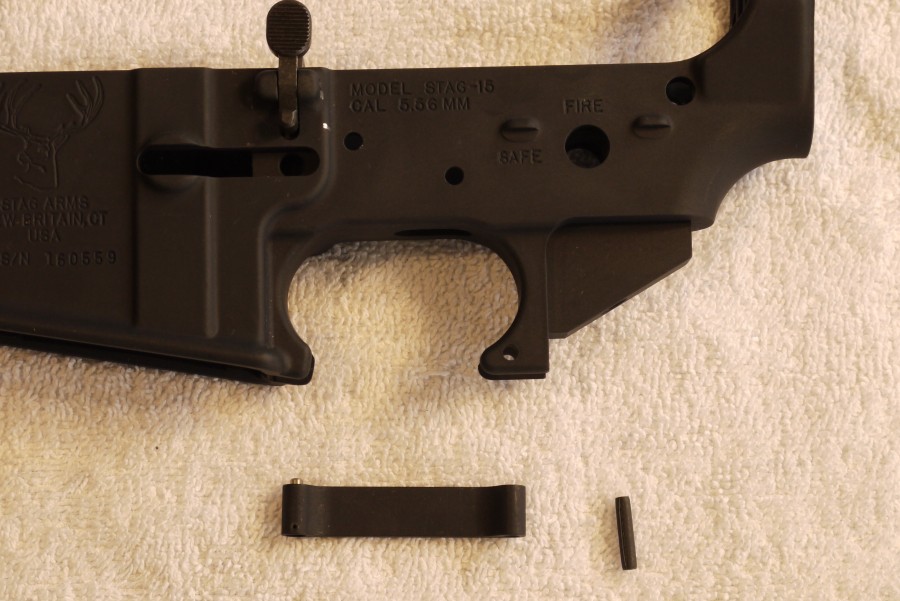
The next step is the trigger guard. Most of this is built into the lower receiver itself, but Mr. Stoner saw fit to design this trapdoor to allow a gloved hand to operate the gun. This one is pretty simple, just line up the hole (with the flat part down and the curved ends up) and hammer the roll pin home.
This is one of the areas that I recommend upgrading. Magpul released an “enhanced” version of this part and has since been widely copied, but the basic idea is to design a slightly larger opening by bowing the triggerguard down and making it much more curved. I like it, and it looks a lot better, but your mileage may vary.
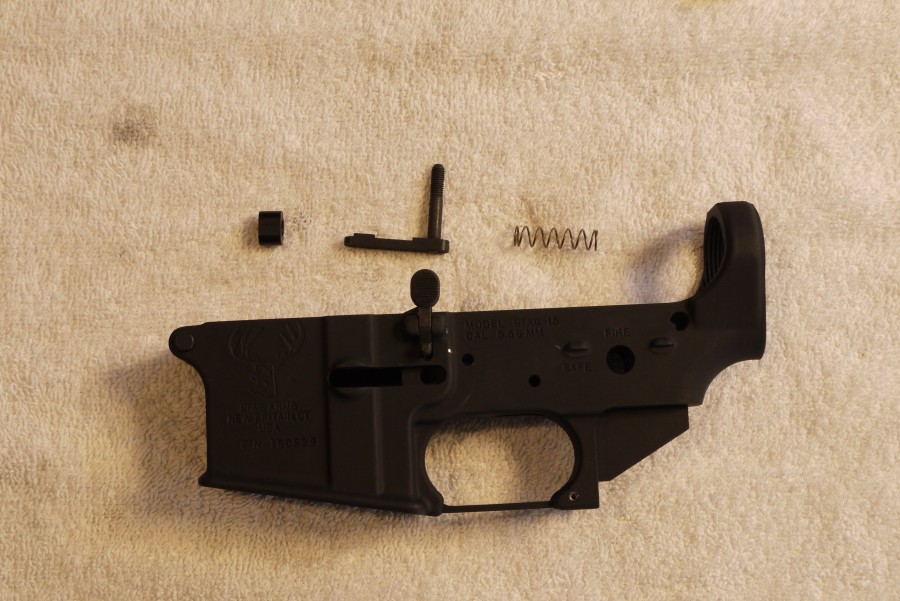
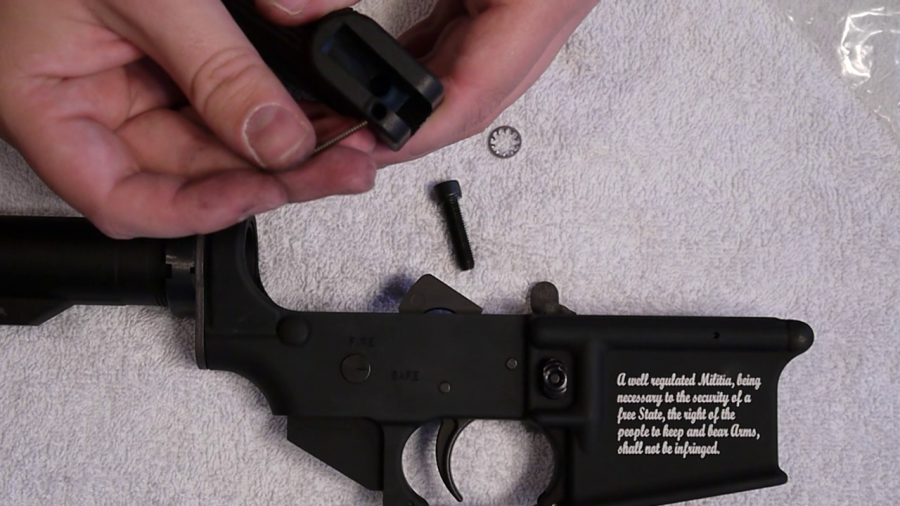
Next up is the magazine catch. The catch itself is rather cleverly held in place by the button on the other side, which is screwed onto the catch and held taut through a spring in the middle of the two. To install the catch first place the catch itself into the proper position, making sure the spindle goes through the hole near the bolt catch.
The spindle will protrude on the other side, and you will put the spring around it. Now, in order to get everything to work you need to screw the magazine catch onto the magazine release button, which sounds a little backwards.
With the button in place on the opposite side and depressed until it can go no further, you will rotate the magazine catch until it can’t screw in anymore. Then, line it back up and release the button. The end of the spindle should be flush with the face of the magazine release button, and the magazine catch should be firmly attached to the gun.
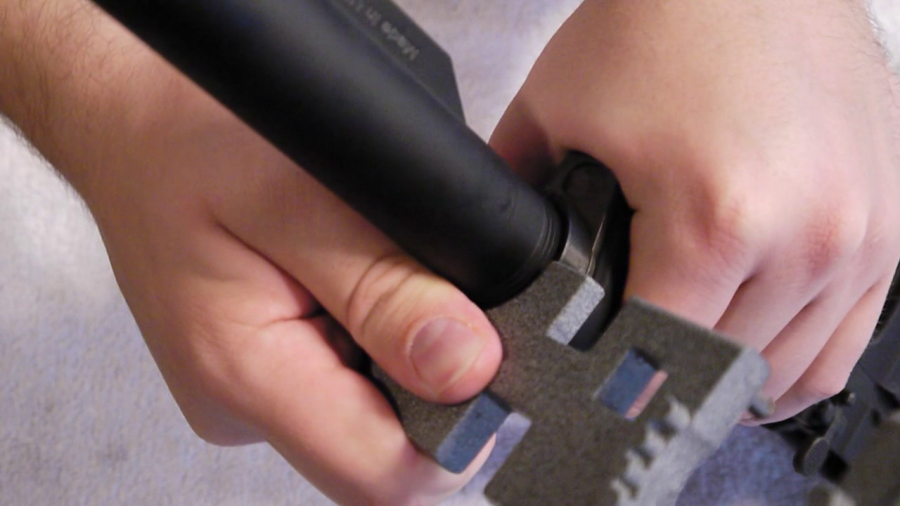
The next step requires the most parts and a special tool, but it is by no means difficult. We need to attach the buffer tube and the rear takedown pin to the gun. Both of these pieces are interconnected, as we will soon see.
Real quick aside here — there are two types of buffer tubes, commercial and milspec. There’s no difference in terms of reliability or function, except that one is slightly larger than the other. I seem to recall that the reason has something to do with the assault weapons ban that has since expired, but just be careful as it will cause issues if you have a milspec buffer tube and a commercial spec stock. I always buy milspec buffer tubes and stocks as a rule just to be safe.
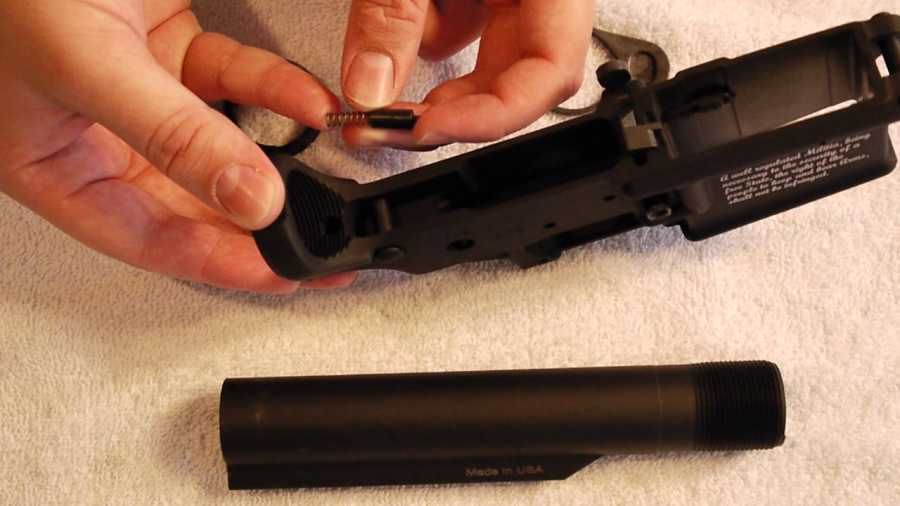
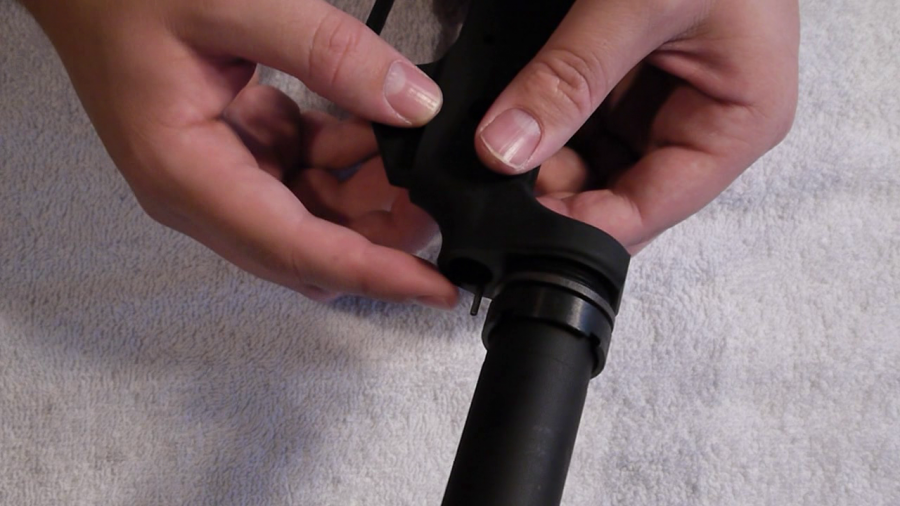
Step one is getting the rear takedown pin in place. It slides into the receiver on the same side as the front takedown pin, and like the front one also requires a detent to capture it. That detent is held in place by the receiver endplate, which is part of the buffer tube assembly. But before we put the buffer tube on, we need to pop the buffer detent into place.
The buffer detent keeps the buffer and buffer spring, which are housed inside the buffer tube, from sproinging out every time you break the gun open. It slots into a hole that is part of the threads that hold the buffer tube in place, and actually the detent itself is kept in place by the lip of the buffer tube (which is brilliant). Pop the detent spring inside the detent and the detent assembly into the hole, the on to prep the buffer tube.
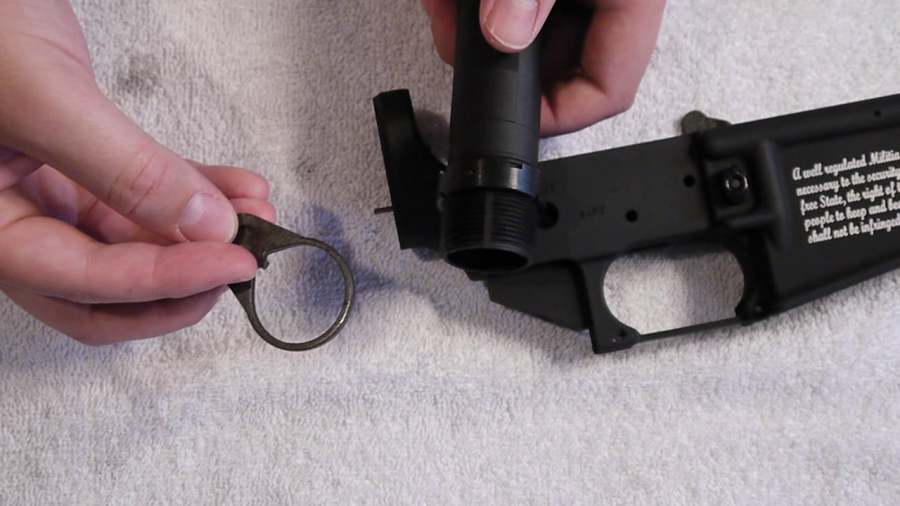
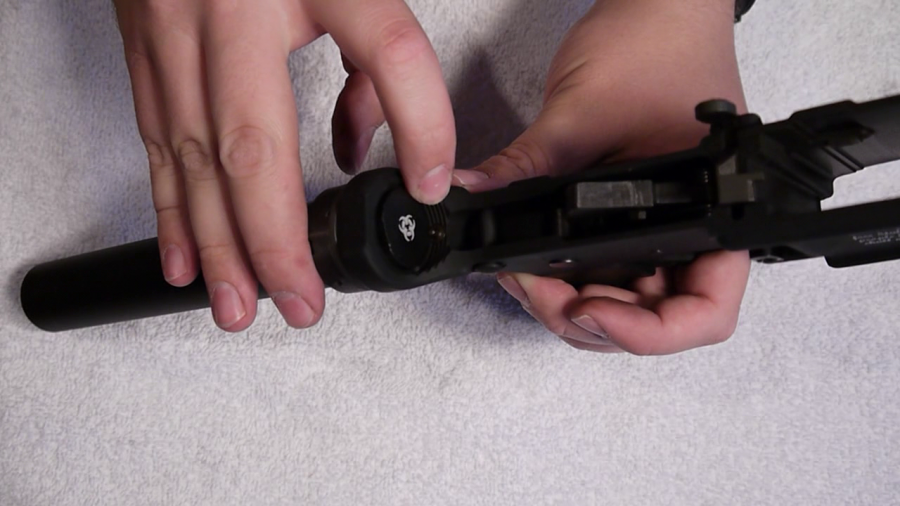
The buffer tube needs two parts added to it before you can screw it onto the receiver, namely the castle nut and the receiver endplate. The castle nut goes first, screwing on as far as you can with the “crown” pointing backwards towards the other end of the tube. The next part is the backplate, which has a notch in it which lines up with a slot on the buffer tube and needs to be installed such that the bump on the bottom of the plate is facing towards the threaded end of the buffer tube.
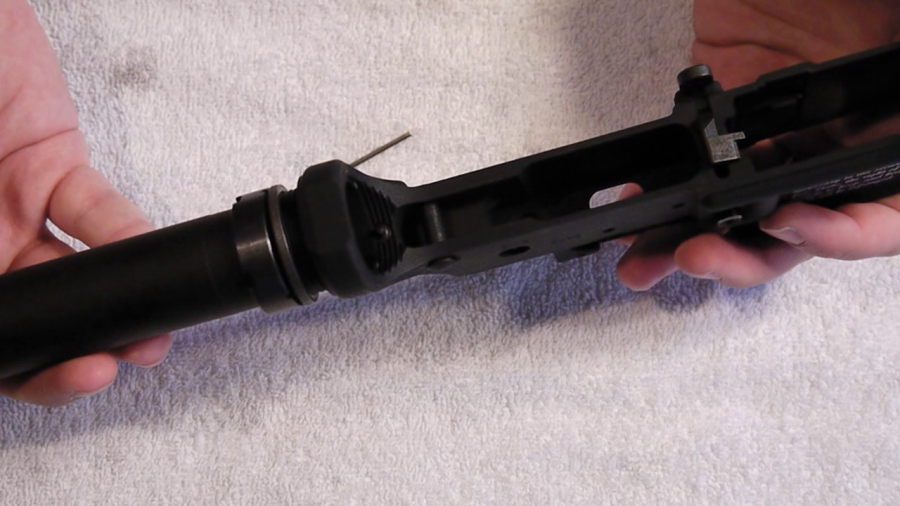
With these parts in place we can now screw the tube onto the receiver. Be careful to ensure that you only turn the tube one full revolution past where it begins to contact the edge of the buffer detent, and hold the detent down while you do that turn. When you’re done the detent should remain in place under the buffer tube.
With the backplate almost on the gun, now is the time to add the detent and detent spring for the rear takedown pin. There should be a small hole in the back of the receiver, and you simply slide the detent first and then the spring into this hole. Cover it with the backplate, ensuring that the bump on the plate matches up with the divot on the back of the receiver itself to hold the thing in place. Once everything is together you can screw the castle nut onto the backplate and tighten it down with the castle nut wrench.
And now for the annoying part: the trigger.
The trigger is the very first part you should consider upgrading on any firearm. It’s the difference between a good gun and a crappy gun, and can do a whole lot more for your accuracy than any other “minor” upgrade. And the good news is that swapping triggers is relatively easy. I’ve never liked a single trigger that has ever come with a parts kit, so I highly recommend splurging for the better trigger.
The trigger is only annoying because its so hard to get everything lined up. But once everything is in its place, the actual installation is a snap.
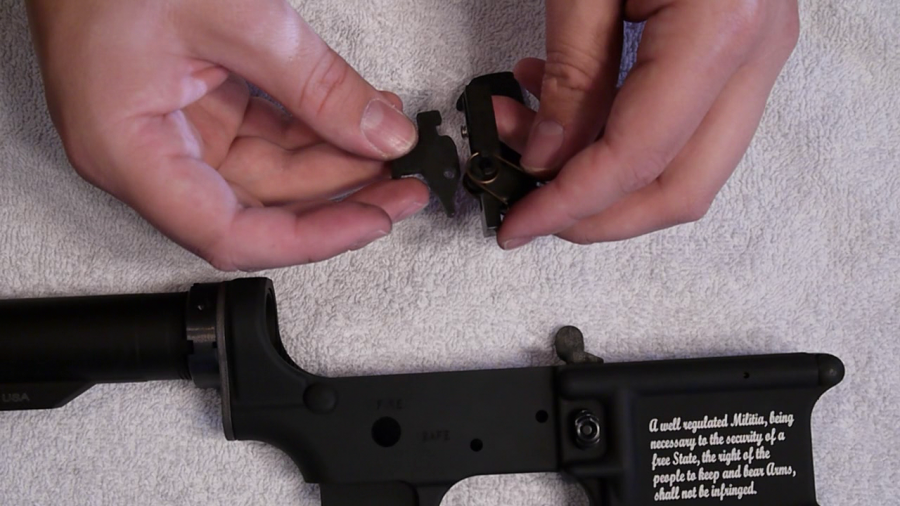
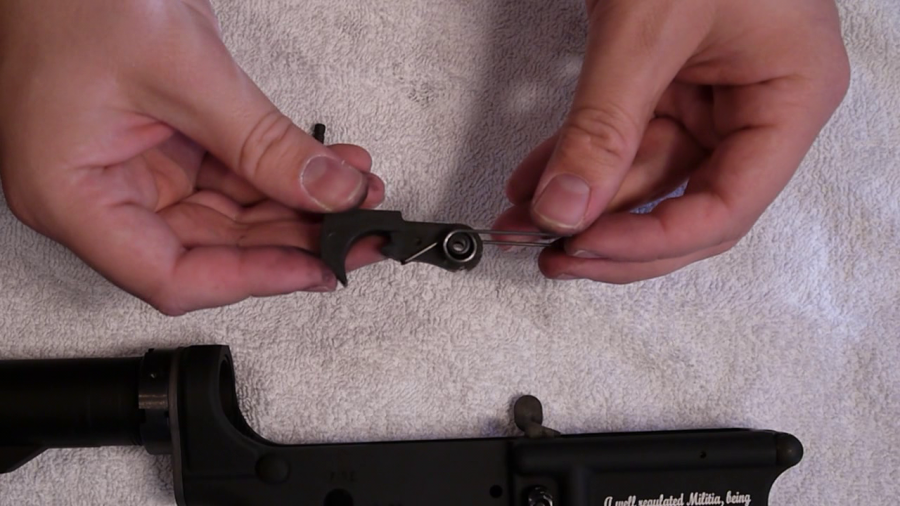
Step one is to get the trigger, disconnector spring and disconnector assembled. Here’s what it should look like:
The disconnector spring is larger on one end than the other, and the smaller end conveniently fits into a slot on the trigger itself. Also note that the trigger spring should be installed so that the free end of the trigger spring is pointed down and forwards in relation to the trigger.
To install, simply align the whole shebang with the lowermost hole on the receiver (with the trigger blade protruding from the bottom of the receiver) and slide a pin in to hold it in place. You might need to wiggle some stuff around to get it all to fit, but given enough coaxing it should work.
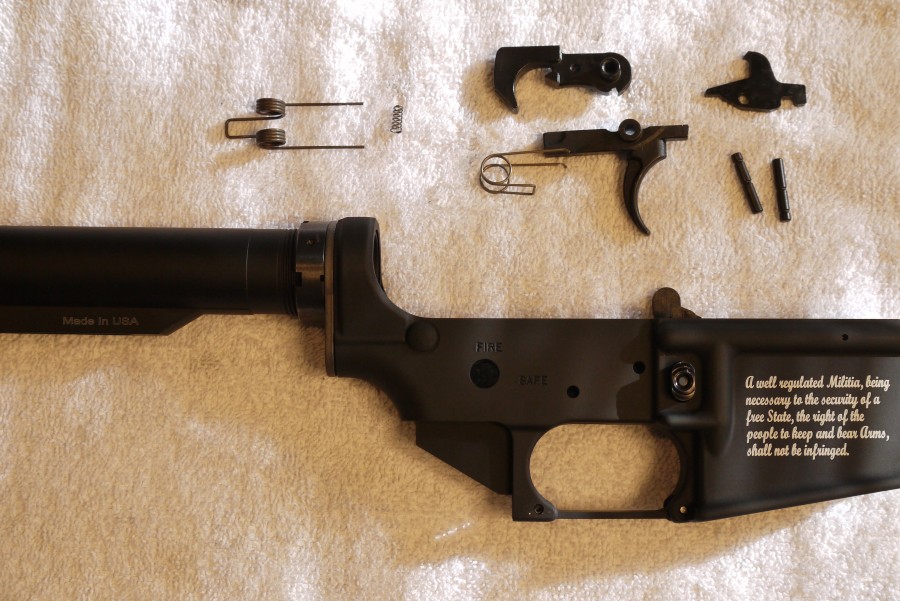
The hammer is the next piece to go in. Ensure that the spring is loaded as seen in the picture. The two free prongs there will actually set on top of the trigger pin when properly installed. Just like the trigger, this one uses a pin to keep it in place. You may require an inordinate amount of brute force to get this thing into place.
The second to last step is the safety switch, which is another recommended upgrade. The BAD-ASS is a fantastic safety, and feels a whole lot better than the standard fare. It costs some dollars, but in my opinion it’s worth it. Anyway…
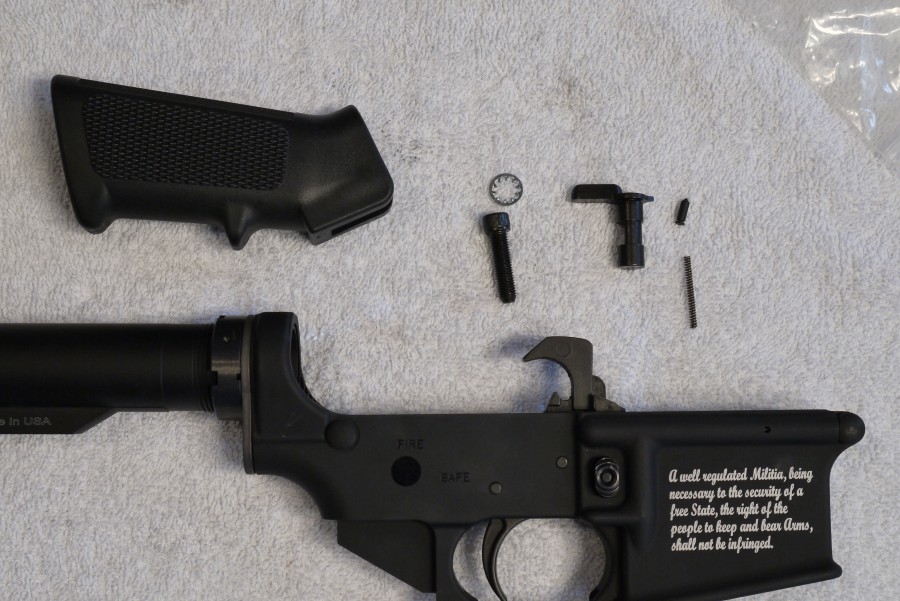
The safety is held in place by (you guessed it!) a detent, which is in turn held in place by the grip. Yep, another dependent system. It’s kinda cool, though, because the housing for the spring for the safety detent is actually inside the grip itself.
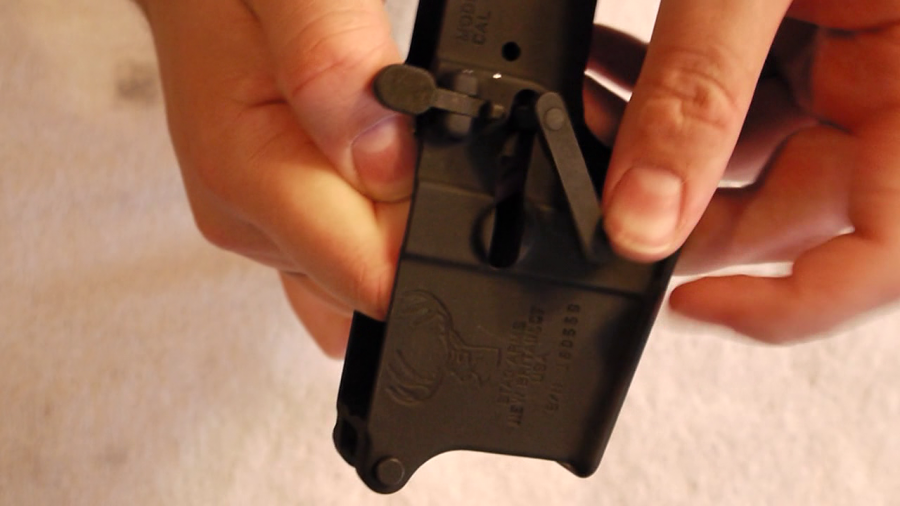
Step one is to cock the hammer, because otherwise the safety won’t fit in the gun. Its just one of those quirks of the weapon system that you can’t do anything to the safety if the hammer is forward. Once you have the hammer back, you can slot the safety into the gun from the left side of the receiver.
Once that’s in, place the safety detent into the small hole on the right side bottom of the receiver right below the safety bar. Then place the spring in the hole in the grip corresponding to that location, slide the grip on, and ensure that the spring and the hole for the detent line up.
The last step in installing the grip is using the supplied screw and inserting it into the bottom of the grip, screwing the grip onto the receiver itself. This will hold everything in place.
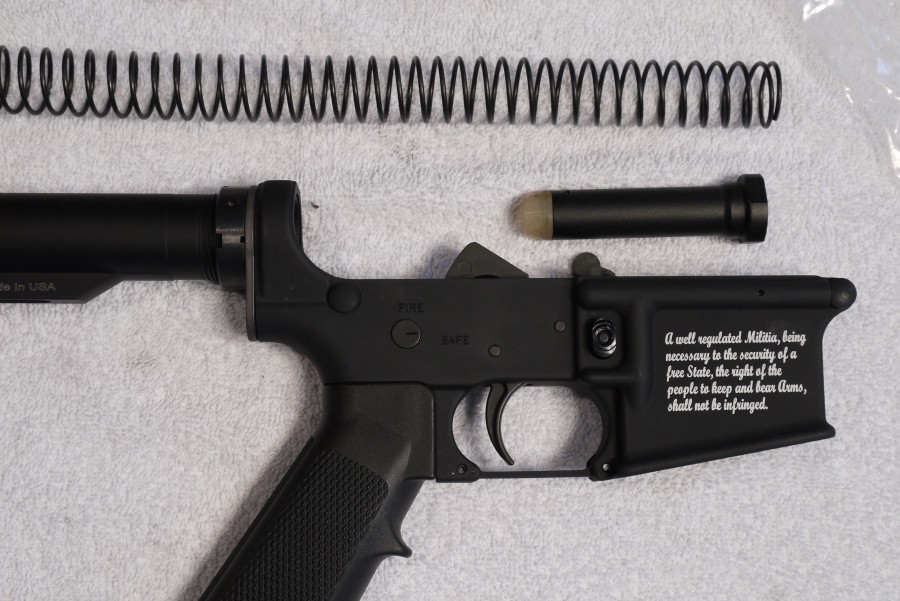
The final step for the receiver is getting the buffer and buffer spring into their proper place.
The buffer spring is inserted first into the buffer tube, and then the buffer is placed inside the buffer spring and pushed into the buffer tube until the buffer detent captures the buffer.
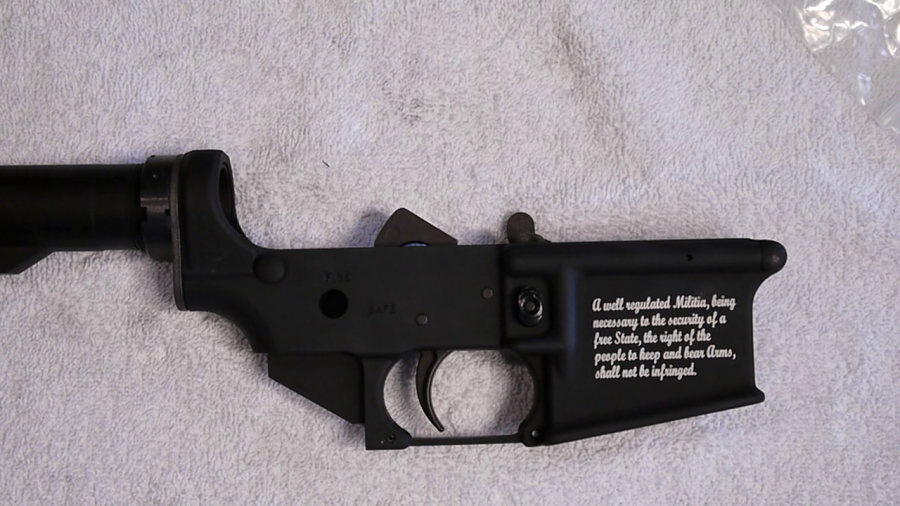
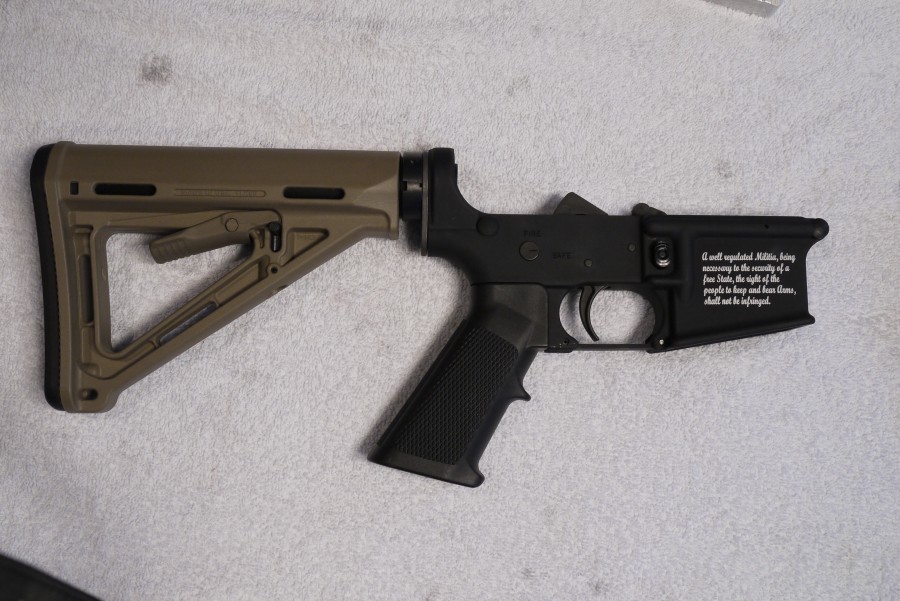
And that’s it, you now have a working firearm. The finishing touch is to put the stock on the gun, but that differs by stock type and to be honest I’m way too tired to get into that tonight.
TA-DA!
If this wasn’t enough for you, I also made a video to go along with this article. Because I’m insane, and would much rather give you guys far too much information than not enough.
http://www.youtube.com/watch?v=YIpFmi8kiks
Right, time for some Shiner Ruby Redbird and bed.
[Email your firearms-related questions to “Ask Foghorn” via [email protected]. Click here to browse previous posts]



“You’re the reason I don’t have any free time.”
I thought that was reddit’s fault.
Thanks for writing this, Nick. I have been waiting for a lower build guide from someone I trust.
Thoughts on staking the castle nut?
It is Colt spec to do so.
It may be Colt’s spec, but I don’t like to do it. Mainly because I like fiddling with things, and I have a castle nut wrench in case anything goes wrong.
The staking doesn’t prevent you from removing the castle nut. Done properly, it only prevents the nut from backing off on it’s own.
Two tips:
1. Use a 6″ steel rule instead of the knife to hold down the detent for the takedown/pivot pins.
2. When you’re putting in the roll pin for the bolt latch, put some masking tape on the receiver to the rear of the latch and drive in the pin from the rear of the lower’s left side with a punch. This prevents marring the anodizing if you slip.
NB that the bolt latch is one of the locations on the AR lower where, if your pin doesn’t line up correctly, you can break off the ear on the other side of the latch by trying to muscle/mash the pin in there.
Matter of fact, I’ll make the pitch right here for using roll pin punches on the AR, since there are so many roll pins. Roll pin punches have a dimple in the middle of the face of the pin so that they center on the pin and don’t slip off while you’re driving them.
“I hate you all” – WIN!!!
HAHAHAHA!!! “I hate you all. You’re the reason I don’t have any free time.” Is going to be the quote of the day for me!
EXCELLENT write up, thank you. Oh, and for what it’s worth, very photogenic hands in the pictures. If this gig ever bores you, you probably could have a career as a hand model.
Oh, and for what it’s worth, very photogenic hands in the pictures…no homo.
FIXED
DO NOT dry fire the lower while detached from the upper. It will damage the hammer. I took an armorer’s course for the Ruger 5.56. The instructer pointed out the rifle is very consistent with 10-12 dry fires with the lower detached will crack the hammer.
A very excellent point which people should heed well.
So beyond normal tools, a castle nut wrench is required, correct? What size punches are needed?
Brownells sells a set of roll pin punches. 3/32nds is one of the more common sizes used on the AR.
You’ll want a brass punch for drifting the trigger/hammer pins, which you can make simply by gluing a 1/8″ piece of gas welding rod into a wooden handle.
The upper assembly is where you need more expensive tools, including an action block to hold the upper&lower in a vise without crushing it, a special wrench for the castellated nut on the barrel, a torque wrench for torquing the barrel nut, flash hider/comp, etc. Technically, you also need to torque the castle nut for the buffer tube to a spec, so you need the torque wrench there too, but it is less critical than the barrel nut.
Is that lower with the 2nd amendment text custom, or did it come that way from the manufacturer? And if the latter, where can I get one like that?
Here you go: http://www.stagarms.com/product_info.php?cPath=18_30&products_id=386
As an interesting point-in-time reference, right now Stag Arms’ website notes they are back-ordered a year, and not taking any orders.
Bookmark-worthy.
This one definitely goes on the “for future reference” pile.
Thanks, Nick. Your sacrifice is greatly appreciated.
Nick fist off thank you!!! Yeah you are insane, but the video is awesome and now I am armed with the knowledge, ok I knew a lot already but now I am going to build out a CA compliant AR-15.
You need to put all this in some sort of interactive book with videos etc.
“Firearms according to Nick Leghorn” I am sure you have enough for like ten editions.
If you are ever in Tracy CA I will owe you a beer or three…
Oh yeah well I hope to get this built by 2020. Many lowers are non CA legal and those that are say sold out, not good!
Here is my idea for the build. Also I know that I need a bullet button and I am limited to ten round mags but this could work for 3 gun competitions as well I would think.
AR-15 Build
Lower (Multi) Forged Pirate – Bullet Markings $115.00
Daniel Defense Lower Parts Kit $80.00
DSA, Inc. Mil-Spec. 6-Position Stock Kit $50.00
Del-Ton AR-15 Pistol A3 Flat-Top Upper Assembly 5.56x45mm NATO 1 in 9″ Twist 14.5″ M4 Contour Barrel Chrome Moly Matte with CAR-Style Handguard, Flash Hider $399.00
Primary Arms Micro Dot With Removable Base PA Riser Bundle $118.00
I just read this piece, and appreciate it very much. I have been trying to build a parts list but could not get the total rifle cost anywhere near what you show. You have really made my life much easier.
Thank you
One item you might want to mention. You can build the lower and complete but you must keep it for a year. If you build it and sell it that is considered manufacturing.
Nick-
A sincere thank you from TTAG’s AI regarding your sacrifices to help the “gun” community become better educated. We appreciate the wonderful resource you have become.
+1 from another long-time reader.
Many Thanks to you Nick, and Dyspeptic, for the highly useful level of detail.
This goes in the “must-have-reference” and “to-do” files.
Thank you for the guidance. My first lower assembly and I was able to assemble my lower kit much faster than I thought possible due to this tutorial.
I realize this is an old post but thought I would share something that helped me in case someone new stumbles across this post.
The tip I thought I would share is in regards to installing the trigger and hammer pin. Once I had the trigger assembly and hammer assembly in place. I used a 1/8″ allen wrench to “open the path way” aligning the holes. I then took the trigger/hammer pin and used them to push the allen wrench out. Still some wiggling but both pins went in easily.
I hope this helps someone!
Thank You for the Great Information
Just finished using this to complete my first AR. Thanks Nick, your old article is still invaluable!
FYI the trigger spring goes in big end down not small end down, if you put the small end of the spring down you can damage the spring, rendering it unusable.
Thank you! I have been reading many articles and you, by far make it worth while.
You write like I think. That may not be a compliment but I hope you take it that way.
I intend to under take the build up of one of these beauties. As soon as I can talk my buddy into paying for it.
I am an Obama “Refugee”. Not really, I was born here, but my financial situation is much like one.
Thanks again,
A devoted fan
Assembled my first AR carbine based on this article( Core 15 upper on a Del ton lower, using PSA LPK- PSA is a class act, included and MOE pistol grip in the kit!)-total cost was $800.00, for a better spec’d carbine than the budget entry bushmaster, dpms, and smith and wessons mt local gun shop was selling.
The “fever” hit bad and again I assembled a Spikes lower with PSA lpk, dropped in a geisselle trigger group, Magpul CTR stock on mil spec buffer tube, BCM H buffer and added the top notch Spikes LE M4 upper which came with a melonited gas tube, outstanding bcg, and a 7″ quad rail. $975.00 total.
This led to a LMT lower with DD lpk, another geisselle trigger group added magpul “furniture”,and a BCM mid length with socom barrel-$1,275.00 total or about as much as a Colt LE 6920, but with a few thethenvbetter upgrades!
Sadly I’m “hooked”, and slapped together a New Frontier complete polymer lower , bought for $150 total, including tax and DROS,
I HAVE FOLLOWED YOUR FILM FOUR TIMES NOW AND EVERY ONE OF THE LOWERS WENT TOGEATHER ( THERE WERE SOME TRYING TIMES ) ALL WORKED OUT. THANKS JIM
I’m super stoked that I’m finally in a position to need this. Now I just need to wait a couple years and I will hopefully have money for the upper to put on it. Le sigh.
I would like to obtain the lower part kit, but one site say’s it has been removed or moved to a different location. Could you direct me to other links.
Here we are in 2020, and your lessons are still valuable. Thanks
Comments are closed.