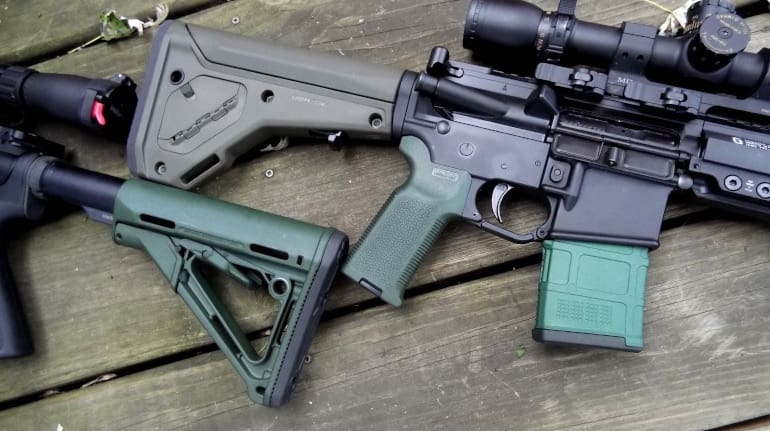
Over the last couple years I have featured a couple of AR builds here at TTAG and elsewhere that had Russian Bakelite colored stocks and mags. Some people really loved the look of them and I have subsequently found some of my images “borrowed” and used on social media by others.
Over that time I’ve been asked just where and how I got such cool colors so, let’s get to it . . .
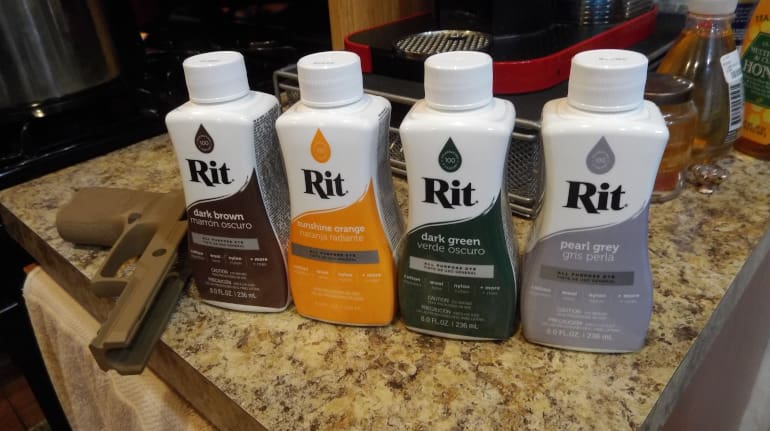
I decided to go for maximum effect and went with four colors of dye, all available at your local craft store. The brand I used was Rit. I used Sunshine Orange, Dark Brown, Pearl Grey, and Dark Green. I knew that I’d get different results when dying different polymers, so I went with parts from SIG SAUER and Magpul for some consistency.
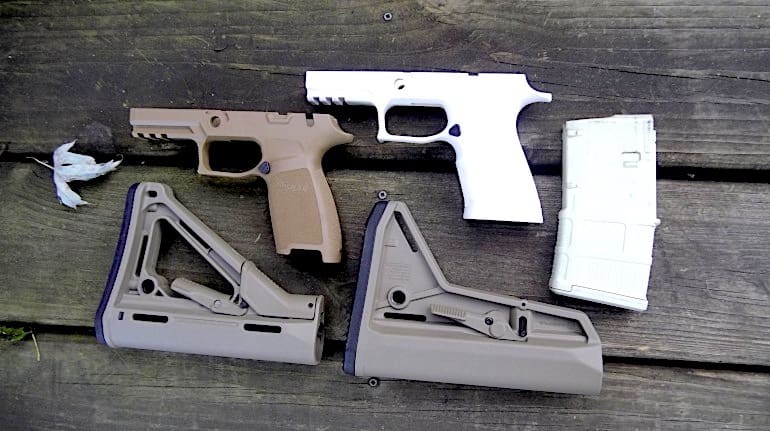
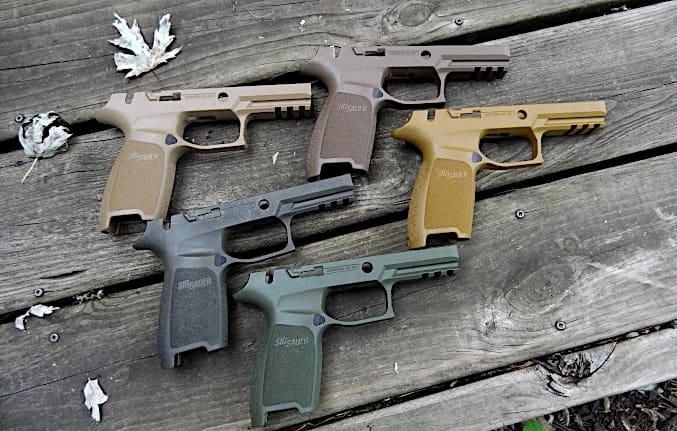
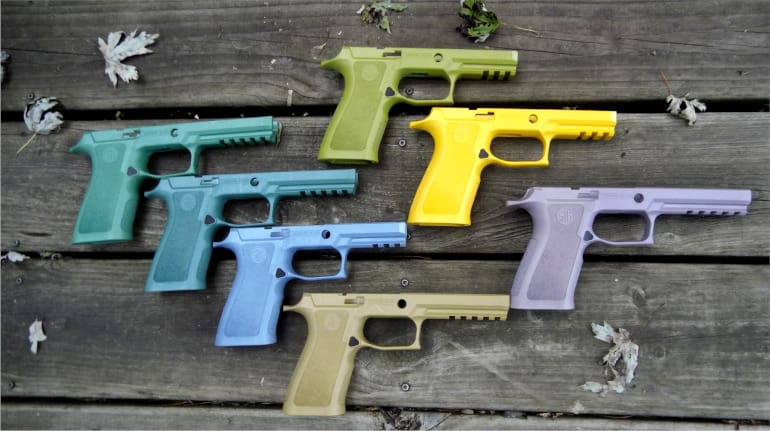
The SIG SAUER parts I used were grip modules for the P320 and M17 pistols. I bought grips in white and FDE. I also got a variety of Magpul parts from Brownells. As you can see, the Magpul FDE is different from the SIG version. I had some older ‘sand’ colored mags that I also decided to dye.
In order to do this project you’ll need a large pot of some sort that can be put on the stove. I used a stainless steel one so that I could clean it more easily. I’d probably refrain from using an enameled version as it could possibly get stained.
You will need to fill the pot enough to cover all your parts as they need to be fully submerged for even coverage. To two gallons of water, I added about ½ to ¾ of each dye bottle. That’s a lot, but you need enough density of the dye in the water to ensure color saturation. I add the dye as the water starts to come to a boil.
The nice thing about this project is that you don’t really have to remove any metal parts. I took the buttpads off the stocks and took the magazines apart, but an argument could be made that I didn’t need to. The dye won’t take to the metal parts.
Once the water is at a boil, you can reduce the heat slightly to a simmer. The next step is to get a pair of tongs and lower your parts into the water.
The Magpul parts take the dye almost immediately and only need to be submerged for a few minutes. If you leave your Magpul parts in too long they’ll keep absorbing color and become darker and darker.
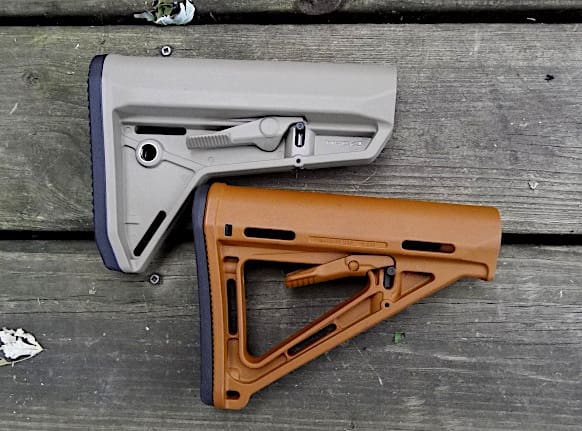
Not the difference between the color of the magazine and its baseplate below. The baseplate was left in for much longer with the SIG parts because I couldn’t find it in the pot with the tongs. You can clearly see the difference between the various shades of green here on these two rifles.
Once removed from the water, carefully move the parts to the sink and rinse them in warm water. The excess dye will rinse right off and you can handle the parts immediately. I just let them sit out and air dry, although you can certainly dab them dry if you want.
The SIG parts didn’t take the color nearly as quickly. In fact, I had to soak all of them for about 15 to 20 minutes at a low boil to achieve good color saturation.
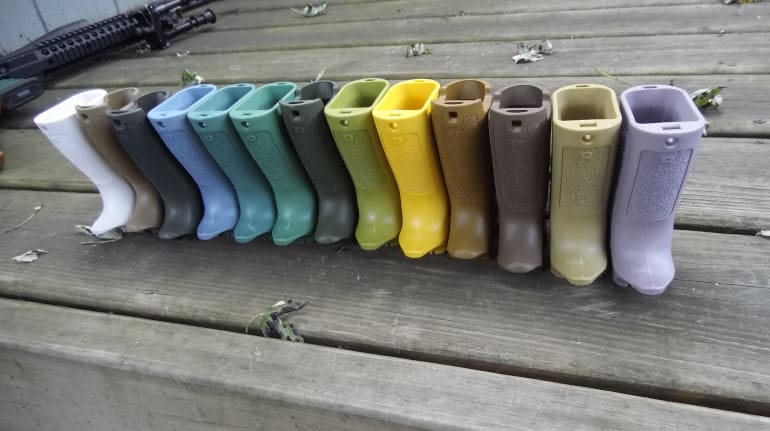
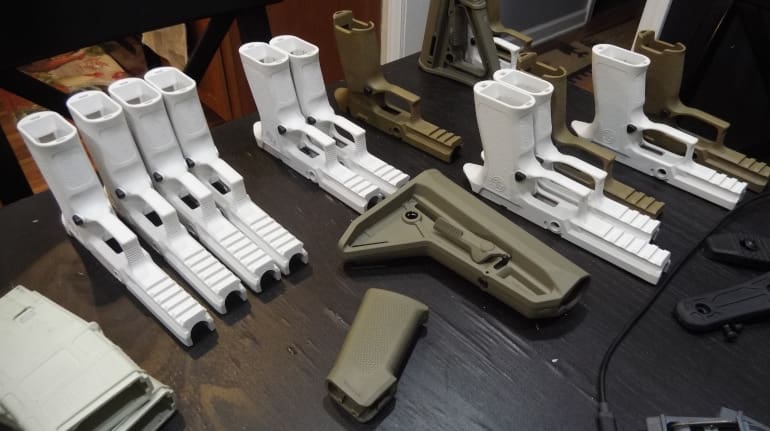
Some odd things happened. While I was expecting the results to be slightly different than the advertised color of the dye, the SIG parts didn’t absorb color the same way as the Magpul parts. The accompanying photos illustrate this quite well.
I got colors ranging from Thanos purple to avocado green. There was no telling what was going to come out when I put the SIG parts in the pot. They took the dye well, they just didn’t turn out as expected.
The range of results I got from one dye color surprised me. I didn’t expect to come out with such a rainbow, but I did all of this in the name of pseudo-science which makes it all worthwhile. I’ll probably take a longer look into the reasons why I got these colors at some point down the road.
So how well does the dye hold up on the parts? Very well, actually.
I’ve been using the Bakelite-colored AR-15 parts for a couple of years now and they have not faded, rubbed off, or scratched. The feed lip area of the mags show no real wear despite those being a high-activity area.
The dye penetrated the plastic pretty deeply — this isn’t like paint — and can’t chip off. If you gouge a part deeply it can show the original color, but you really have to damage it to see that.
Right column: DG over SO, Sunshine Orange, and Dark Brown (aka Thanos Special) (Josh Wayner for TTAG)
This was a fun project that really doesn’t take too long. My suggestion would be to buy a couple of sample parts that you don’t mind screwing up to test first. I had no idea that I’d get the range of results I did and was surprised when Sunshine Orange dye came out a bright yellow.
There isn’t any going back once you dunk a part, so be careful and make sure you want to permanently alter a part before you begin your own project. And have fun.