“Hey, weren’t you the guys with that color case hardened Hi Power on display at SHOT Show?” I asked of the gentlemen wearing Midwest Gun Works polos at a shared lunch table in Louisville. We were at the NRA Annual Meetings & Exhibits, enjoying some pulled pork and talking guns. “I have a weak spot for color case hardening, and an 80’s HK P7 with that purple-tinted bluing on it in mediocre condition…y’all don’t tinker with P7’s, do you?”
To my surprise (the no-longer-produced P7 is a massive PITA to work on, requiring some proprietary tools, skills, and knowledge) they not only said “yes,” but stated that they’re something of HK experts. Furthermore, Rich from MGW claimed to have a fondness for the P7 in particular. Done deal, then. A melding of MGW’s color case hardening and refinishing skills and my 32-year-old P7 PSP would happen.
Turn the TTAG clock back almost exactly two years and you’ll find my “The Heckler & Koch P7 is the Best Pistol Ever” article. Talk about trend setter! This gunfighter’s gun set a mess of “firsts” that we take for granted today.
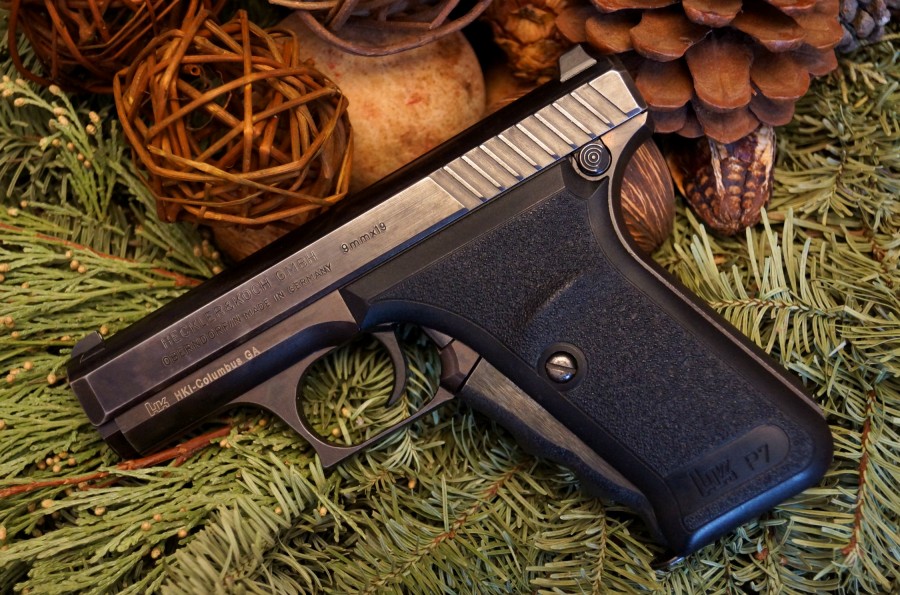
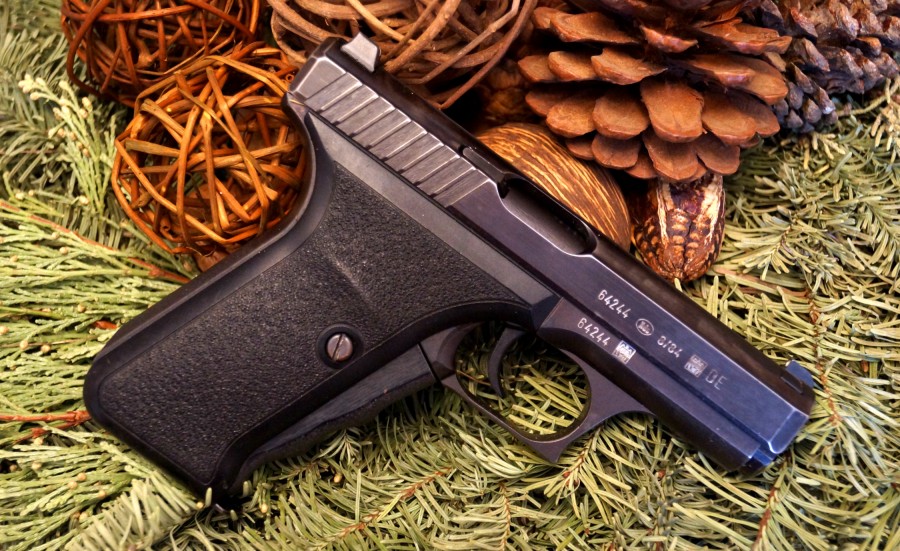
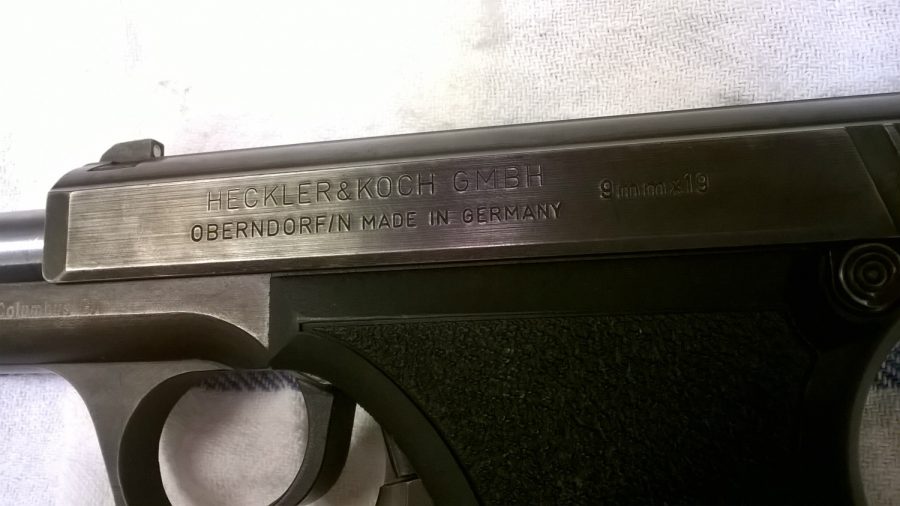
But today we’re only flashing back for “before” photos. Ewww. Patchy purple bluing, holster wear, and — gasp! — plastic grips? This just won’t do.
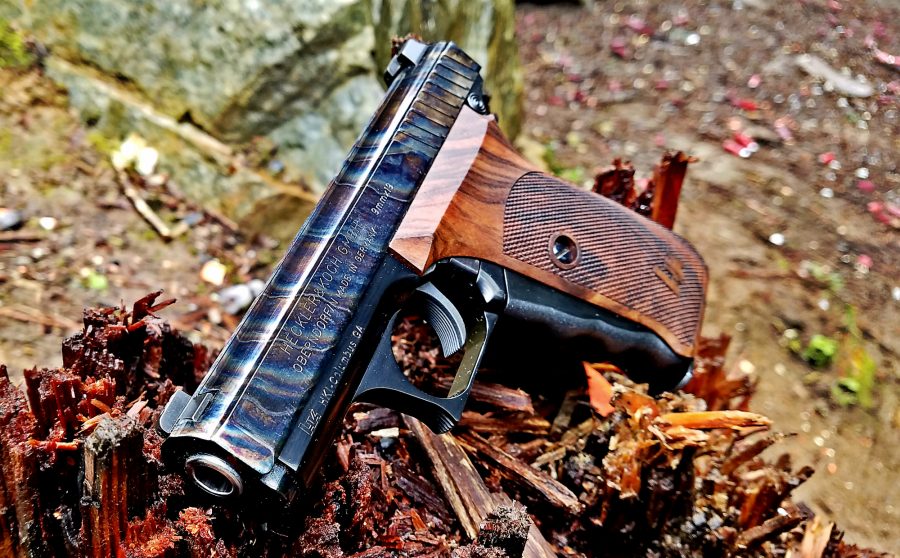
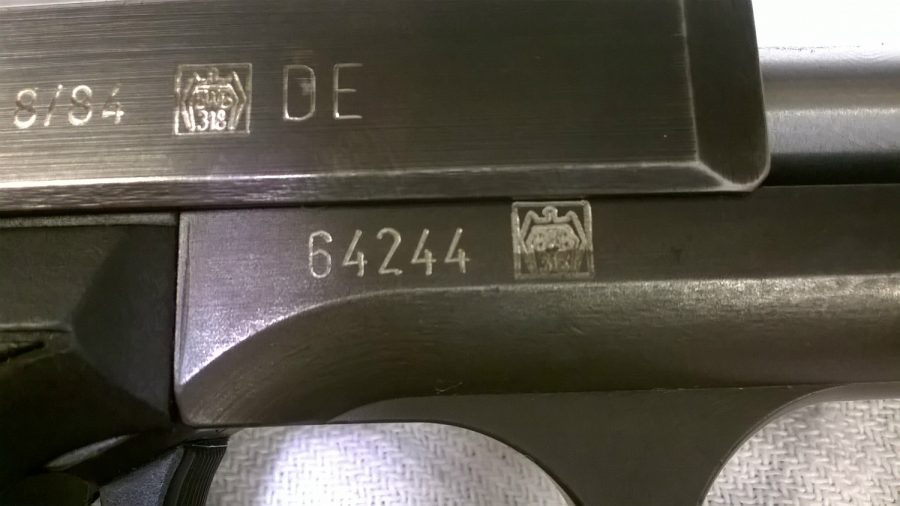
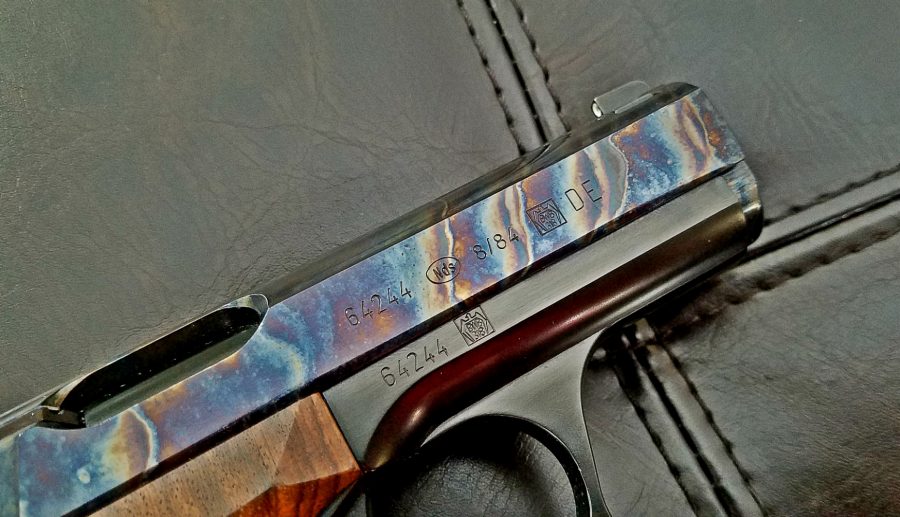
First step: MGW documents and photographs any markings and proof marks. The engraving on the P7 series was always incredibly light and is typically lost upon any type of restoration attempt.
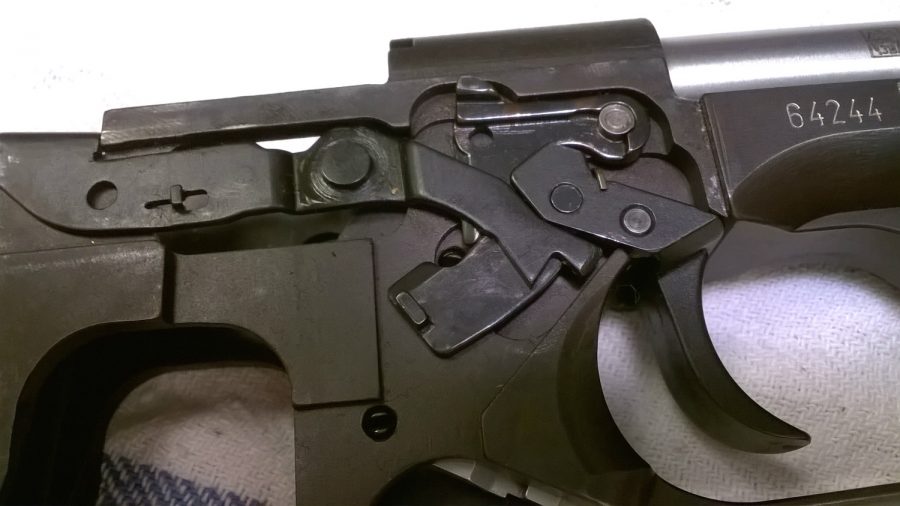
Kent Wilkerson, one of MGW’s Master Class Gunsmith/Armorers, then proceeded with a complete teardown of the pistol. Any OEM parts showing wear were replaced.
As you might guess, HK P7 parts aren’t always easy to find. What I didn’t realize, though, is that Midwest Gun Works is one of the country’s largest gunsmithing and custom shop centers and has a parts inventory to match. They stock over 100,000 SKUs, and HK is one of their flagship brands (See: MGW HK Parts). Obviously they do install work, too, along with customization, historical restoration, and more.
Kent began the CCH process on the slide by hand polishing it.
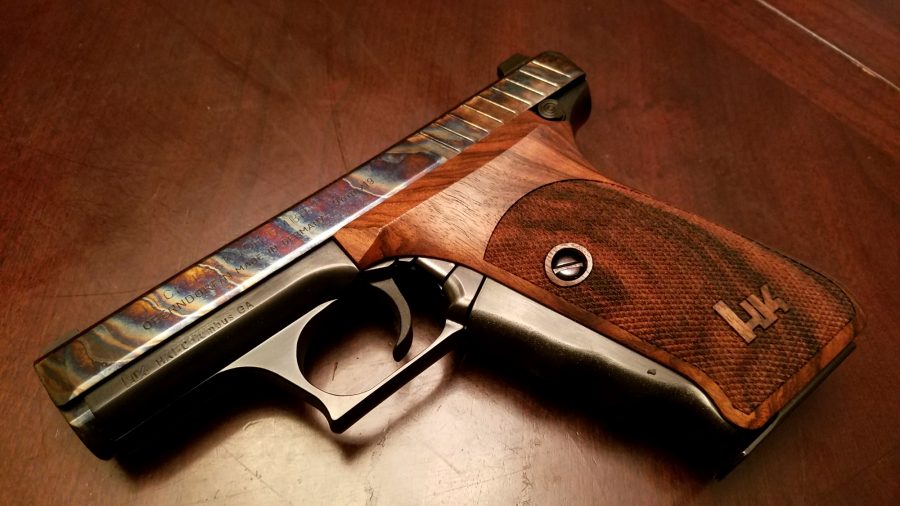
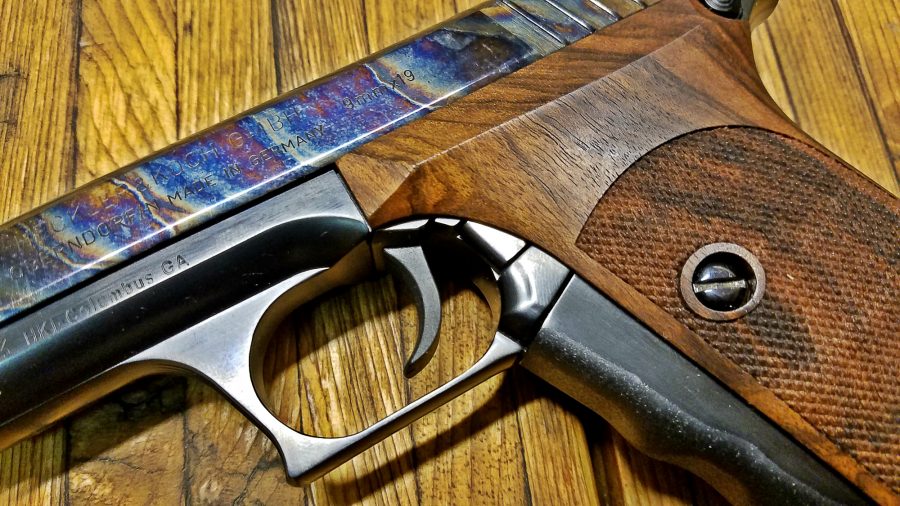
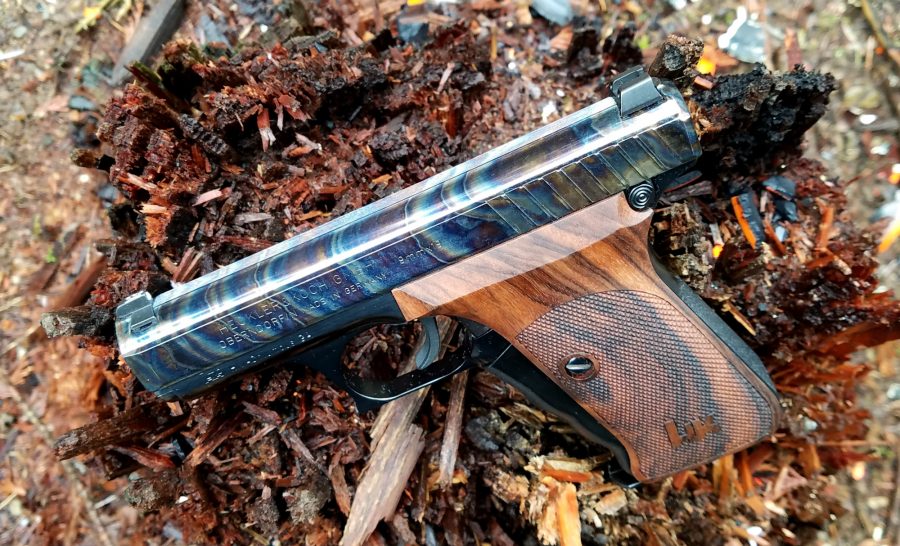
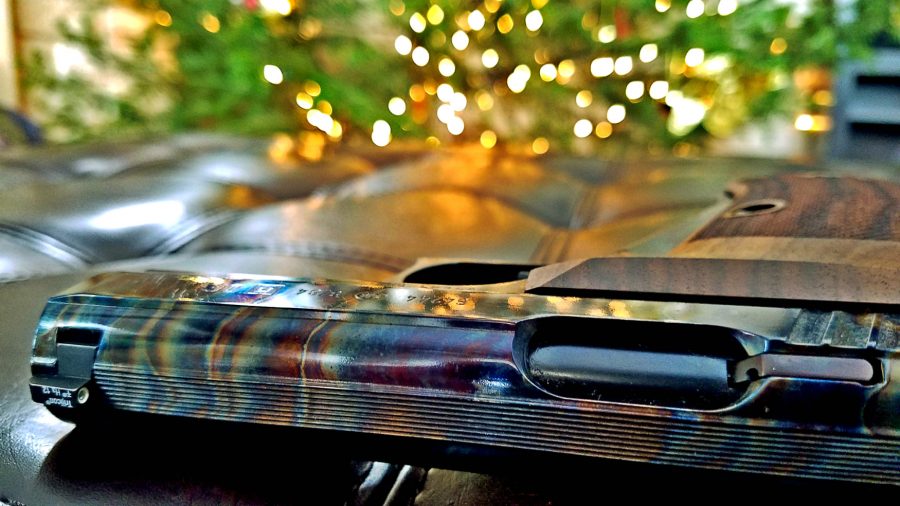
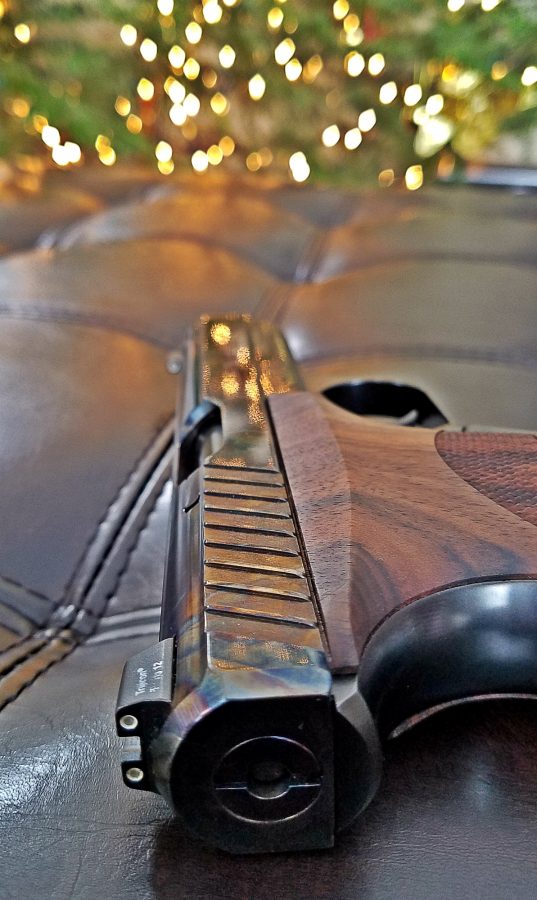
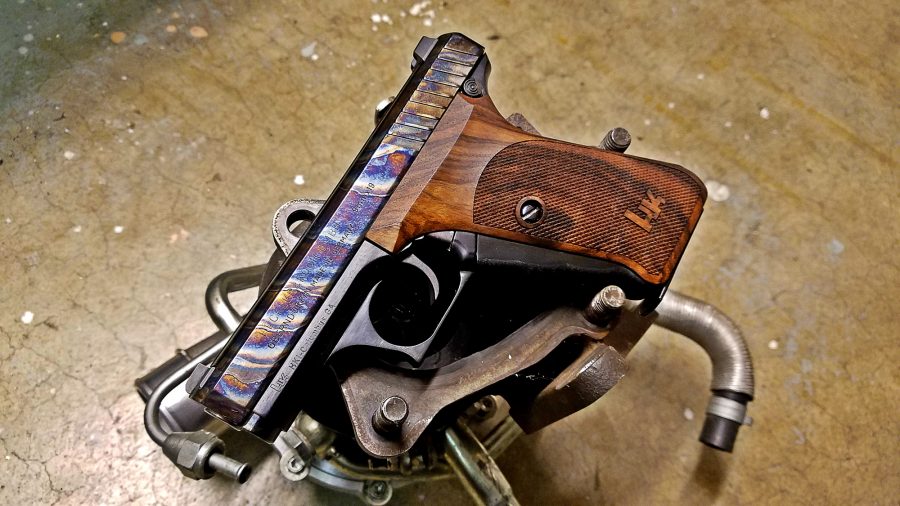
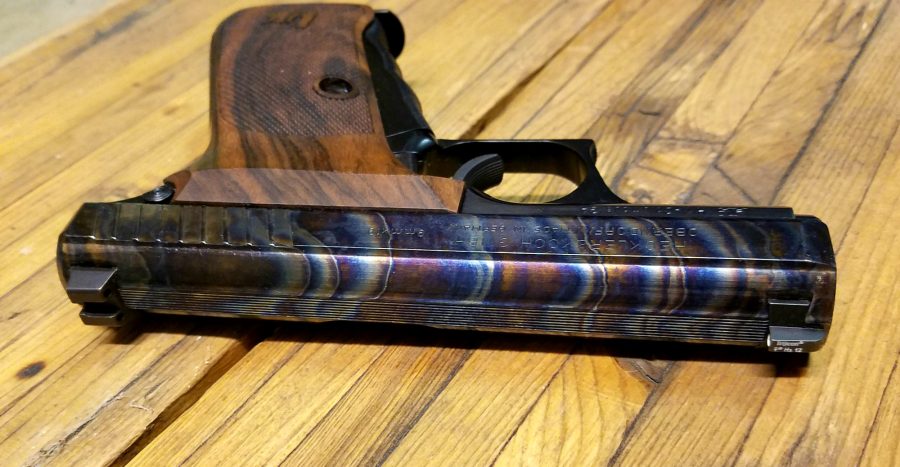
In order to achieve a vibrant color and pattern, the steel has to be worked to a very high polish while keeping sharp lines — a careful and tedious task. On a related note, the fantastically-glossy flatness combined with the depth and colors in the CCH pattern look amazing in person, but for the life of me I just can’t do it justice in a photograph.
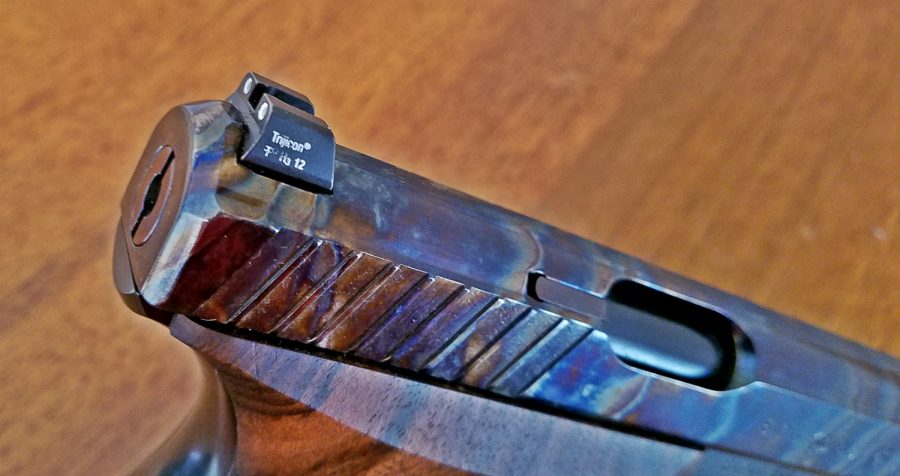
Of course, the factory engraving was lost in the process. Everything seen on the gun now was re-engraved by hand to duplicate the original markings.
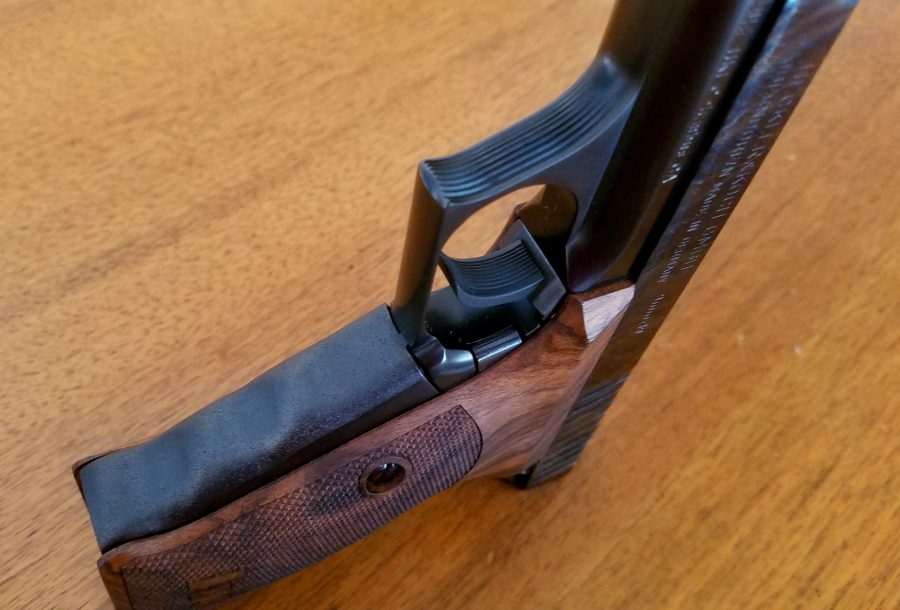
Over to the the frame and most of the parts, they also received polishing — more so on the flats than the curved areas for a “distinguished” and very subtle two-tone look. The textured area of the back strap and the front of the cocking lever were bead blasted. Then, all of these frame components were black oxide treated. I had no idea a black oxide finish could be so deeply black, consistent, and smooth.
Once it was fully prepped, the slide was case hardened in a 1,200º furnace and oil quenched. As for further details of the process, this is all I know. Much is proprietary.
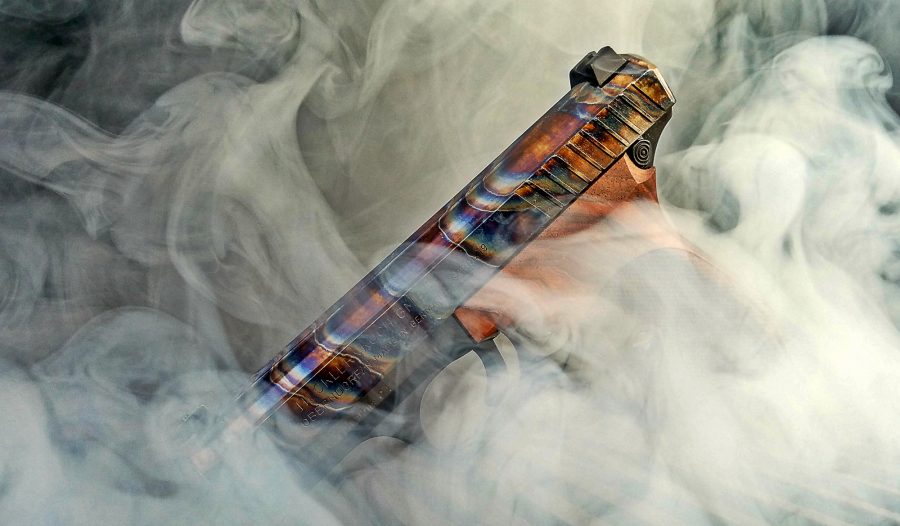
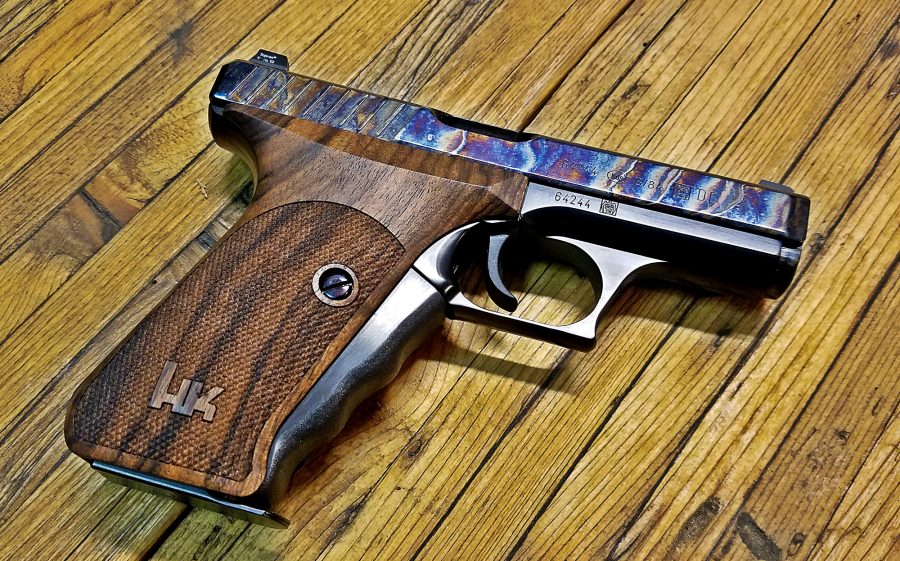
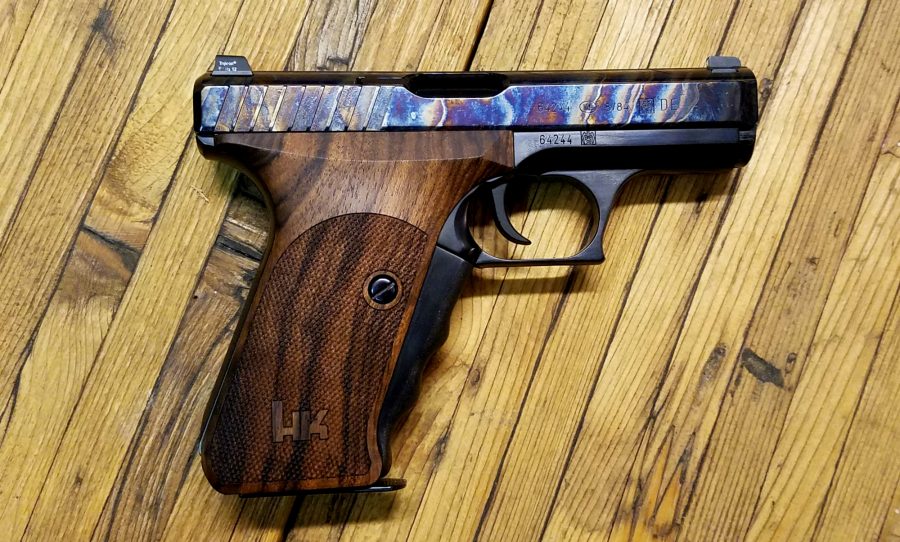
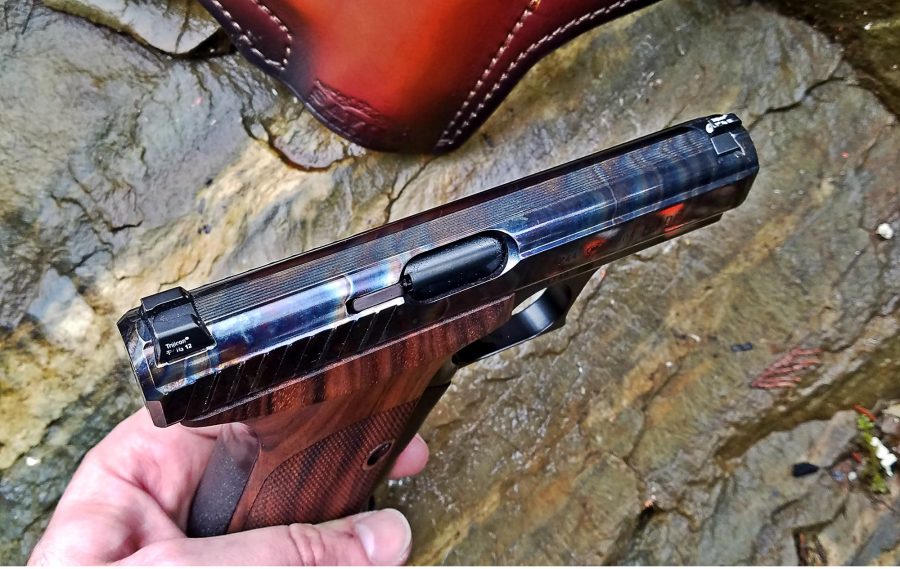
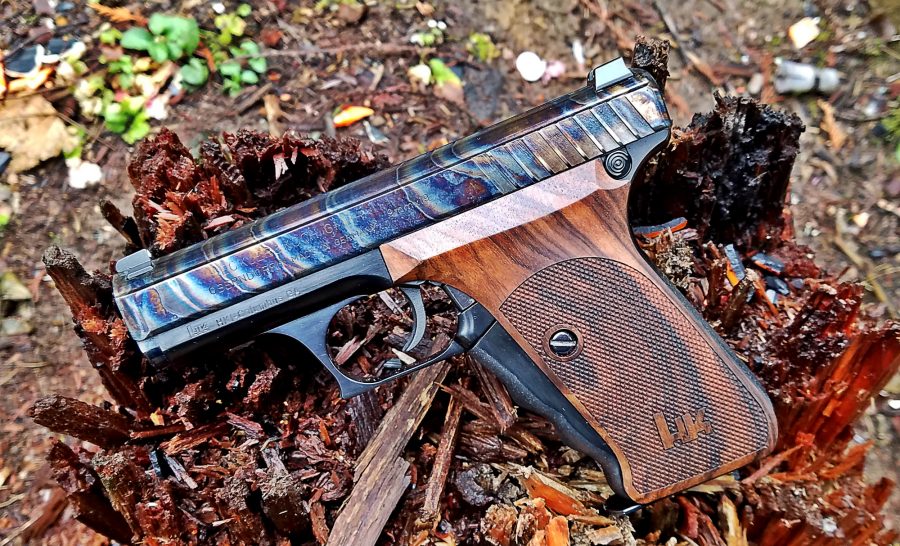
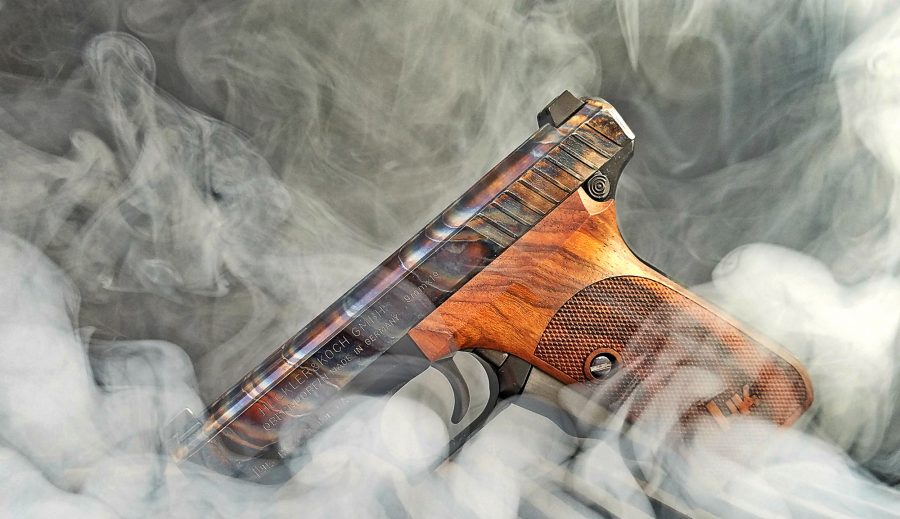
Though I do know I haven’t seen flowing quench lines like this before. It’s organic in its slight randomness, while giving a sense of motion and fluidity. It also lends some of the Damascus-like appearance that is part of why I like color case hardening.
Trijicon night sights were installed front and rear.
Kent then actually selected a specific set of HK-logo Nill grips from inventory, because the figure in the wood complemented the quench lines best. This would not have occurred to me. Add that to the list of reasons I’m not a Master Class Gunsmith.
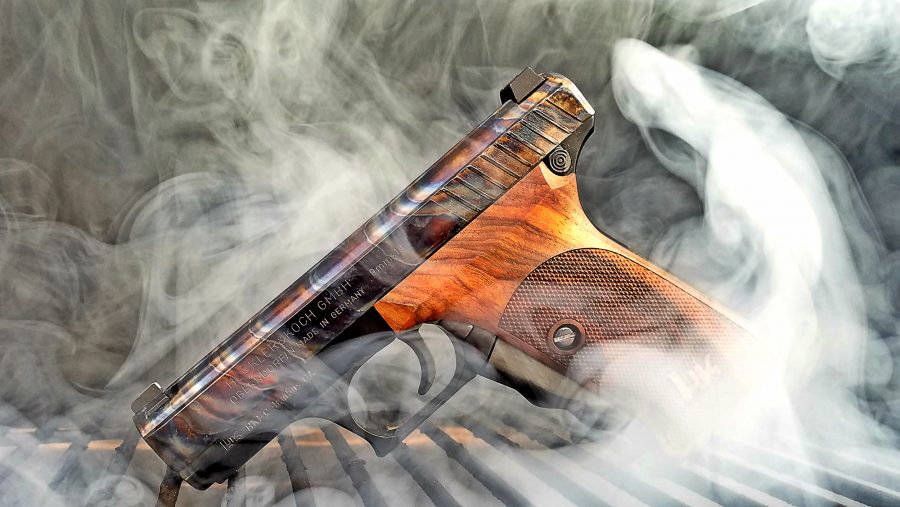
At this point, it’s all about the quest to capture at least a part of this gun’s presence in a photo…
Cranks the term “BBQ gun” up to 11, eh?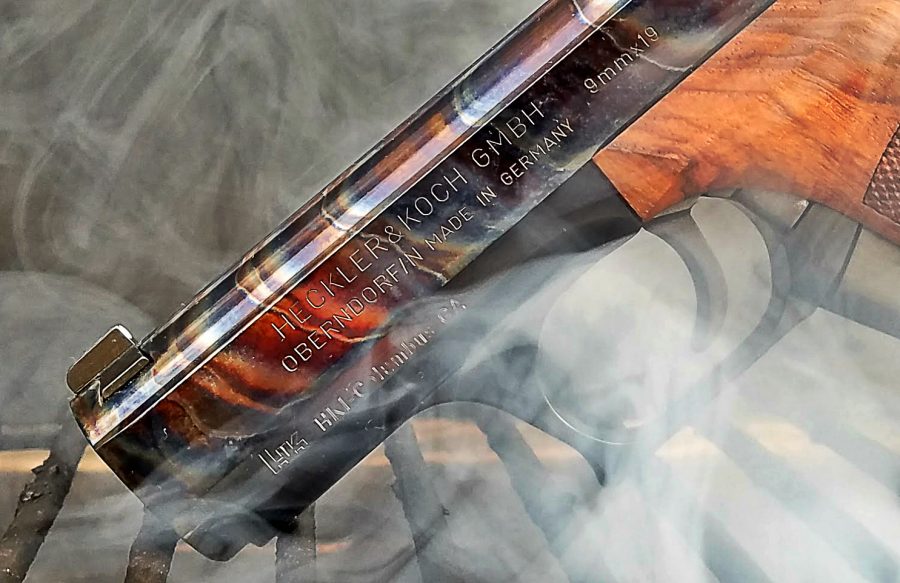
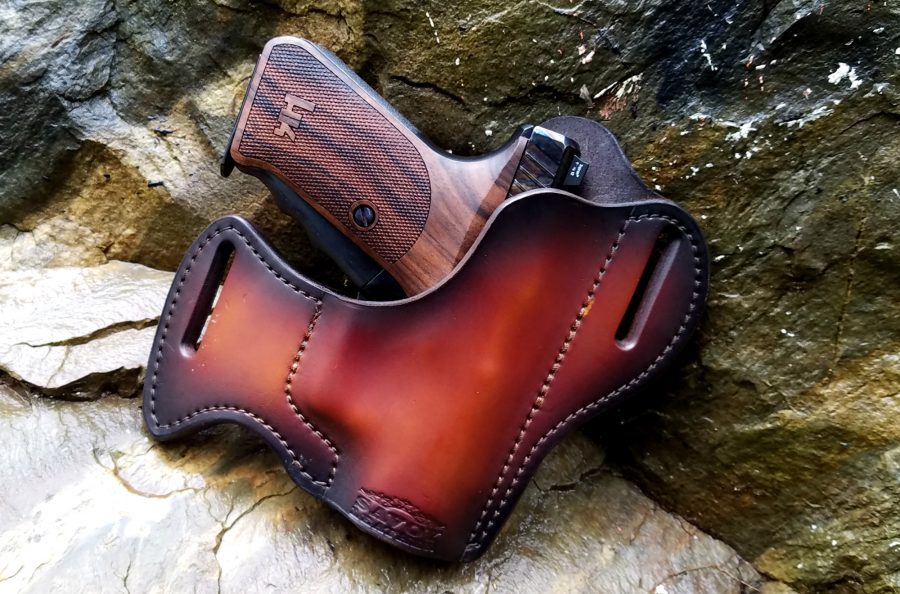
A proper church gun needs a hand-tooled leather holster. I found mine at Savoy Leather, opting to keep things really simple despite Savoy’s myriad custom and intricate designs. Although, once we move to Texas I may have to switch things up for a sugar skull model.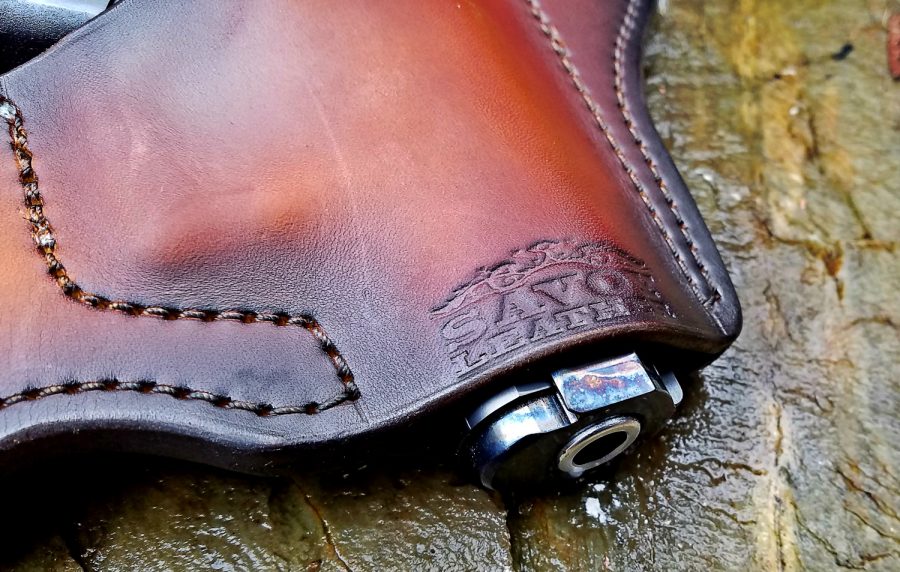
Unfortunately, yeah, the leather sure blocks a lot of that CCH goodness. Maybe I can get a custom window cut or something.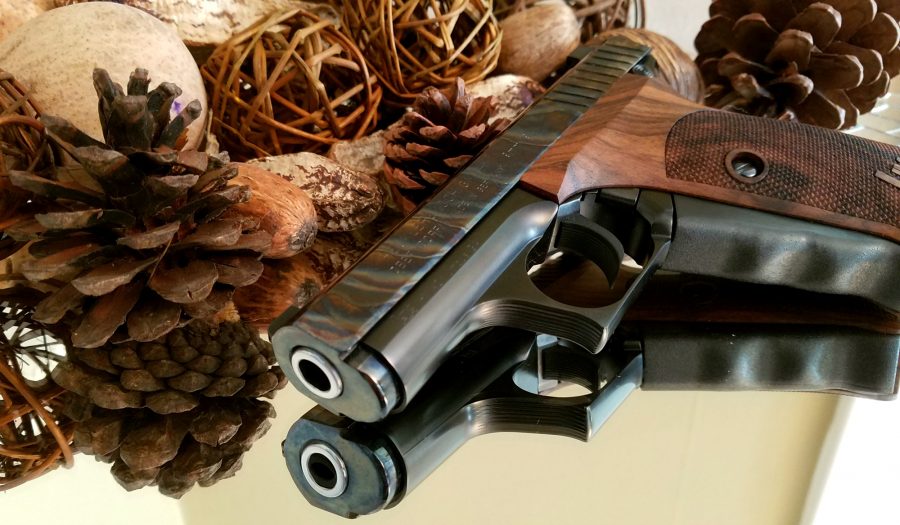

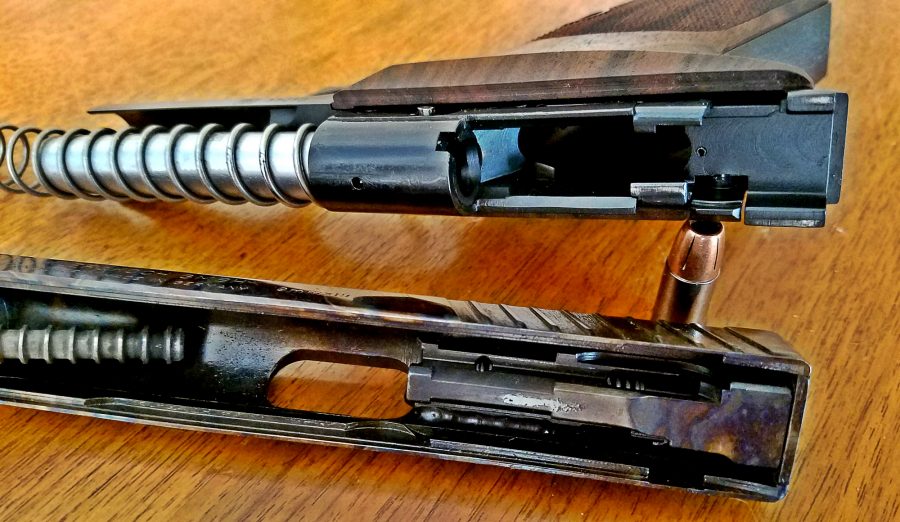
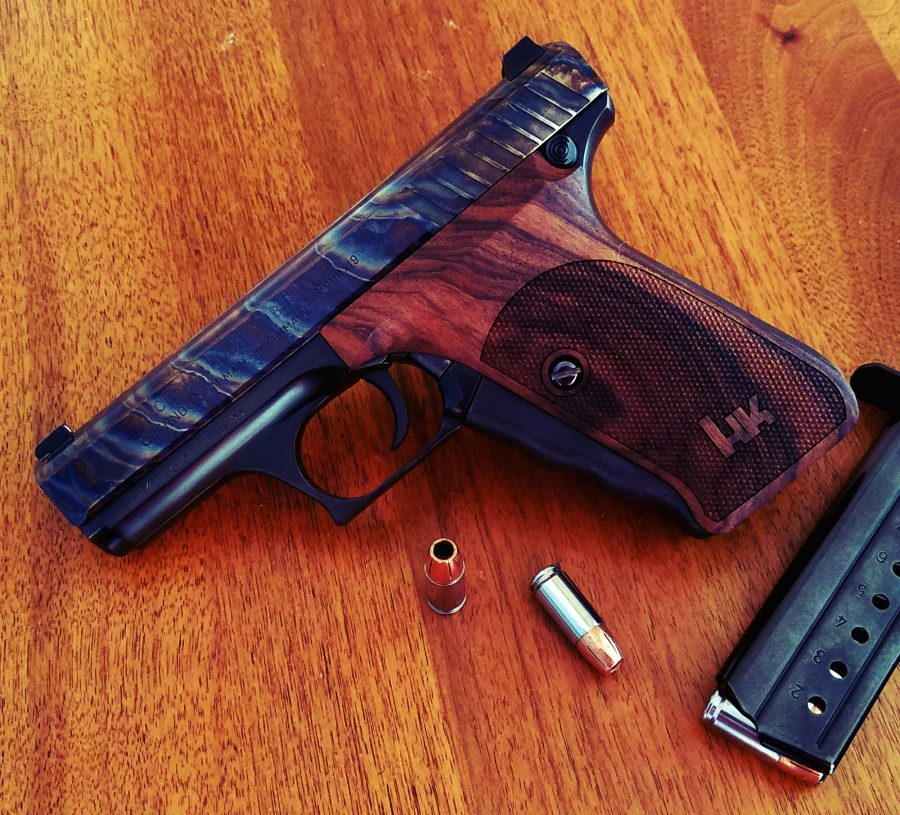
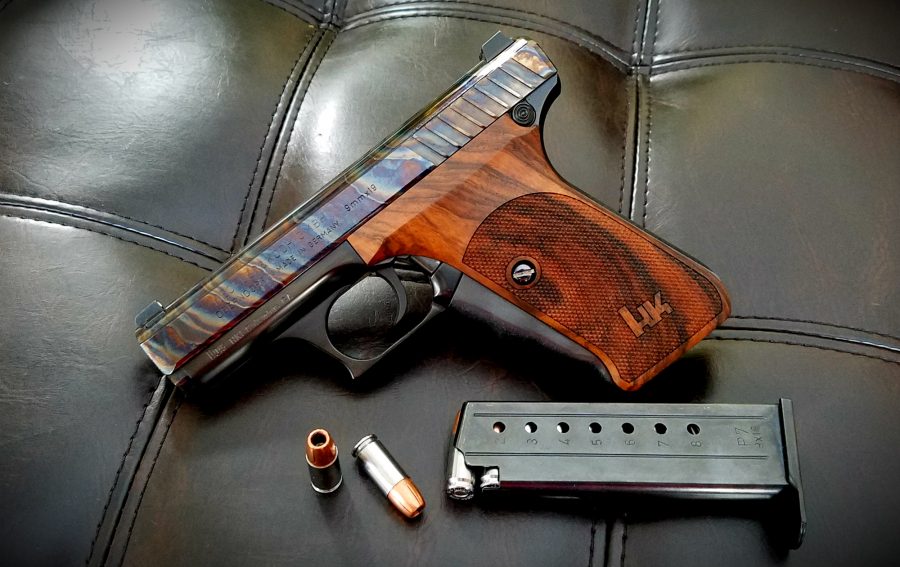
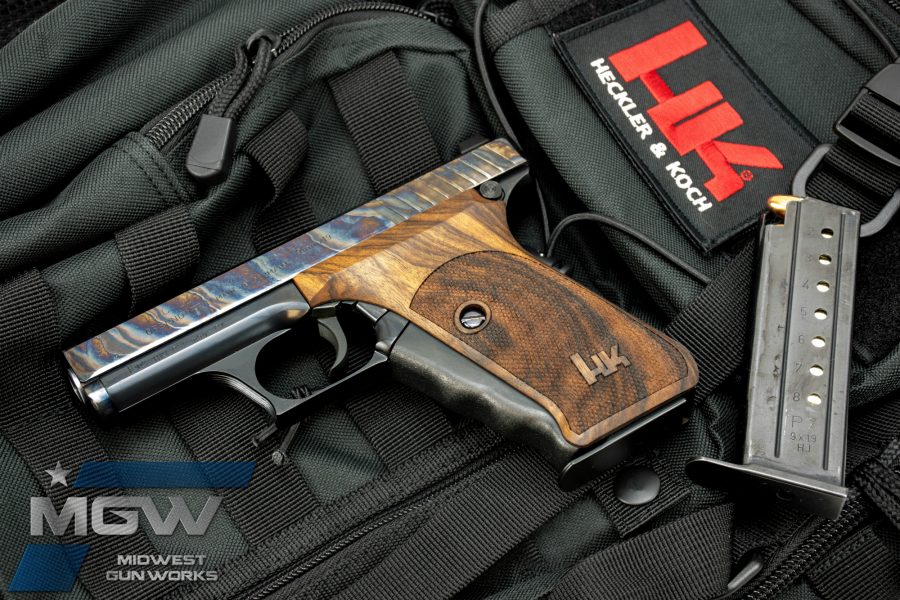
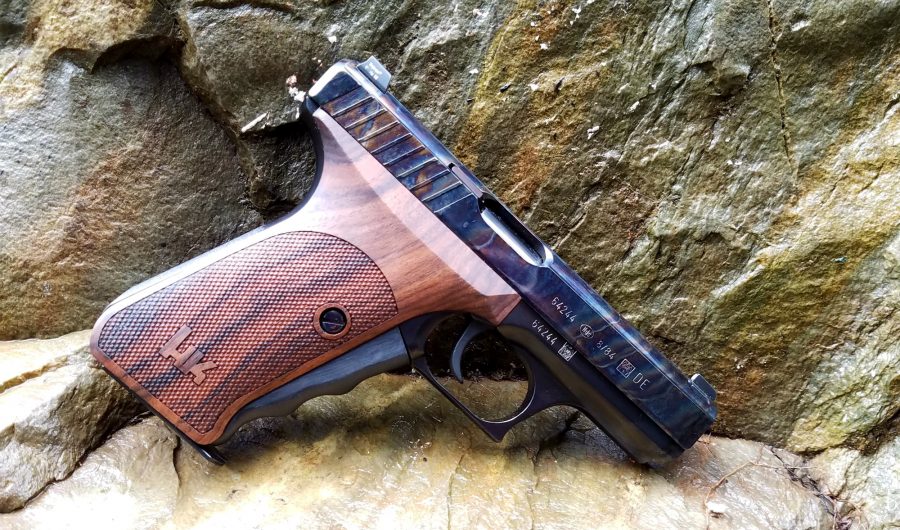

is it me, or do the bullets in the mag seem to be loaded backwards????? in 2 of the 3 pics showing a mag
It’s an HK joke.
Is it a funny HK joke?
It is, to me. The only way HK could ever live it down, would be to do a tongue-in-cheek ad where they do it again.
A major HK high gloss catalog made it out of marketing with the mag loaded backwards and it hit distribution.
The cover of HK’s 2004 SHOT Show catalog featured a photo with bullets loaded backwards in the mag (http://i36.photobucket.com/albums/e17/soshaggy/20130509_131006_zps942019b0.jpg). Apparently a mistake by the photographer and they were late to press, shipped straight from the printer directly to the show, and went out on the SHOT Show floor with some escaping into circulation before somebody noticed.
No, it really isn’t very funny. But easily amused people like me tend to do it when photographing an HK pistol just to be annoying.
“Is it a funny HK joke?”
It’s not just funny, it’s friggin’ HILARIOUS.
Well done, Jeremy! I’ve tried to capture stuff like that in photos before, and I can only imagine the hours you spent tweaking angles and lighting trying to get the best possible shots of that glorious finish.
I’ll have to add this to my list of reasons I carry a revolver. Try sticking .357 cartridges in the chambers backwards, even a complete idiot will figure it out.
They are loaded backwards for the top round for SAFETY purposes. They don’t want someone who is photographing or working around the gun to “accidentally” load a magazine into the gun and round into the chamber.
Extremely jealous. I’ve always wanted a P7, and that CCH is gorgeous!
I love P7s and case-hardened firearms, but I can’t get into this… much like the “case-hardened” limited run of the Ruger Mk IV, it just looks too far off from what real, old-school case-hardening looks like. Do a quick Google image search for “case hardened firearm” and you’ll see that none of them have the sharp dip-lines that you’ll see on this P7 (or most modern case-hardening attempts). If I paid to have this done and it came back looking like that, I would not be a happy camper.
I don’t know if the techniques are different due to the required cyanide use in older techniques… but like modern ‘damascus steel’ use in knives, it’s better off not done at all if it can’t be done correctly.
It’s a choice. MGW does the traditional look as well including doing it for historical restoration projects. The link in the first sentence to the CCH Hi Power shows a more traditional pattern.
Jeremy, you are one lucky son of a gun to get ahold of a P7 M8! And this one is now absolutely gorgeous! Had a P7 M13 that I got rid of because my finger couldn’t reach around the trigger but when my bigger brother in law shot the thing it was the definition of accuracy. You lucky dog!
The old school technique for CCH was to pack the piece in an airtight box filled with a mixture of wood & bone charcoal. Put it in an oven, heat to about 1450 to 1475F for a period of time (the longer the time, the deeper the case), then pull the box from the oven and upend it into a quenching bath of finely bubbled water.
Cyanide (aka Nitriding) is certainly used for case hardening, but it might not result in colors. In that case, you use an atmosphere furnace, put the parts in naked & cleaned, then heat to the desired temp, displace the air in the oven with cyanide, and wait.
M14 action parts used to be case hardened in this manner.
That is beautiful. Also, good job on the mag loading; proper HK style.
Came to say the same thing; when I saw the post was about a HK product, I specifically looked to find a photo with the mag loaded bass-ackwards. As for the gun community’s memory on mistakes gun companies make, we put elephants’ memories to shame.
Oh my god, it’s full of stars!
“Though I do know I haven’t seen flowing quench lines like this before. It’s organic in its slight randomness, while giving a sense of motion and fluidity.”
OK, so were they kind of bumping, twisting and wiggling the slide as they lowered it vertically into the quench to get that look?
(And yeah, it’s not traditional, but the end result is nothing short of *stunning*…)
I have no idea. And I swear, I know it looks cool in some of these photos but I’m simply not a good enough photographer to capture what it looks like in person. I think that would be pretty complicated, actually. For the camera to see the colors in the CCH the light has to hit it at the right angle, but that tends to cause reflection off the polished surfaces and such. Much of the time I’d end up with part of it looking right but the rest of it would look dull and black in the photo even though in real life it looked awesome. I think you’d need a photo studio with diffuse lighting and more skill than I have. Suffice it to say, though, that the eye handles it much better and isn’t as easily tricked by the depth and reflection and whatever else as a camera.
It has more to do with the layering of carbon (and impurities) in the carbon pack.
When a piece undergoing CCH is quenched, there’s no “lowering” – it is dropped into the bubbling water as rapidly as possible. If the piece gets exposed to air on the way from the carbon pack into the quench, you tend to lose lots of color.
Oh dear lord that is gorgeous
Forget the haters nicest P7 redo I have seen
I’ll take a hard chrome with brushed flats and matte curves any day.
I considered doing NP3+ on this gun for years, but it didn’t speak to me. Too 80’s modern haha. Maybe if I open carried this in a DeLorean 😉
Looking at those pictures. Dayum. That turned out exceptional!
To get better pictures that give you a better idea of polishing and finish, use a light box for your photos. Flash and backlights give you too much localized light from one or two sides.
If you look for Stephen Dodd Hughes’ books on guns, you’ll see the sort of photography I’m talking about.
My only two wishes on that gun now would be:
1. Nitre blueing on the grip screw(s)
2. The screws should be timed to be parallel with the long axis of the grip.
I had one but it was cheap and it sucked. Definitely not using flash though. Maybe when I move to Austin I can talk the powers that be into pooling resources for a small photo studio that the whole Austin-ish-based TTAG crew can use to photograph the guns that come in and out. In general it’s fair to say the photography game could step up a level round these here parts (Joe Grine excepted, in particular).
But I do like these smoke photos I took! (If I may say so myself) Those were all done with my cell phone, btw 😉
You can make your own light box very easily.
Step 1. Go out and get a refrigerator or other large appliance box. I’m sure there’s no shortage of them on the streets of Austin, TX – just offer some bum living in front of the local Whole Foods[tm] $10 or a bottle of Thunderbird and you’ve got a box.
Step 2. Cut open said box and line it with white shelf paper. You need to have one side on the bottom, and then three sides surrounding the object you want to photograph.
Step 3. Shine some lights with reflectors at the three vertical sides.
Step 4. Position your gun and start taking pictures.
Jeremy, the box can usually be had for free, just ask at an appliance store, you will be saving them the hassle of breaking it down for the dumpster.
(And besides, you’ll *never* get the stinky bum stench out of the cardboard).
Since I (obviously) have *zero* shame, just how broke did that restoration job make you?
That is awesome! I have a later model (1992 I think) p7m8. It has been my carry for many years. It is a LEO demo model with the wierd colored slide and the mill mark on the slide. The last couple of years the slide is showing some pitting. I have been thinking having it refinished for a while, but didn’t really see the point for an old EDC. I recently had a part break and almost gagged at what parts for these wonderful pistols are costing. Since then, I have been thinking of getting something made in this century to replace the p7. Hate to do it, but there you go. A makeover on my p7 like yours would give it new life as a bbq/OC show off gun. What was the turnaround time, and approximate cost? That p7 looks amazing!
MGW does basically every type of finish available, and I’m pretty sure they’re all less expensive than CCH. For all the parts (grips, sights, etc) and labor in this gun the total is ~$1,200…
Always wanted a P7. Unfortunately, now I want yours.
Oh, BTW, DG is right about the light box. Also, get a camera that will accept a polarizing filter, i.e. a DSLR (not a digital filter, an actual glass polarizer). This will help with cutting out glare while allowing the colors to show. You’ll also probably want a tripod because the polarizer will reduce the available light to the sensor resulting in slower shutter speeds and/or more open aperture settings. Depending upon the type of lights you use, you may also need to become familiar with your white balance settings in order to acheive good color reproduction.
I built a little setup along these lines for a friend who sells machine parts and tools online. The whole setup – a used mid grade Sony DSLR, a couple filters, some low end tungsten lights, inexpensive tripod and a white melamine box – came to a bit under $500.
HO-LEE SHEEIIIT! Sorry, but after seeing the photos, that seemed appropriate. That is one of the most beautiful handgun refinishes I have ever seen! Will they work on any pistols or just certain brands? And could you throw out a ballpark idea on what they run to do this? I would love to have something like this done, but I am guessing it is out of my price range presently.
They will work on pretty much any pistol.
You ruined it.
If only HK still made the P7M13… I would gladly spend $2000 for one… but alas, it is not to be.
I understand the angst some might have about altering a “collectible” high dollar pistol like the p7, but it was not designed as a safe queen, it was designed for gunfighting, so why cry about altering it from factory finish? For the cost of a NIB p7, there are other, more profitable collectibles to be had in that price range. That gun is a runner, not a curio.
Definitely was not a safe queen. Ran me $600 and was in pretty good condition but certainly used. One of the German police trade-ins probably.
Usually I’m not a fan of customizing guns. Especially ones that are no longer made.
But that P7 is one beautiful gun ! The wood grips just flow into the CCH. The CCH job looks like a Hubbel shot of some distant nebula. Simply beautiful !
Thanks for sharing.
A number of police agencies including the NJ State Police, and some German police agencies have had problems with the P7. One notable incident comes to mind where a German police firearms instructor shot himself in the leg with a P7 when drawing it. The design encourages what we naturally tend to do which is move all of our fingers at once when we squeeze something. I’ve never understood the appeal of this thing, nor do I like the gas retarded system. There are not many guns that have used this system, I can only think of a couple. The Styer GB, and then Walther has made some attempt at it recently. Meh.
hate to be the bearer of bad news, but I’ve been living in the US for almost 3 1/2 decades and read on a regular basis about Leo’s/instructors/and individuals shooting themselves in the legs or feet. It is NOT pistol specific but lack of attention/intelligence or having suicidal tendencies. H&K’s rock, in particular my M8 (9mm) and my M10 (40 Cal), although they do not look quite as spectacular as the one shown in this article. Great job!!!
Am I the only person who read the first line of the article as, “aren’t you the guys who color case hardened a Hi Point at Shot show?”
I had to re-read it twice.
Anywho, pretty gun.
Nope, that’s exactly what I read it as the first time, too. Maybe the next project after the snazzy Hi-Point would be a custom Jennings…
It’s ugly. Color case hardening looks good on certain guns. It does not look good on that.
You killed it, and not in a good way.
I have a pair of M8s, a Trussville commercial and a police trade-in like this one, that I had Ford’s refinish last year. One in all brushed chrome and the other in all brushed chrome slide and deluxe blue frame — both with Nill-Griffe grips. And this pistol rivals their beauty. I have a third M8 but although a shooter, the factory finish is too intact to consider a refinish right now. If I come across another beat up M8 for a reasonable deal, though, I’m going to send it to MWGW for this treatment.
still a turd, no matter what finish
Sorry but it’s got that oil in water sheen finish to it now. That how I see it and not really crazy about it. Just my opinion but as long as you’re happy that’s all that counts! Good for you.
It’s neat that they can do that but not correctly put a trigger on an old Remington 788.
WUNDERBAR! However, you need to send it back to MGW for some minor appointments … NITRE BLUE ON AT LEAST THE SLIDE RELEASE, MAG RELEASE AND GRIP SCREWS, BROTHER!! You just KNOW you must do this! 😀
I love all the details. I was given the P7M8 when I retired. I carried both the M13 and M8. I was highly disappointed when we switched to the Glock 21 in the mid 90s.
My M8 looks great but I would like to have it refinished. Does anyone know the approximate cost?
Please email me if you do. [email protected]
Comments are closed.