
The Handgun 104 class at the SIG SAUER Academy finishes out the Academy’s Beginner/Intermediate line of handgun skills classes. It builds on the earlier courses by adding some movement and alternate shooting positions with the intent to graduate a student who has a fair level of comfort driving their gun in various scenarios.
I’d previously taken the Basic Practical Handgun Skills (Handgun 102) and Intermediate Handgun Skills (Intro to Defensive Shooting – Handgun 103) classes having chosen to skip over the most introductory course. Like all of the Handgun 10X series courses, this was a single day (8 hour) class and cost $200 although a 20% discount is available on any of the SIG classes (guest instructor classes excluded) if you register for it within 20 days of a taking a previous SIG Academy course.
One of the biggest adjustments for me at the start of this course was the regimented safety procedures. After completing Handgun 103, I’d taken a couple of advanced handgun courses (Close Quarters Pistol Operator and Point vs. Precision) where the instructor assumed a fairly comprehensive knowledge of gun handling and safety on the part of the participants.
With the Handgun 104 course we returned to very strict rules regarding the removal of handguns from holsters – basically only when instructed. We even had to check our guns in during the lunch break. While this level of nanny-ness was a bit chafing, I understood the reasons for it. It would be a very bad thing if someone accidentally caught a bullet during a SIG course. And as this was part of the 10X series, the instructor correctly erred on the side of caution. Once I got over it, everything went very smoothly.
As with many of the pistol classes I’ve taken at the Academy, this one was conducted on the indoor range which meant we were shooting lead-free frangible ammo. While this significantly enhances safety by preventing ricochets and eliminates exposure to lead, the downside is frangible ammo costs $22-$28 for a box of 50 rounds (depending on caliber). That gets a tad pricey in a class with over 400 rounds expended. The other negative is frangible ammo is a lot dirtier to shoot than standard FMJ rounds, which means a fairly extensive cleaning session once the course is over.
The Academy provides all of the ammo you need (for purchase, of course) but the prices are very reasonable. Students also have the option of borrowing a SIG gun of their choice at no additional cost.
Our instructor was a LEO and trainer with 20 years of experience on the force. He’s also a member of a regional SWAT team and a member of the SWAT instructional staff. TTAG readers will forgive me if I confess that I chose not to share the prevailing view of some of our membership on the role of SWAT in our communities <grin>. I previously had this same instructor for the Handgun 103 class and knew that we were in for some top notch training.

Unlike the rest of the 10X courses, there is no classroom component to the 104 class. You arrive, get suited up and hit the range. The class began with a basic review of the fundamentals, starting with the classic SIG “wall drill” in which you take an unloaded pistol and point it at the wall with the end of the pistol about an inch away. The object is to choose a segment of wall with no marks on it and simply practice pulling the trigger while keeping the barrel as steady as possible.
The proximity of the end of your barrel to the wall enables you to clearly see movement in the pistol as you pull the trigger and helps you work on keeping the gun steady through and after the trigger pull. This was followed by the Bullet Hole drill which challenges you to stand three yards from your target and put one round anywhere you choose. The challenge is then trying to put four more rounds through the hole made by your first shot.
The pattern your subsequent shots makes helps diagnose certain types of movement made during firing. For example – shots that consistently hit to the left of the first hole suggest that you are not pulling the trigger smoothly. A vertical line above or below your target suggests you may be dropping your barrel slightly and peeking over the sights to see where your shot landed.
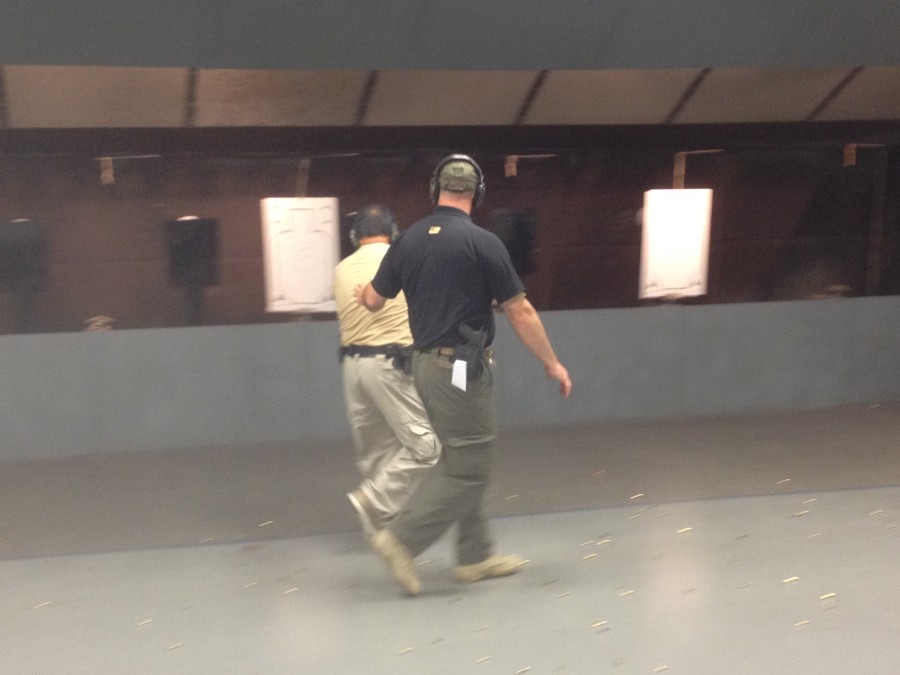
Once these introductory drills were out of the way, we proceeded to basic movement, shifting left and right while pulling the gun out and sending rounds down range. We also practiced reloading on the move. The intent here is to try to keep moving as much as possible while manipulating the pistol to make for a more difficult target for the opposition.
Next was shooting while advancing on the target as well as retreating from it. For these drills, the eight person class was broken into four teams of two. One of each pair would be the shooter and the other the safety officer. The job of the safety officer was to hold the back of the shooter’s belt, ensuring he moved toward and away from the target at the same rate as the other three shooters. That way no once got too far downrange (or uprange) of the other shooters. During this segment, shooters were encouraged to shoot enough to empty their guns at least once during the advance/retreat so they could reload while on the move.
One other thing the instructor encouraged during all of the live fire drills was to include a few dummy rounds in the clip that would pop up at the damnedest times. This enabled us to practice a tap-rack to clear a malfunction, all the while staying on the move.
Next up, we walked the length of the range while engaging a series of targets, first to our left and then to our right.
To add a bit to the challenge, we were told that the three cardboard targets were the bad guys while the black steel plate targets in between were innocent bystanders. We had to engage the cardboard targets nearly head on, otherwise our bullets might pass through and hit a bystander should we shoot at too much of an angle. Again, dummy rounds and reloads added to the degree of difficulty. Needless to say, despite our best efforts, more than a couple of the bystanders got tagged. We all subsequently agreed that the ones that got shot were probably guilty of something, making us feel much better about it.
Following lunch, we got into non-traditional shooting positions. The first was several variations on kneeling.
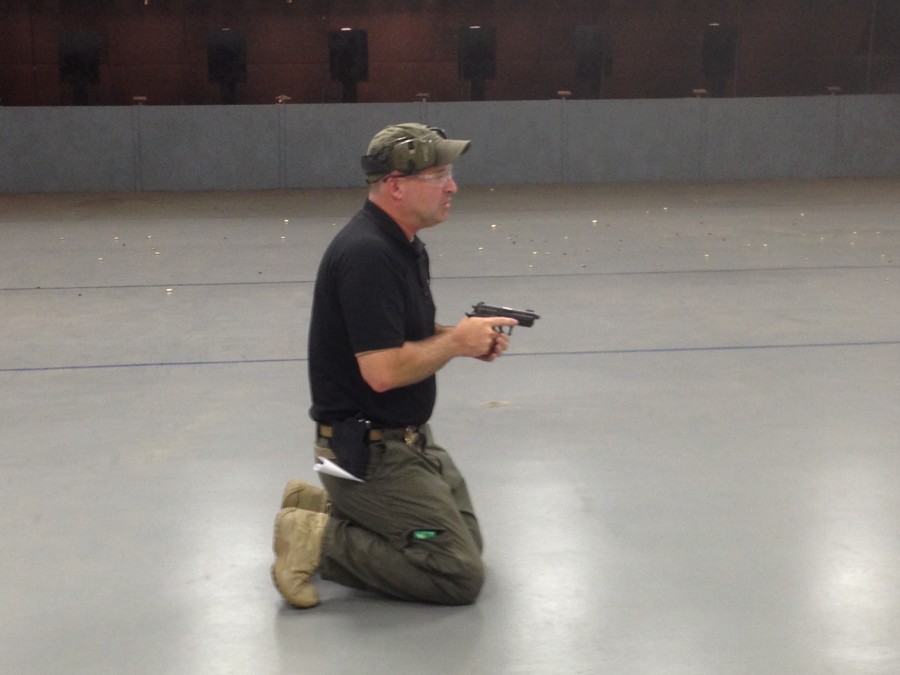
The main advantage of this position was it enabled us to make ourselves a smaller target as well as allowed us to see cover behind an object. It’s also a fast position to get into and a fast one to get out of and allowed us to engage targets in nearly a 360 degree circle with only minor repositioning. The downside: it really didn’t provide all that much additional support for the handgun.
Next were variations on the sitting position.

As I had deduced during my Appleseed experience, this was by far the least comfortable position. On the plus side, by bracing the gun on our legs (as shown) we had a somewhat stronger shooting position. I asked the instructor about the benefits of this position, particularly since the prone position would provide even more support and would be more comfortable to boot. But he correctly pointed out that if we were taking up a position in tall grass, a prone stance might not work, while this one would allow us to actually see the target.
He did admit, though, that it’s a position much more likely to be used by a police officer on a stakeout which could require the officer to remain in one position for some period of time while keeping a target in sight. The primary disadvantage of this position as compared to the other ones is it takes the most time of the three to get into and if you have to engage a target directly behind you, you might find things a wee bit tricky.
We finally moved to the prone position.
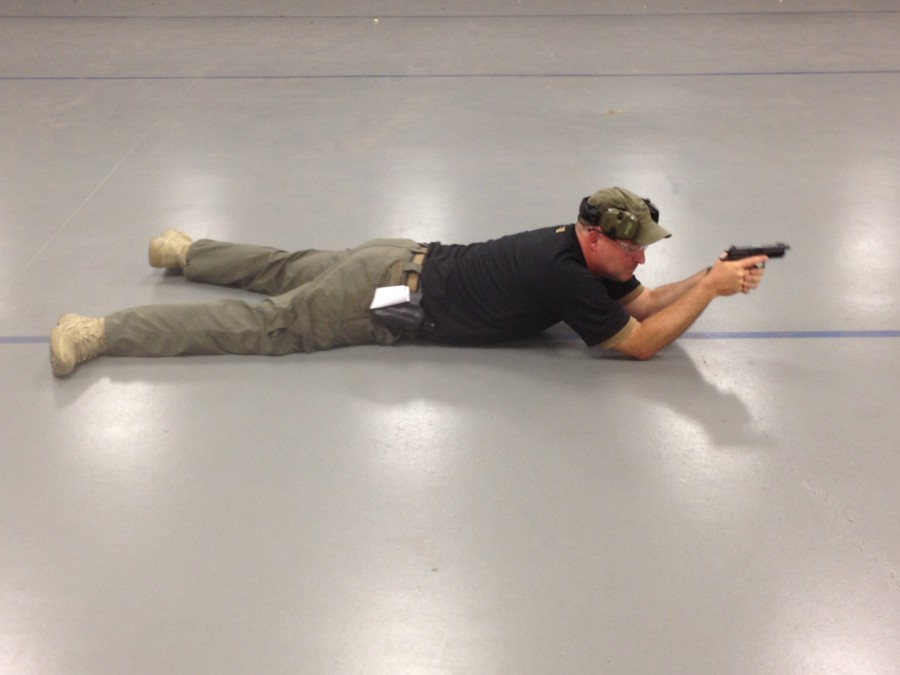
As you’d expect, this provided the most support for shooting and was a bit quicker to get into and out of than the sit. The idea is you’d drop to your knees first and then stretch out into the prone position. It also affords your opponent the smallest possible target for return fire. The downside was it takes longer to move into than the kneeling position and if the bad guy was directly to one side or another, it would make engaging the target harder. And if the bad guy’s behind you, you’re pretty much screwed.
We had one final challenge left. The instructor set up a shooting range with barriers and both fixed and moving targets. We paired up again and took position behind the barriers. Initially, each partner in the pair was responsible for their side of the range, but we were told that we would need to be able to cover each others reloads.
On the go command, targets spun to face us then spun away, other targets moved across the shooting area, etc. It was a lot of fun and a great way to dump a lot of bullets down range fast. We were given lulls in the action to practice tactical reloads and to deal with slide lockback reloads when we ran out of ammo. I was using my SIG P229 with 15 round mags, but my partner had to deal with 8 round mags in his 1911 so I did a lot more covering of his reloads than he did of mine.
http://youtu.be/oL-NV1mjGiw
All-in-all, this was a great course and a great capstone to the SIG SAUER Handgun Skills line of courses. The instructor was top notch and the facility was up to its usual excellent standards. For those who can make it to Epping, NH, I strongly encourage you to check out SIG’s line of courses. You’ll walk out a better shooter than when you walked in.


Thanks for this excellent review. I was already signed up for the 102 course and this posting gives more motivation to also take the others.
You should NEVER get training from cops. They’re all corrupt homicidal rapists…just ask Ralph.
I’m betting that the instructor told you to put dummy rounds in your magazine, not your “clip”, since I don’t see any M1 Garand rifles in those photos. Maybe the difference between the two would be a good topic for a future article?
AMEN!! Good review but please say magazine unless you are Snoop Dog!
It’s “snoop lion” now, seems as though these terminology gaffs are contageaous.
Thanks for raising the level of discourse. It was getting a little juvenile around here, and your comment was a ray of sunshine.
Interesting article, Jim. Thanks for writing it up.
Holding your unloaded pistol in a normal shooting grip and stance, press the muzzle to the wall until it just barely makes contact, then back off about an inch. Because you are using a blank wall as your backstop, you effectively have no target. There is nothing for you to focus on except your front sight.
Jim, thanks for the kind words.
Regardless of your body position, it all falls back on sight alignment and trigger control. If you can keep the sights aligned and operate the trigger until the handgun fires without disturbing that alignment, you will hit the target even if you are standing on your head or sitting on a stump. Master pistolsmith and top-level IPSC shooter Jerry Dove considers the practice of sight alignment and trigger control essential elements of every range session for a handgunner.
Snoop Dogg with 1 G(Dog)= calling magazines clips. Word to your mother.
Comments are closed.